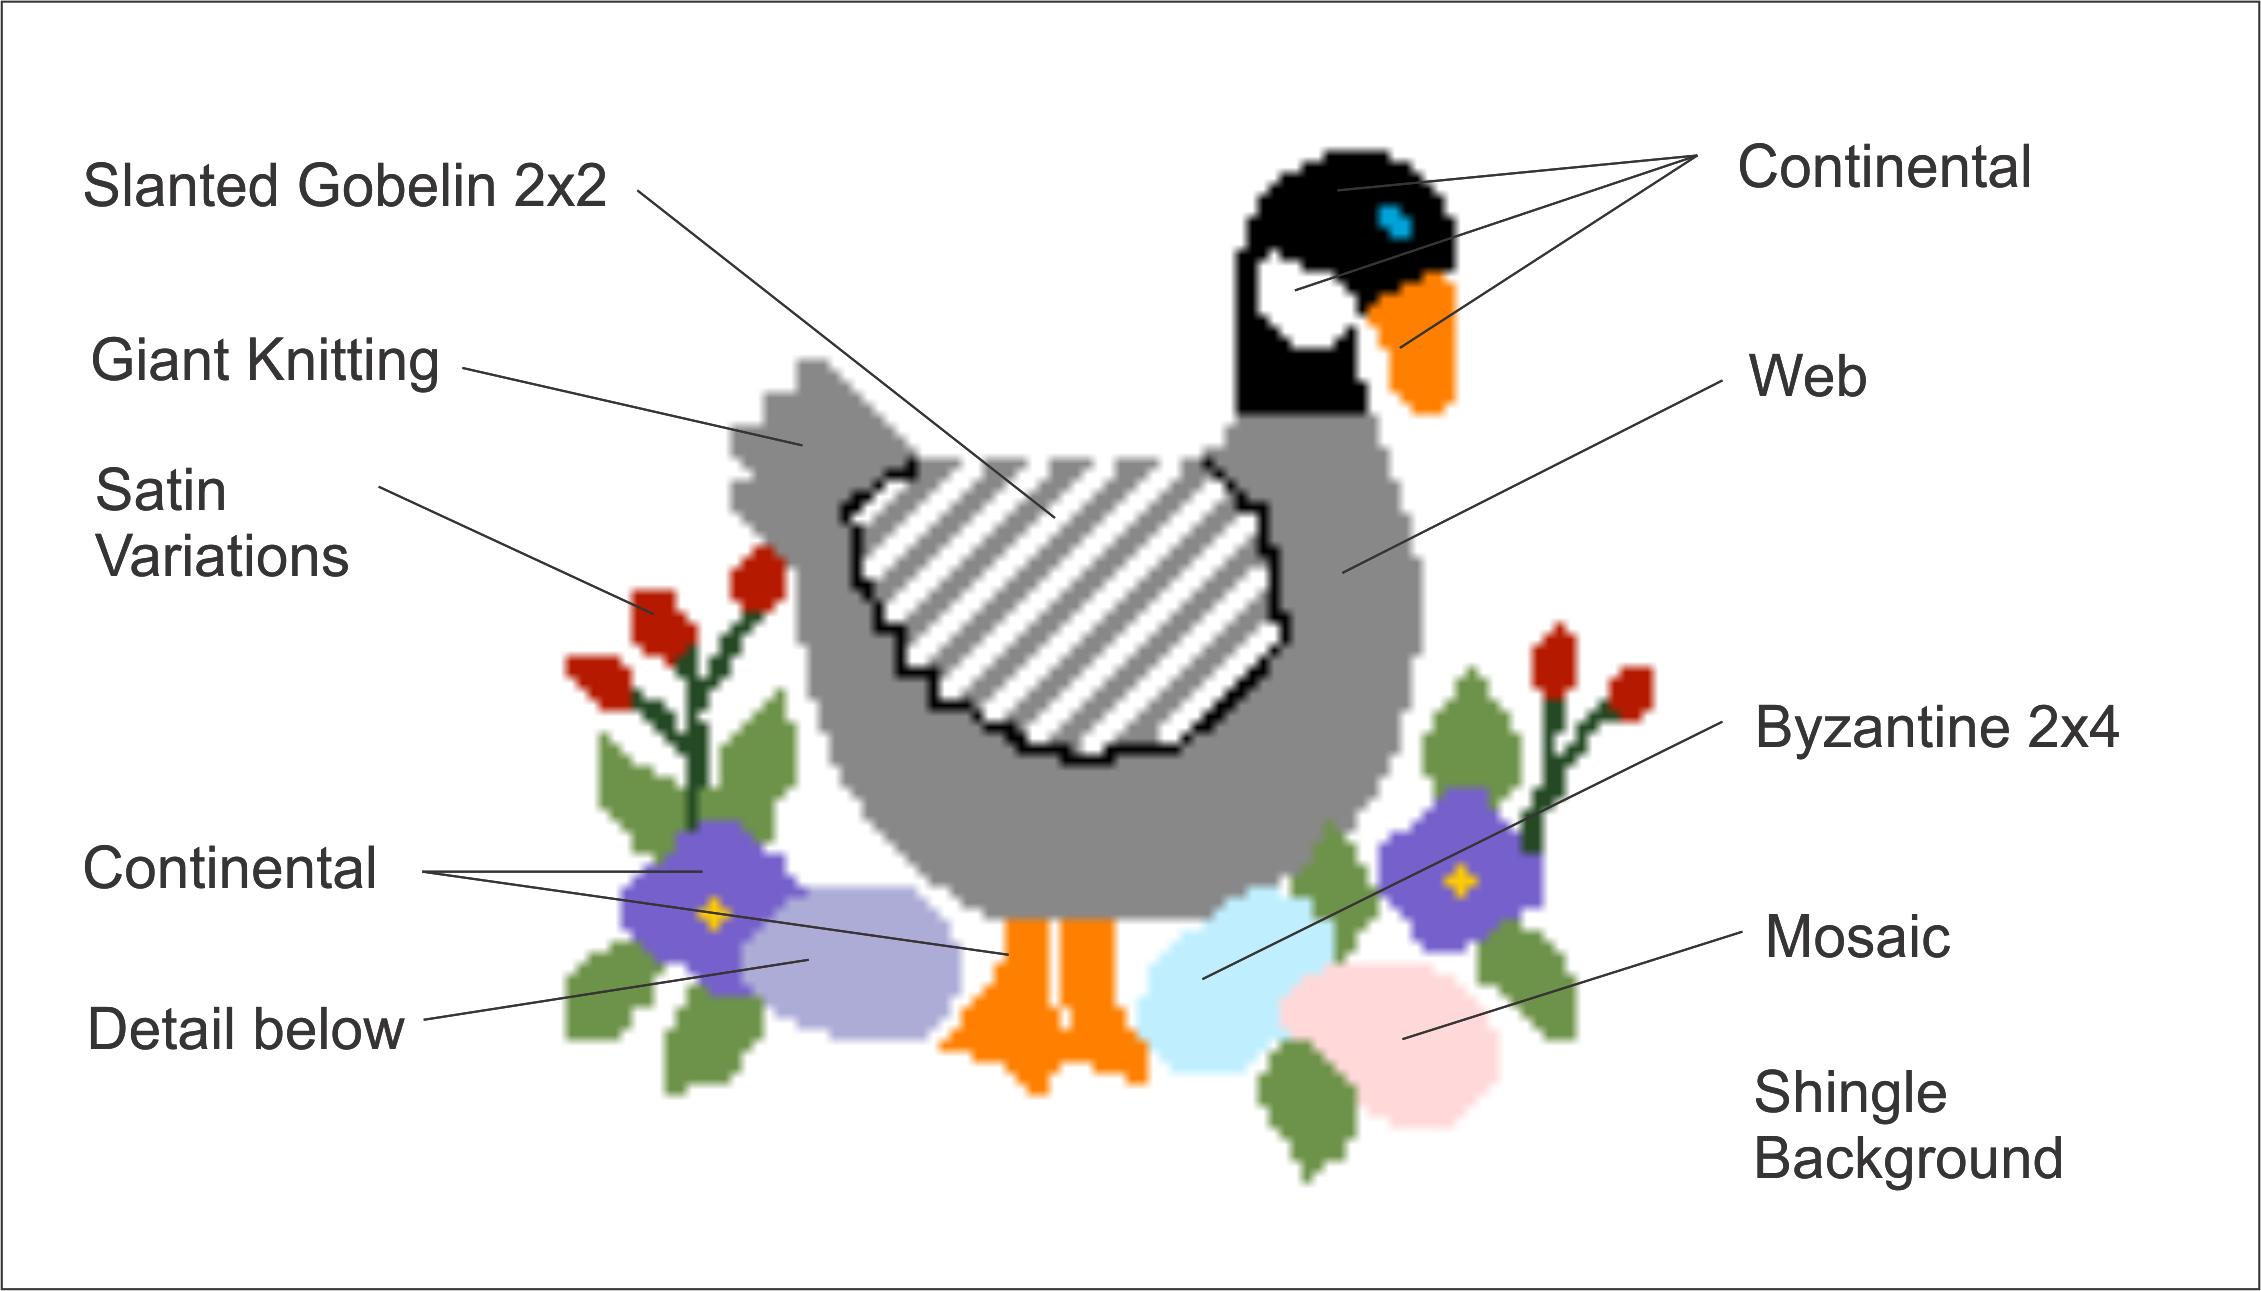
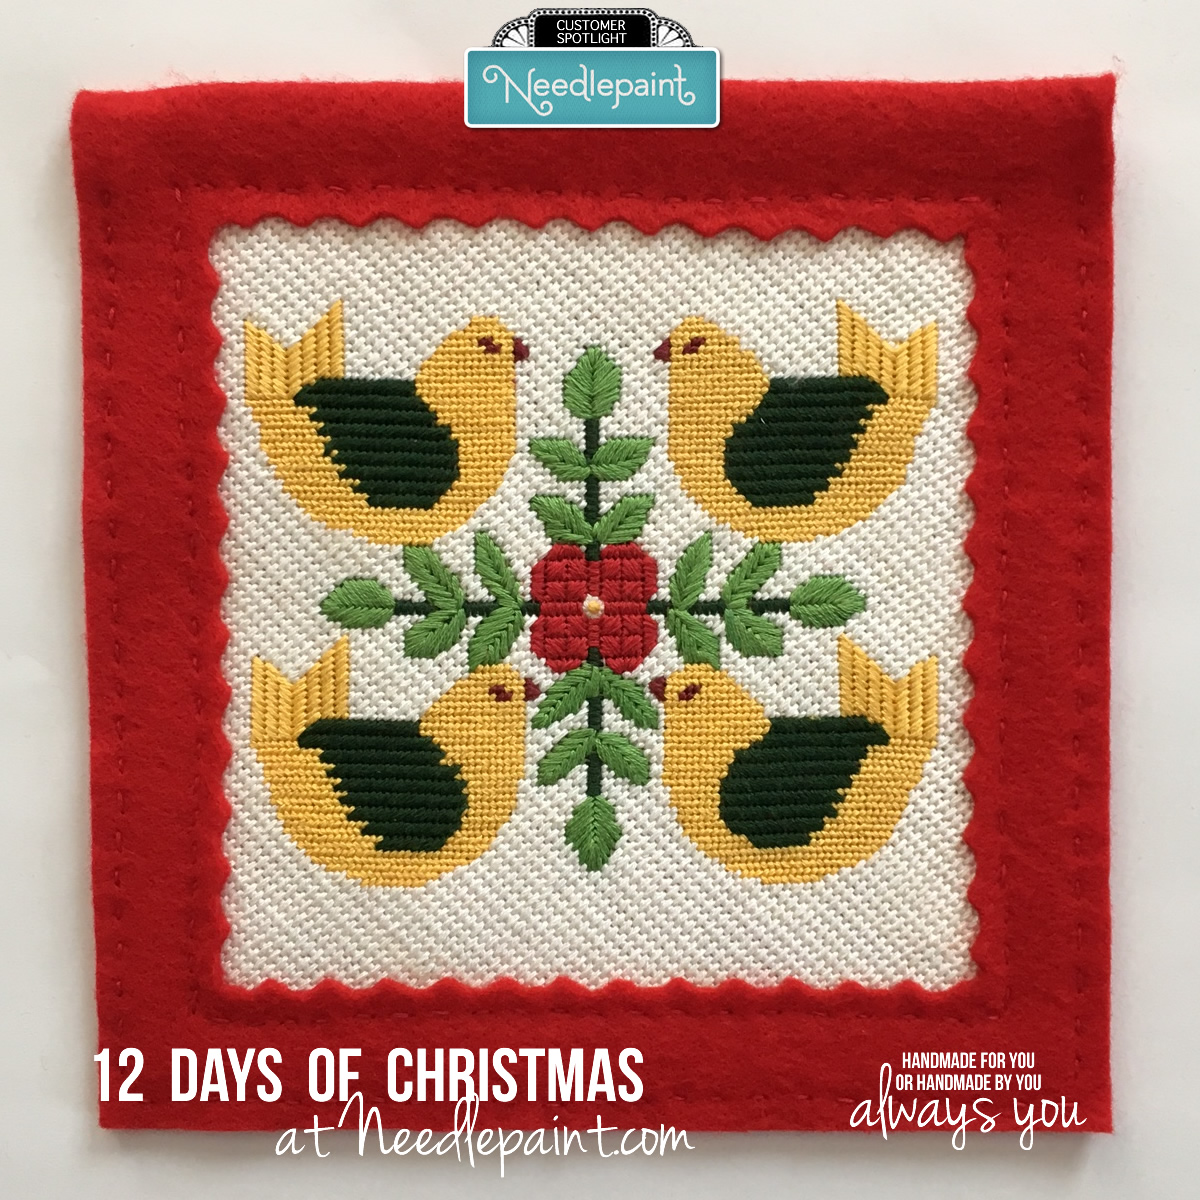
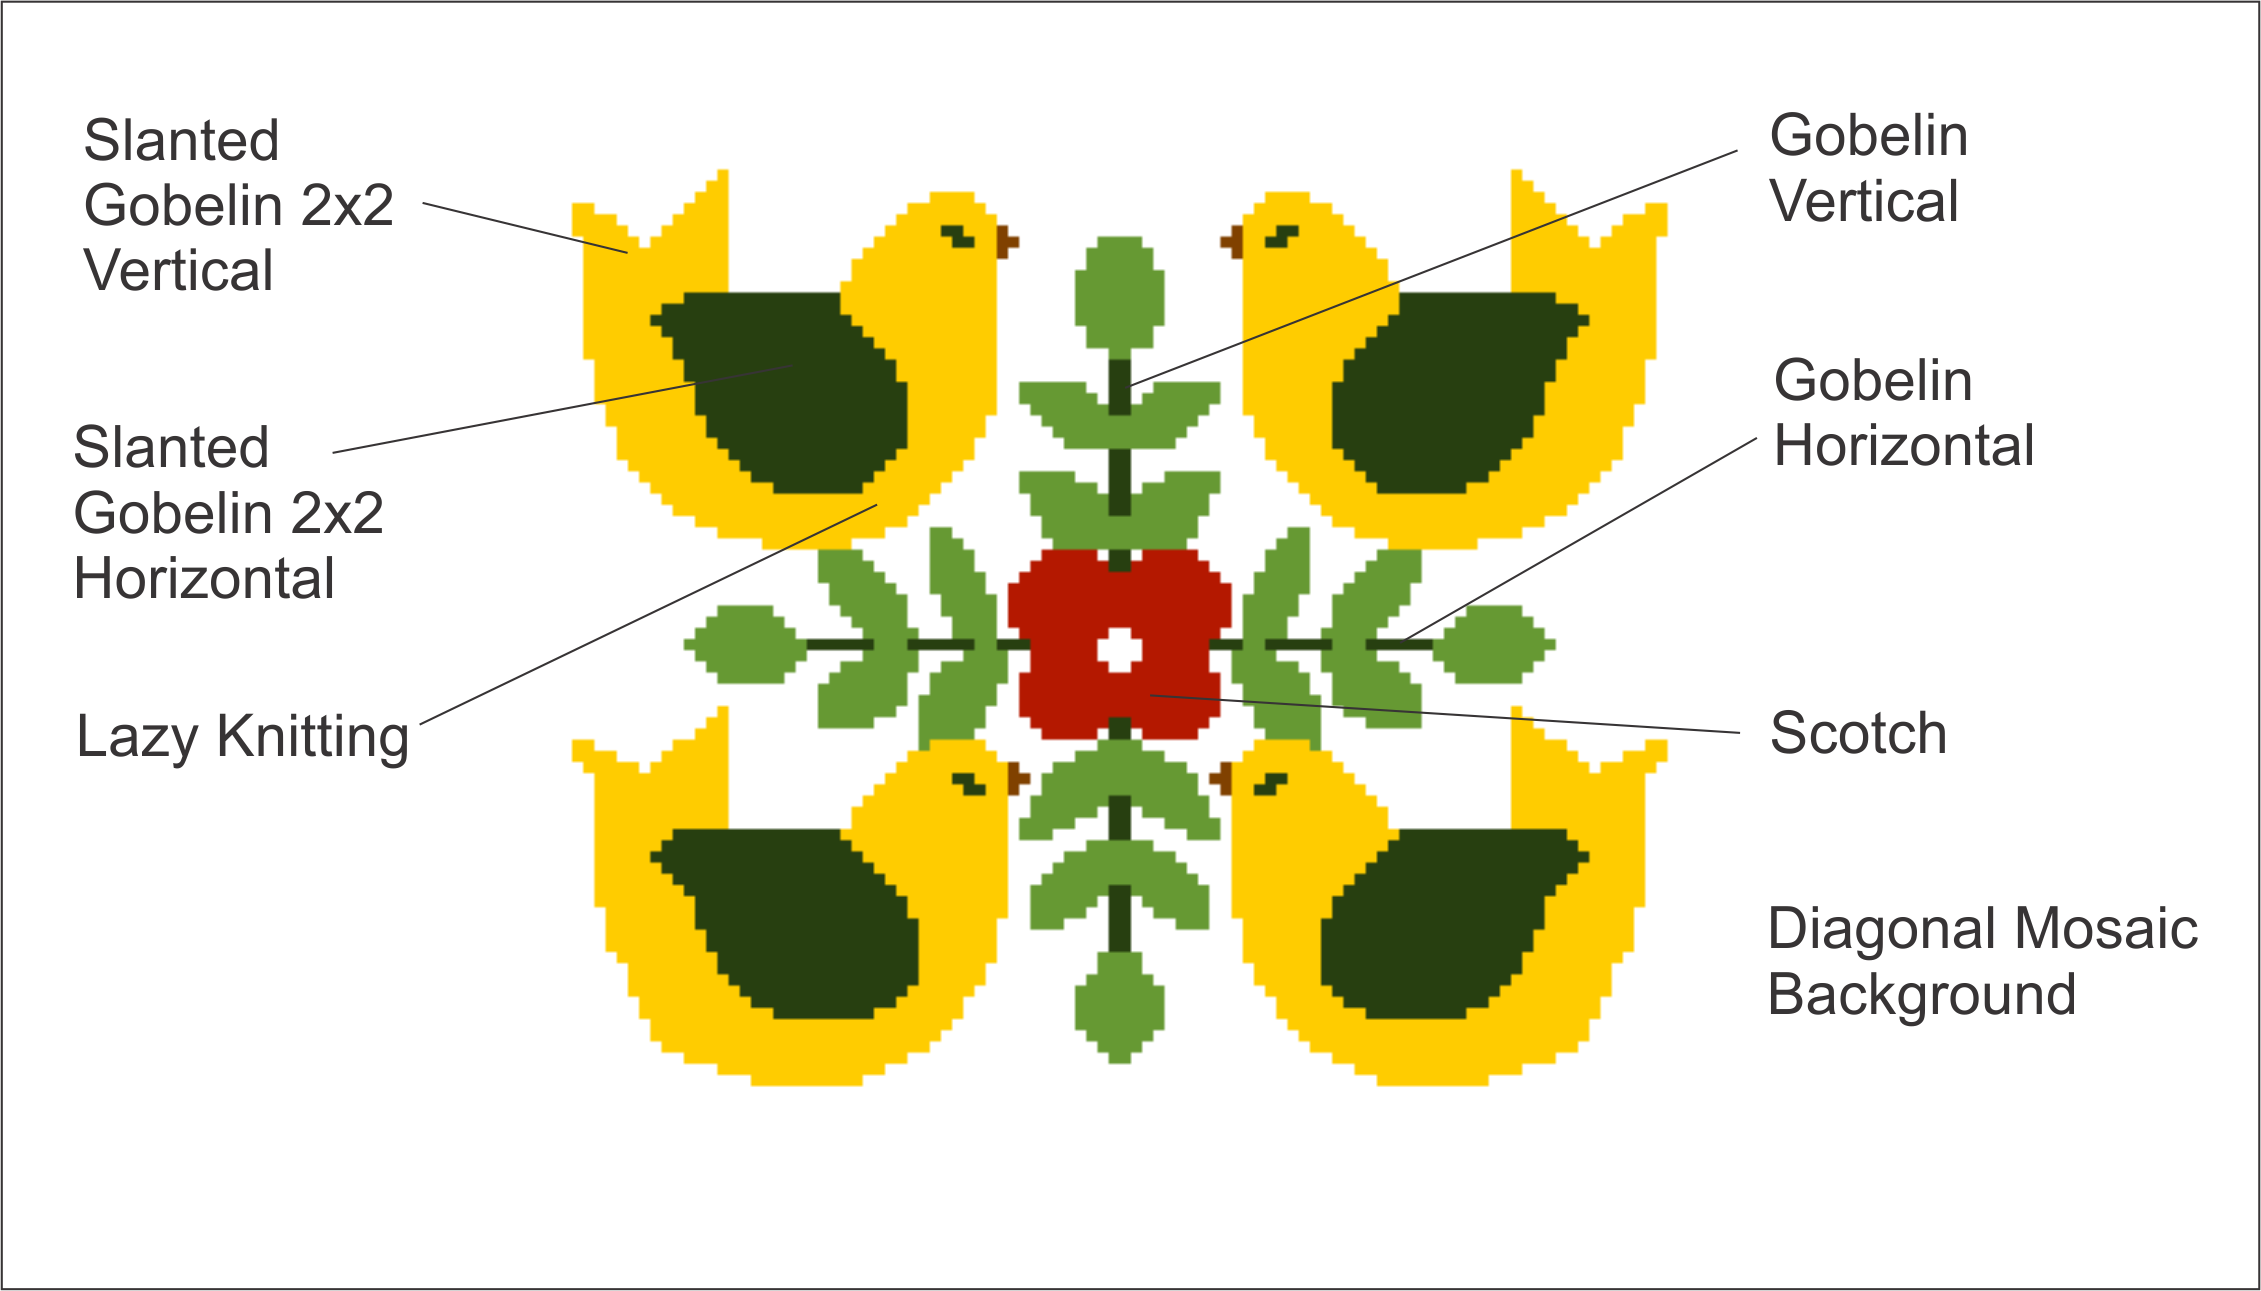
As I explained in my previous blog, I used at least 20 different stitches on the 12 Days of Christmas. Most are simple and many are quick-cover. They are only suggestions and we would love to get your recommendations for different ones.
Day 1, the Partridge in a Pear Tree
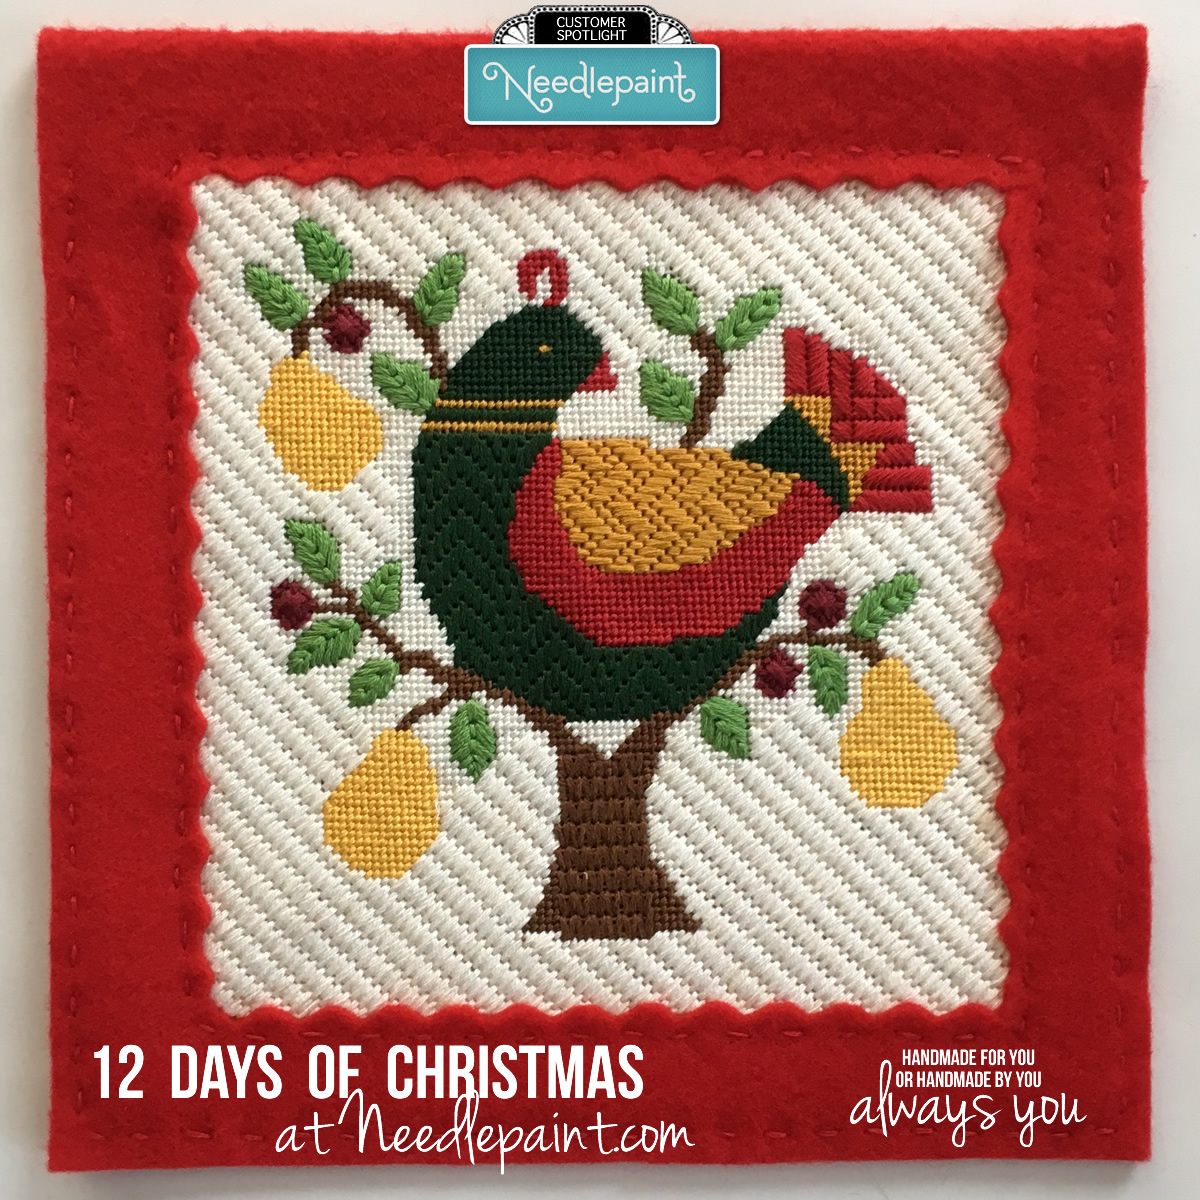
Partridge in Pear Tree Christmas Needlepoint
I tried to choose stitches to add textures that would mimic feathers and tree trunk textures. The partridge’s green feathers are done is 2 different stitches. The head and small portion of green near the tail are stitched in Continental to give smoothness, while the breast is done in an Austrian V.
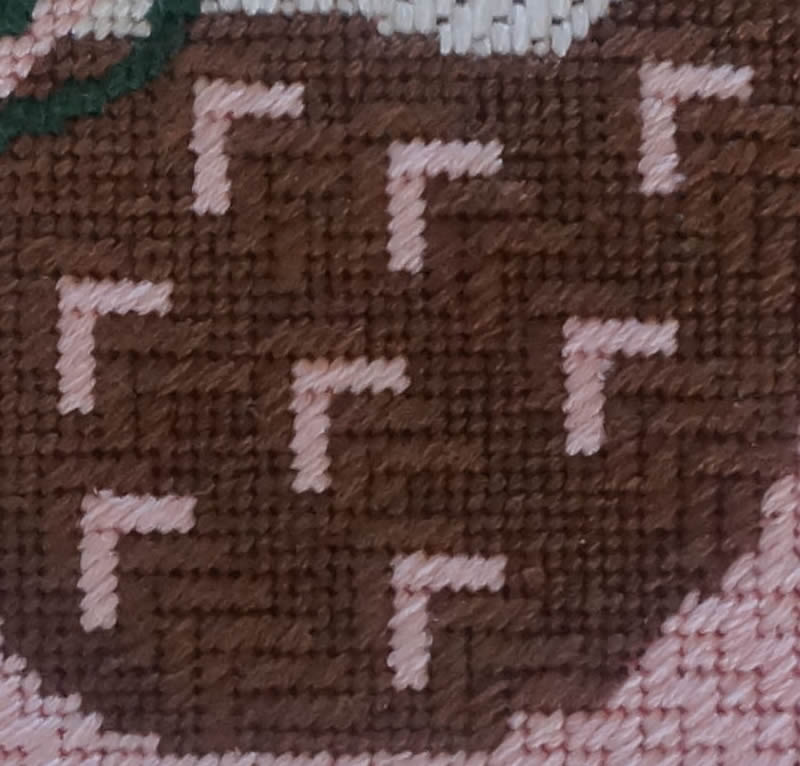
The Continental stitch is used for the pears, tree limbs, partridge’s top knot, gold stripes, gold tail feathers, red wing, and background to fill the small areas around the image. Tree trunk is the Knitting stitch and red tail feathers are varying lengths of Elongated Cashmere. The leaves are variation of the Leaf stitch, some longer and other at different angles than the traditional stitch. Leaves can also be done with a satin stitch.
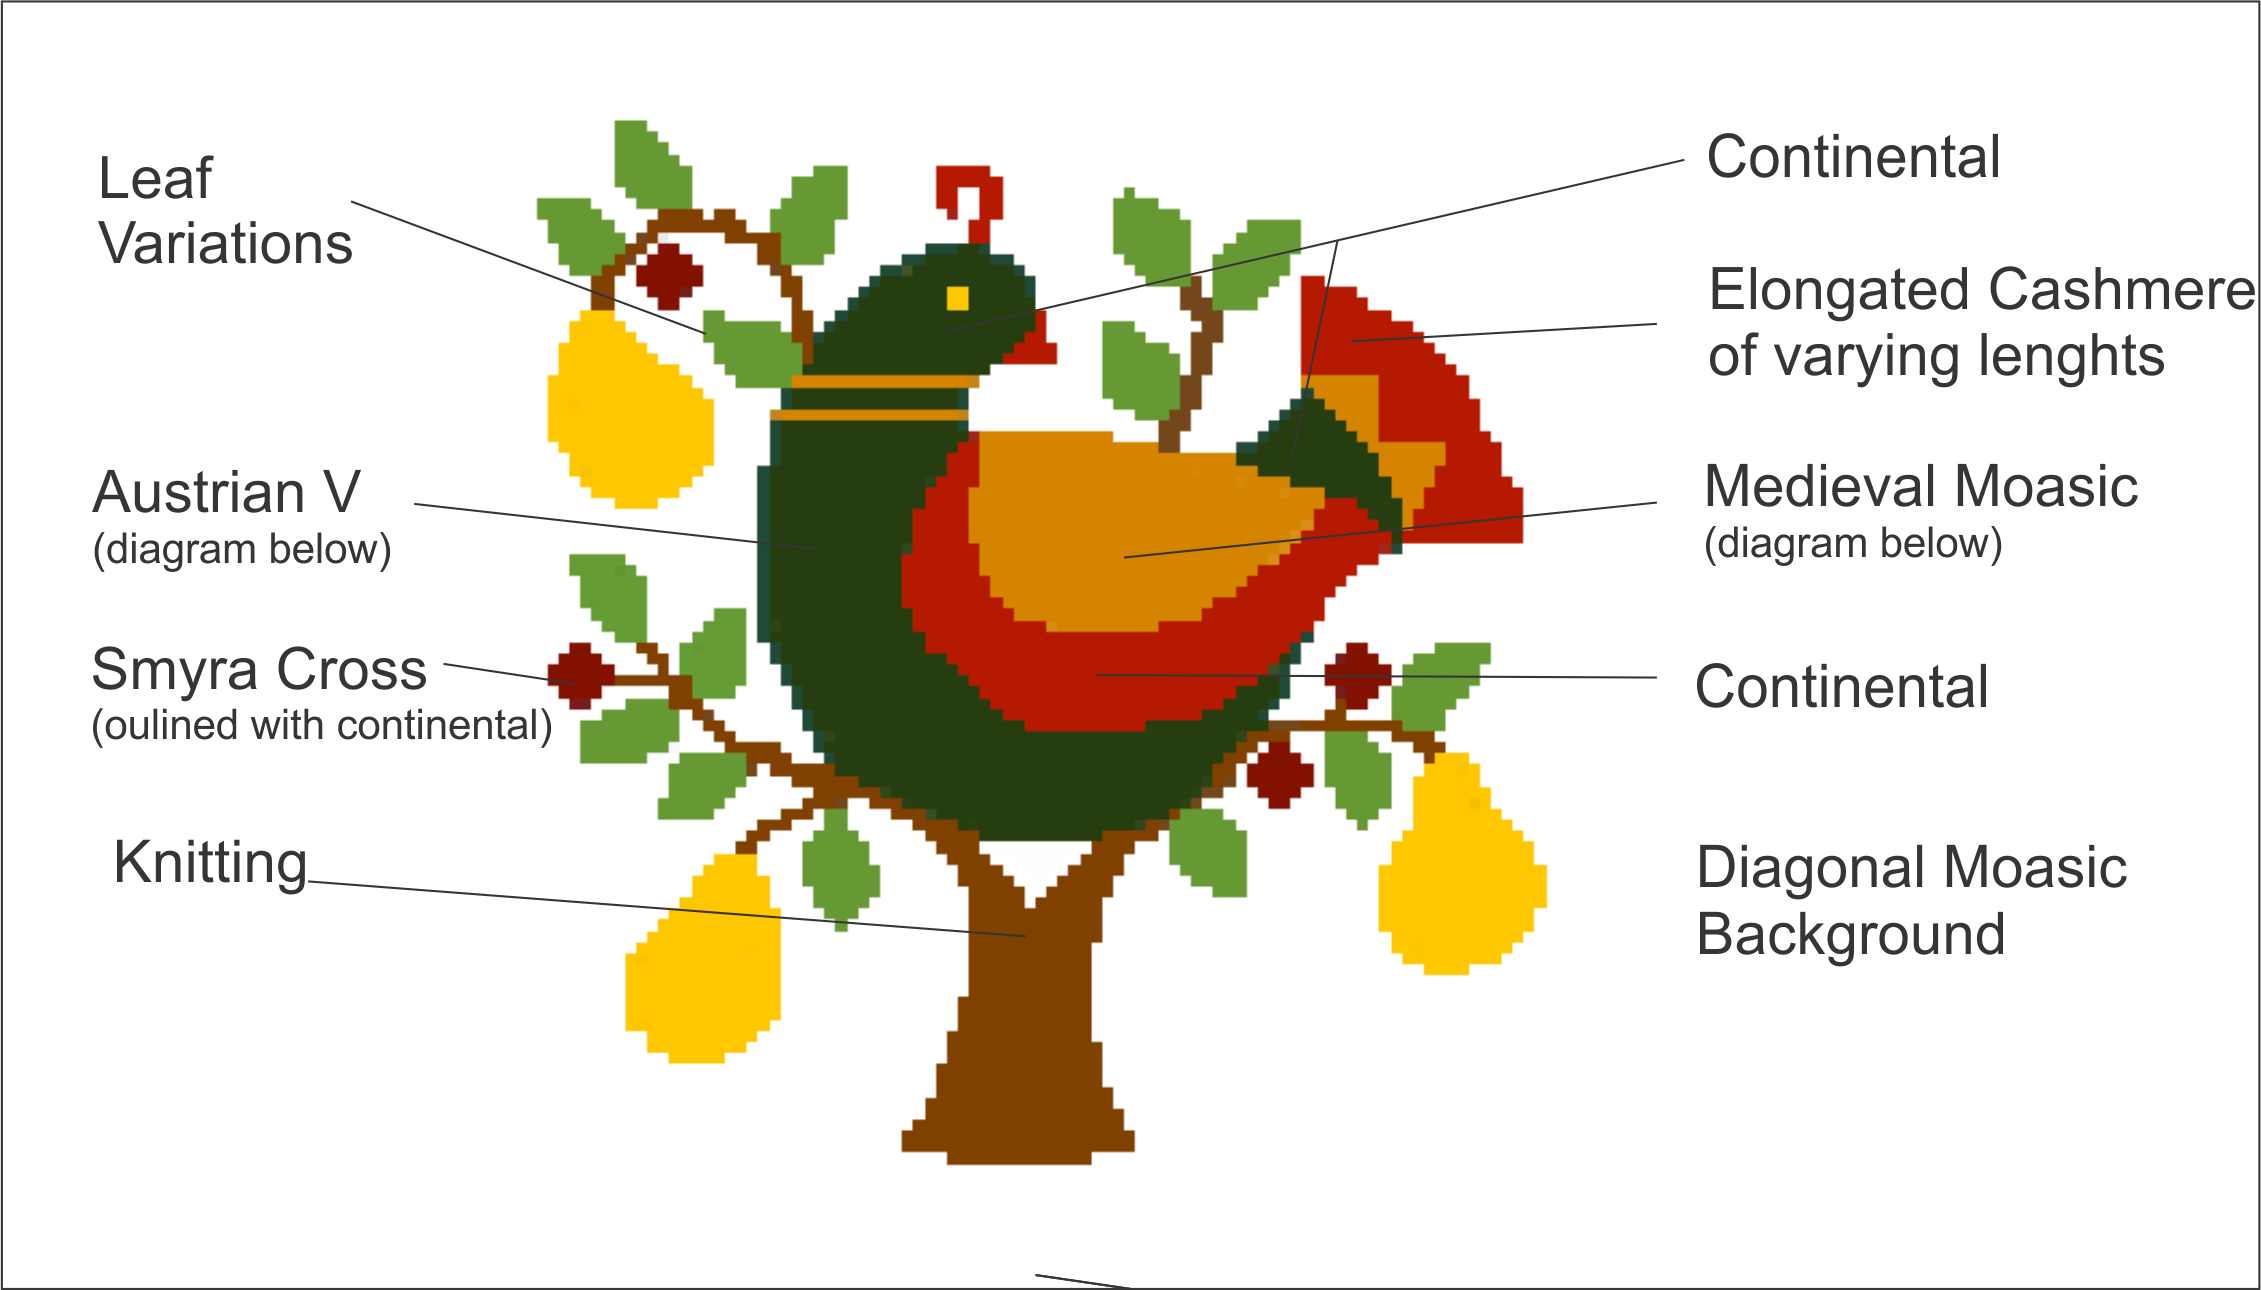
Partridge in Pear Tree Stitch Chart
(NOTE: The stitches, which are not diagramed, can be found in The Needlepoint Book by Jo Ippolito Christensen which is available from online book sellers and your local book store as a print book or eBook as well as in several needlepoint webpages.)
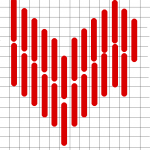
Figure 1 Austrian V
The Austrian V is 19th -century pattern taken from an Austrian Sampler of 1859. Typically, it is used is a vertical strip but it has been adapted here to repeat to fill the bird’s breast.
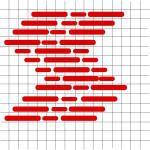
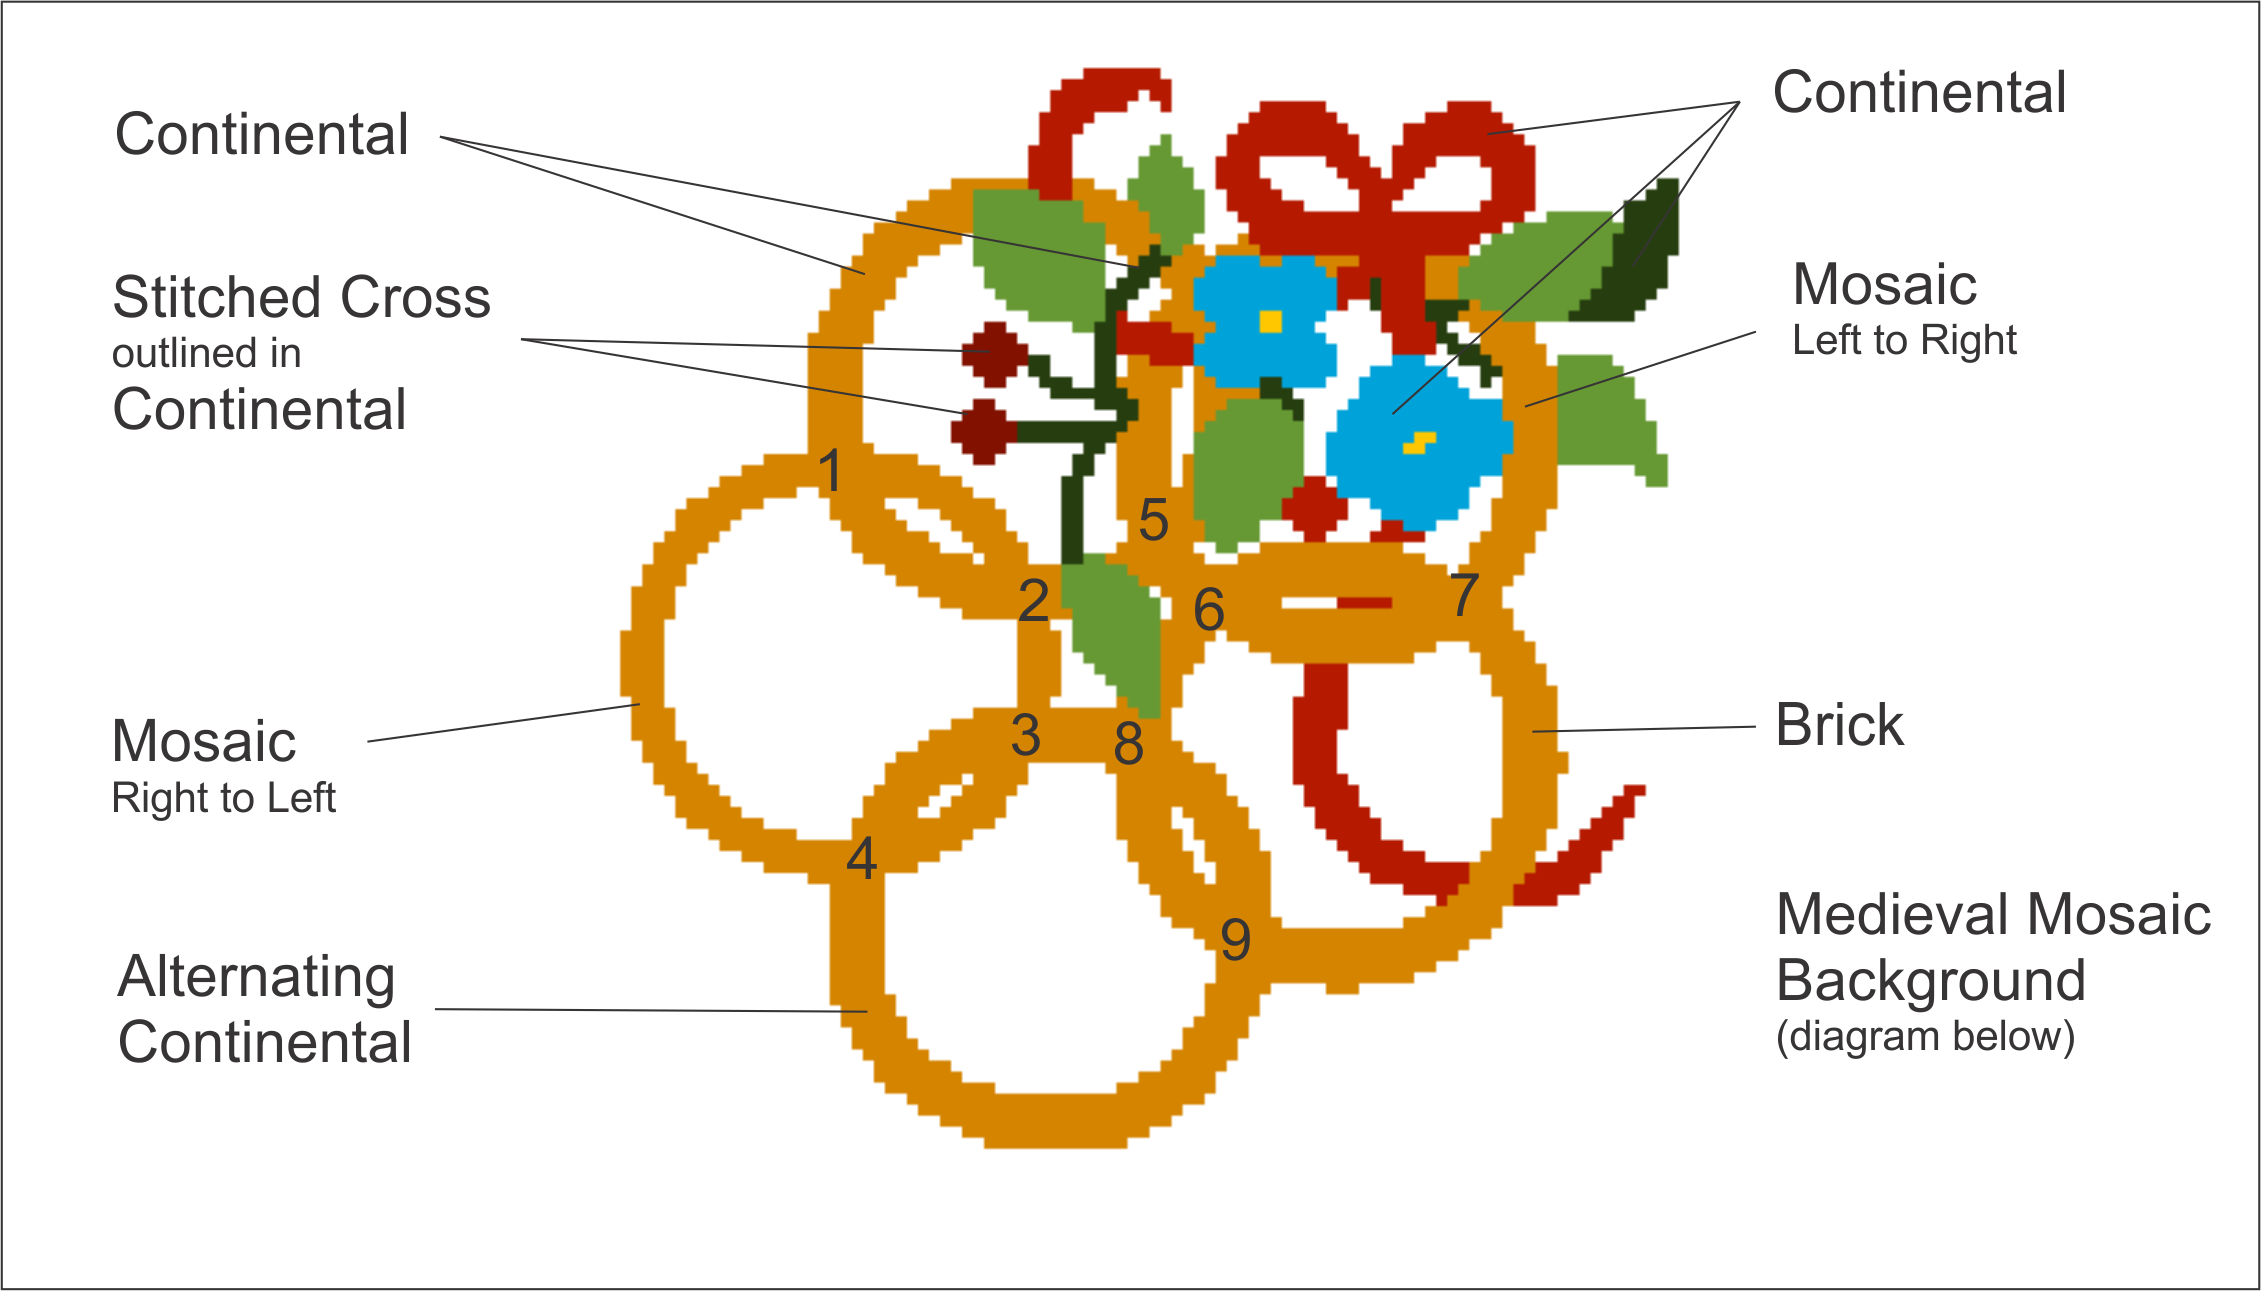
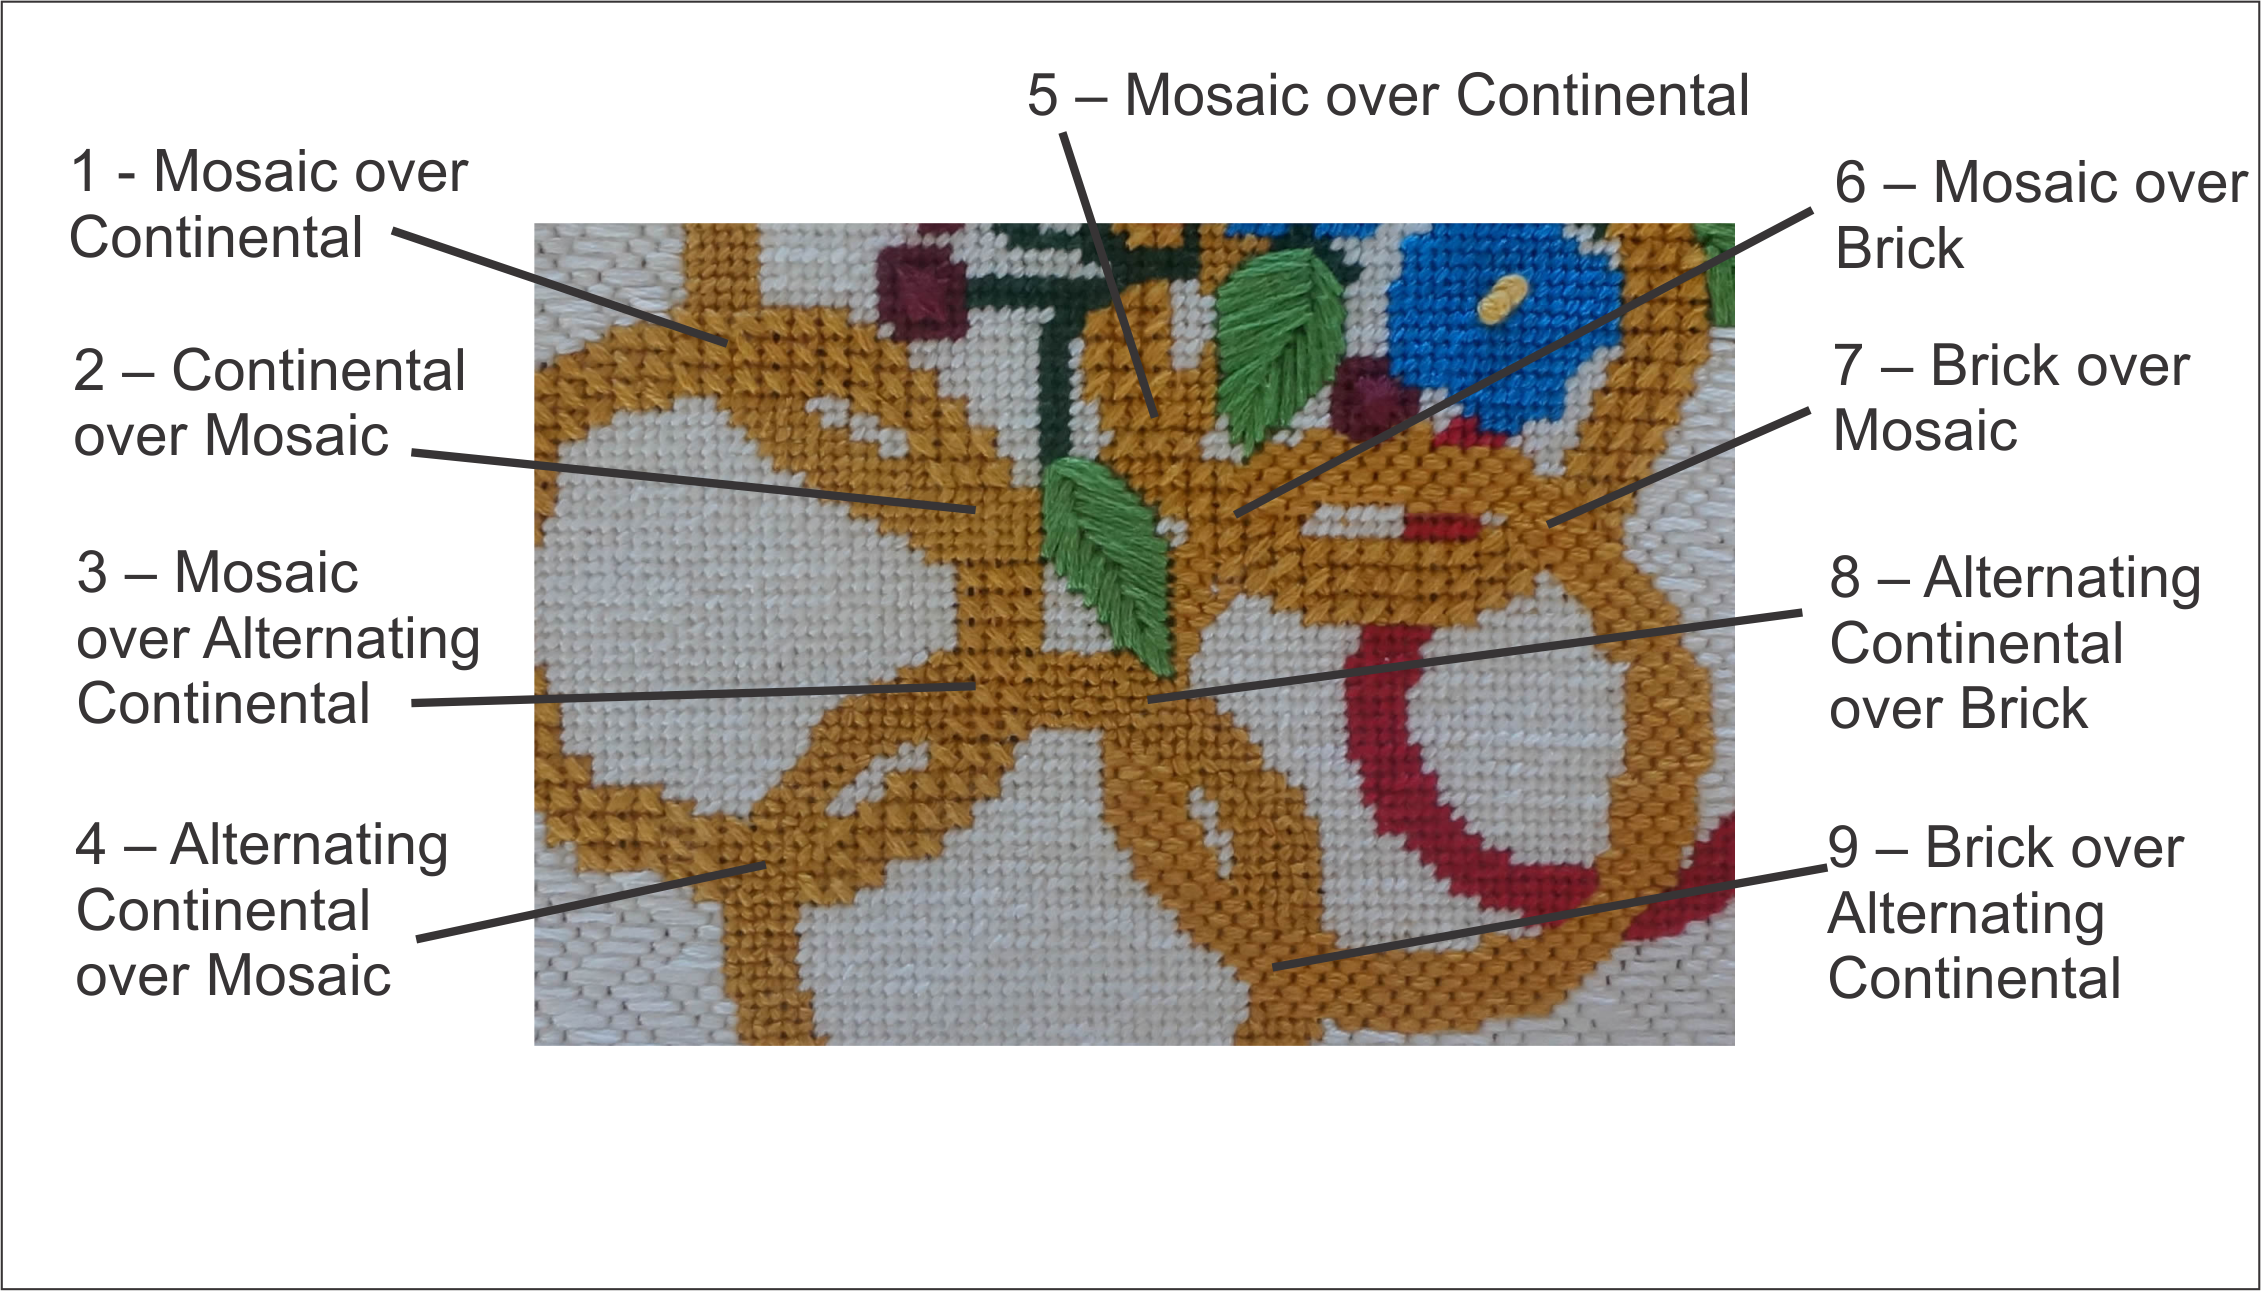
Figure 2 Medieval Ground
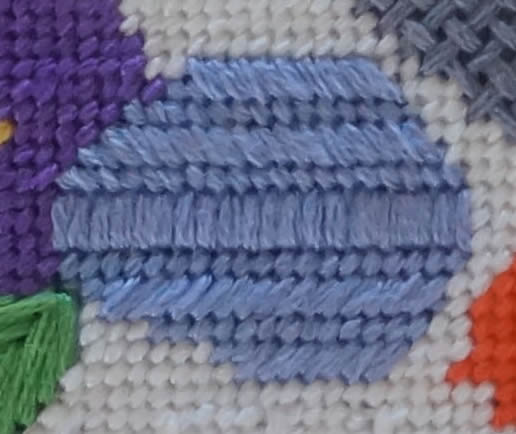
The gold portion of the wing is done in medieval mosaic stitch which was adapted from an ancient geometric pattern.
The background is the Diagonal Mosaic. An easy stitch to do which covers well and quickly, but not so quickly as some I will describe in the later blogs.
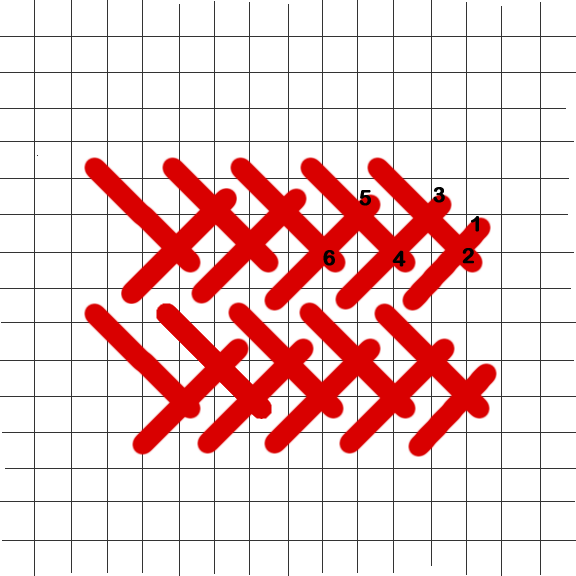
Day 2, Two Turtle Doves
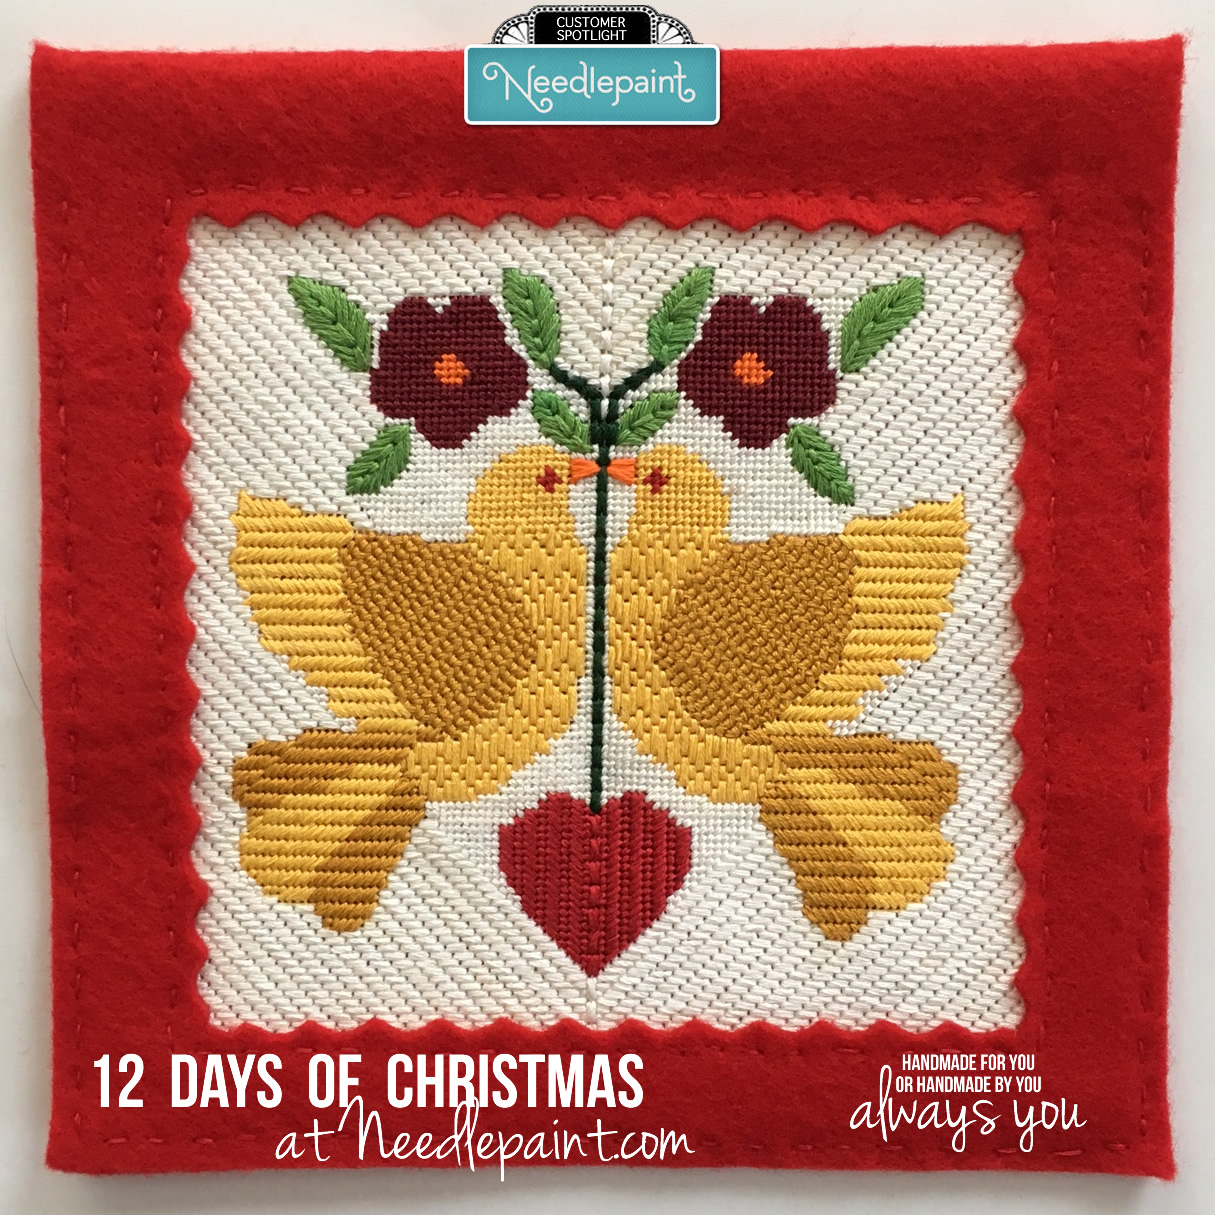
Two Turtle Doves Christmas Needlepoint
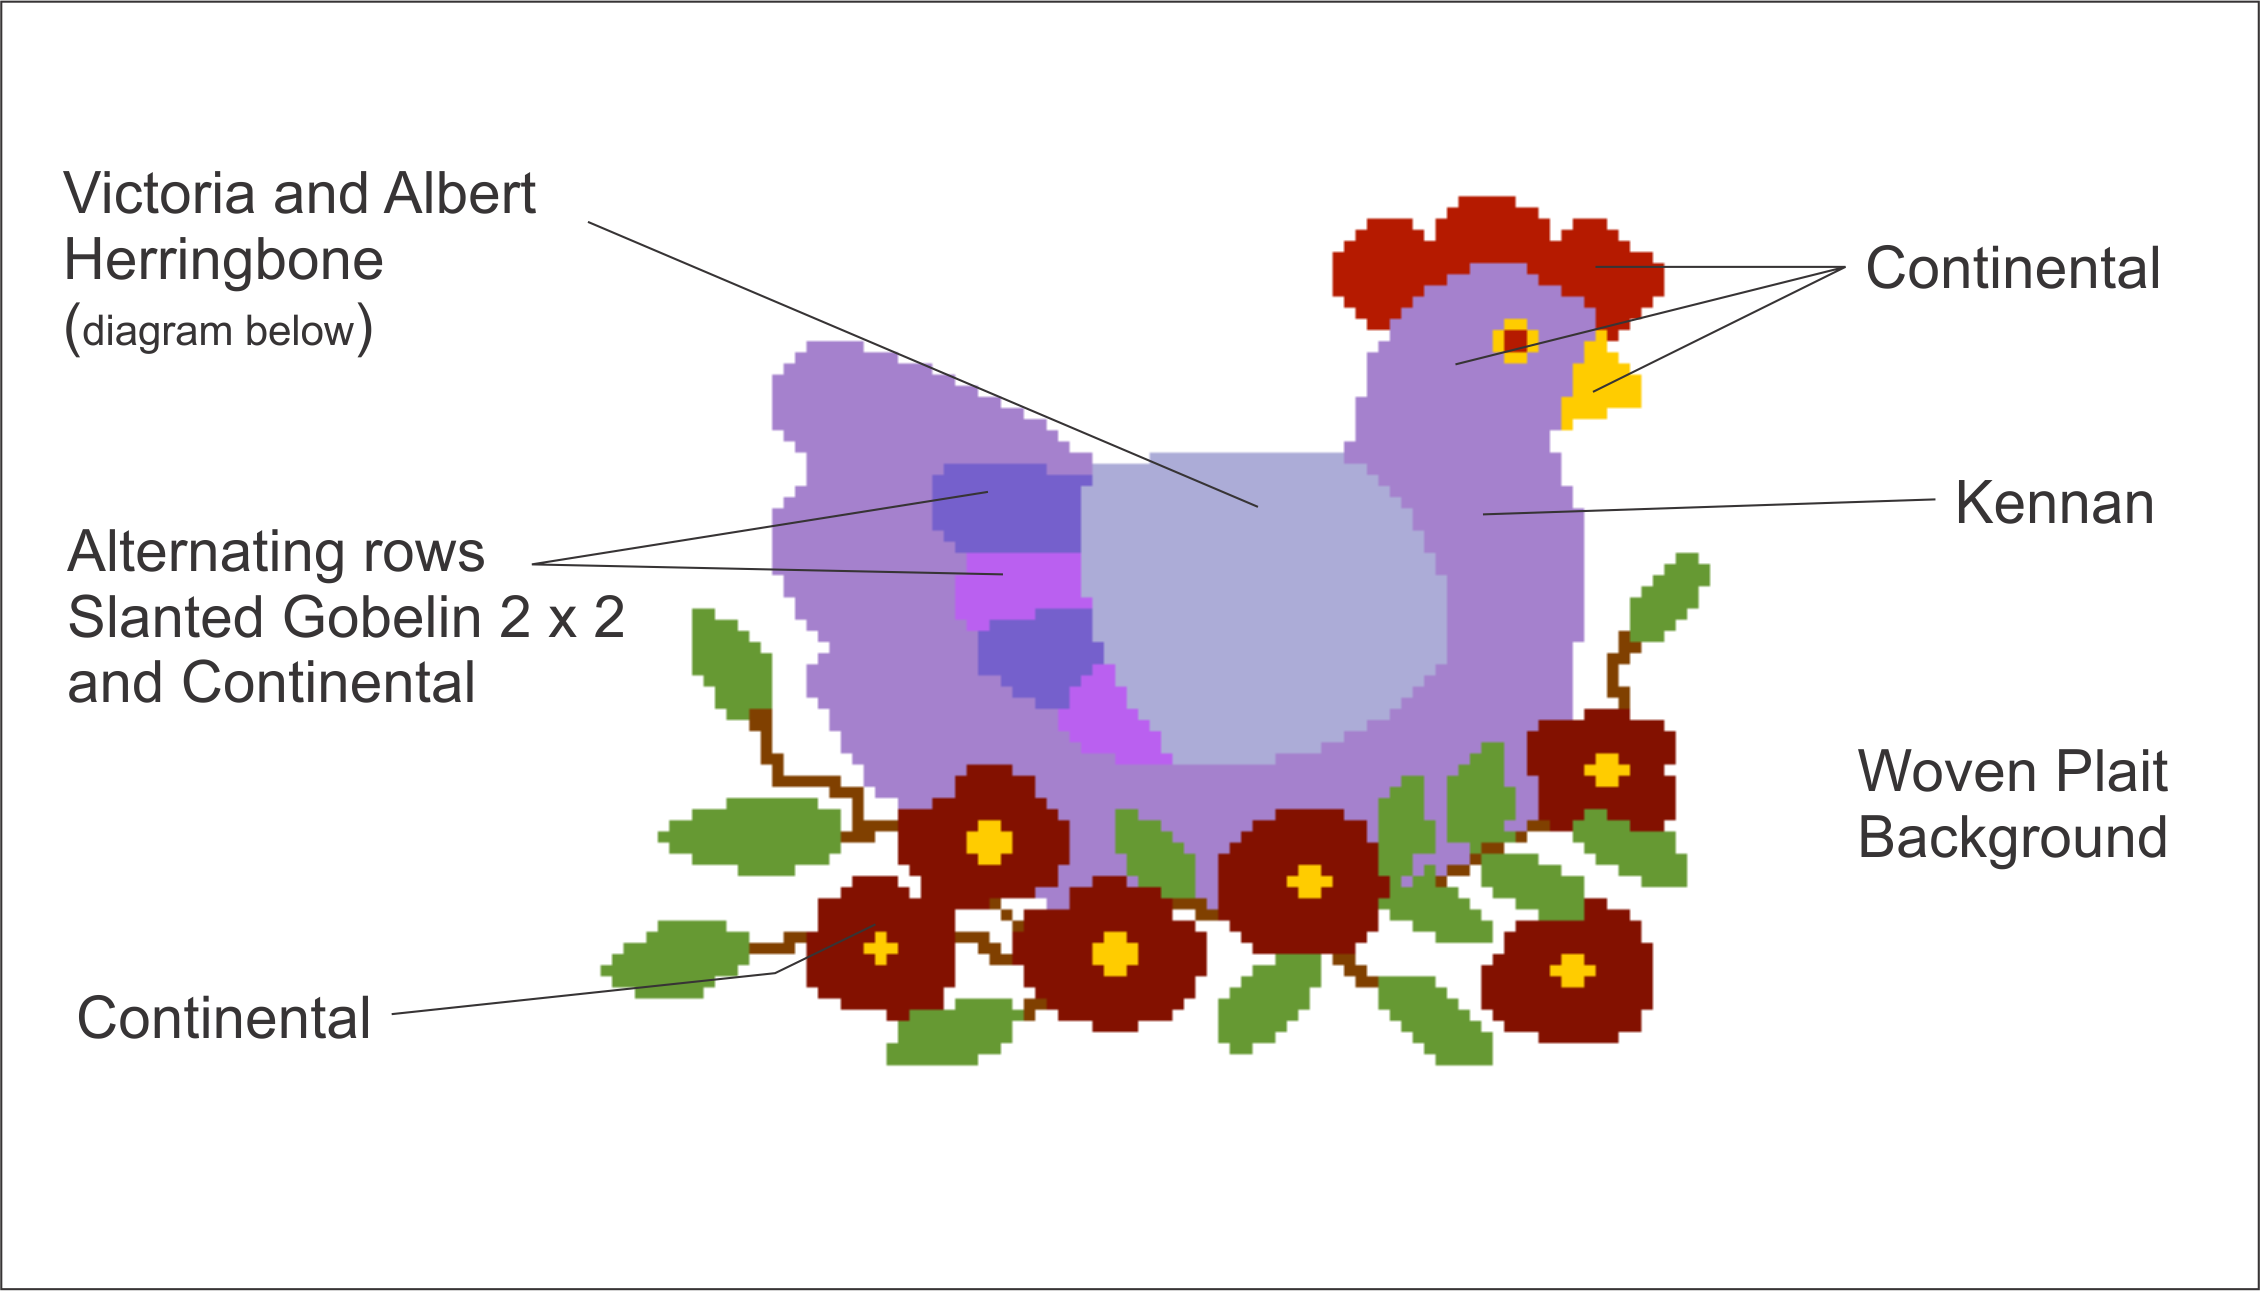
This is one of two designs that are vertically symmetrical. Vertical line of the oblong cross separated the two halves. Stitches are worked right to left on the left half of the canvas and left to right on the right half so that each side is mirror of the other.
The bright yellow of the bird is done in four different stitches: Kalem for the outer wing, Continental for the head, Hungarian Ground for the breast, and Slanted Gobelin 2×2 for the tail feathers. The eyes are Continental and the beak, Satin stitch. The gold inner wing is Diagonal Stem (the stitch that I found the most tedious to execute) and the gold tail feathers are the Slanted Govelin 2×2. Leaves are worked as described above. Flowers are Continental. On this block, I used the Continental for the centers of the flower but in other blocks I used French Knots. (Flower centers and bird eyes can also be enhanced with beads and/or sequins.)

Turtle Doves Needlepoint Chart
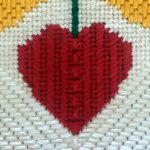
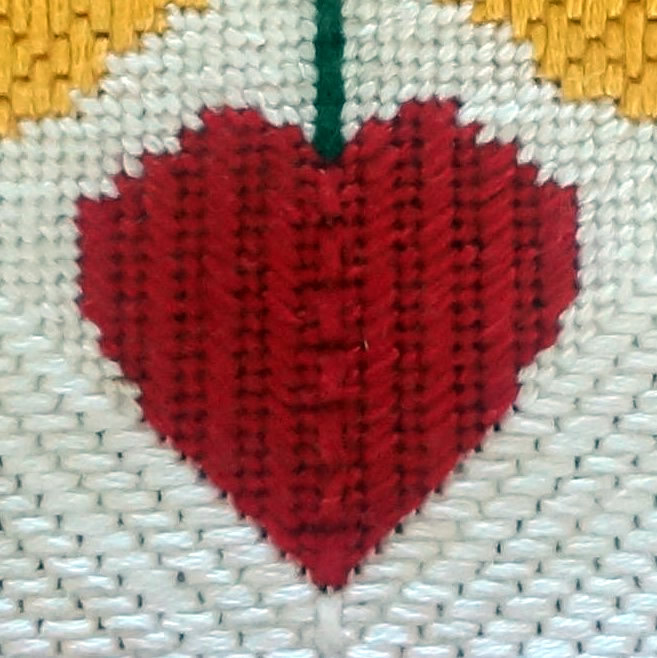
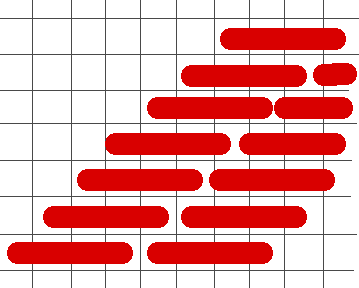
Figure 3 Heart Detail
The heart is worked from the center line out. Start with the Oblique Cross and alternate vertical lines of the Continental stitch and Slanted Gobelin 2 x 2. To the left of the center line, stitches slant from left to right and to the right they slant right to left. As shown in the photo, the point of the heart forms a prefect “v” which fits smoothly with the Straight Diagonal.
The Straight Diagonal is worked over 3 canvas threads from top of canvas down. The stitch diagram shows in running from the top right down to the left. It would be reversed for the opposite half.
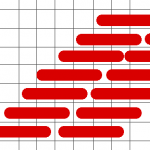
Figure 4 Slanted Diagonal
Where the continuity large Straight Diagonal is difficult maintain, the background areas around the center line are worked in the Continental stitch, slanted left to right or right to left depending on side. Likewise, flowers are done the same way.
Coming next: Day 3 and Day 4 with more feathered friends and the second symmetrical design.
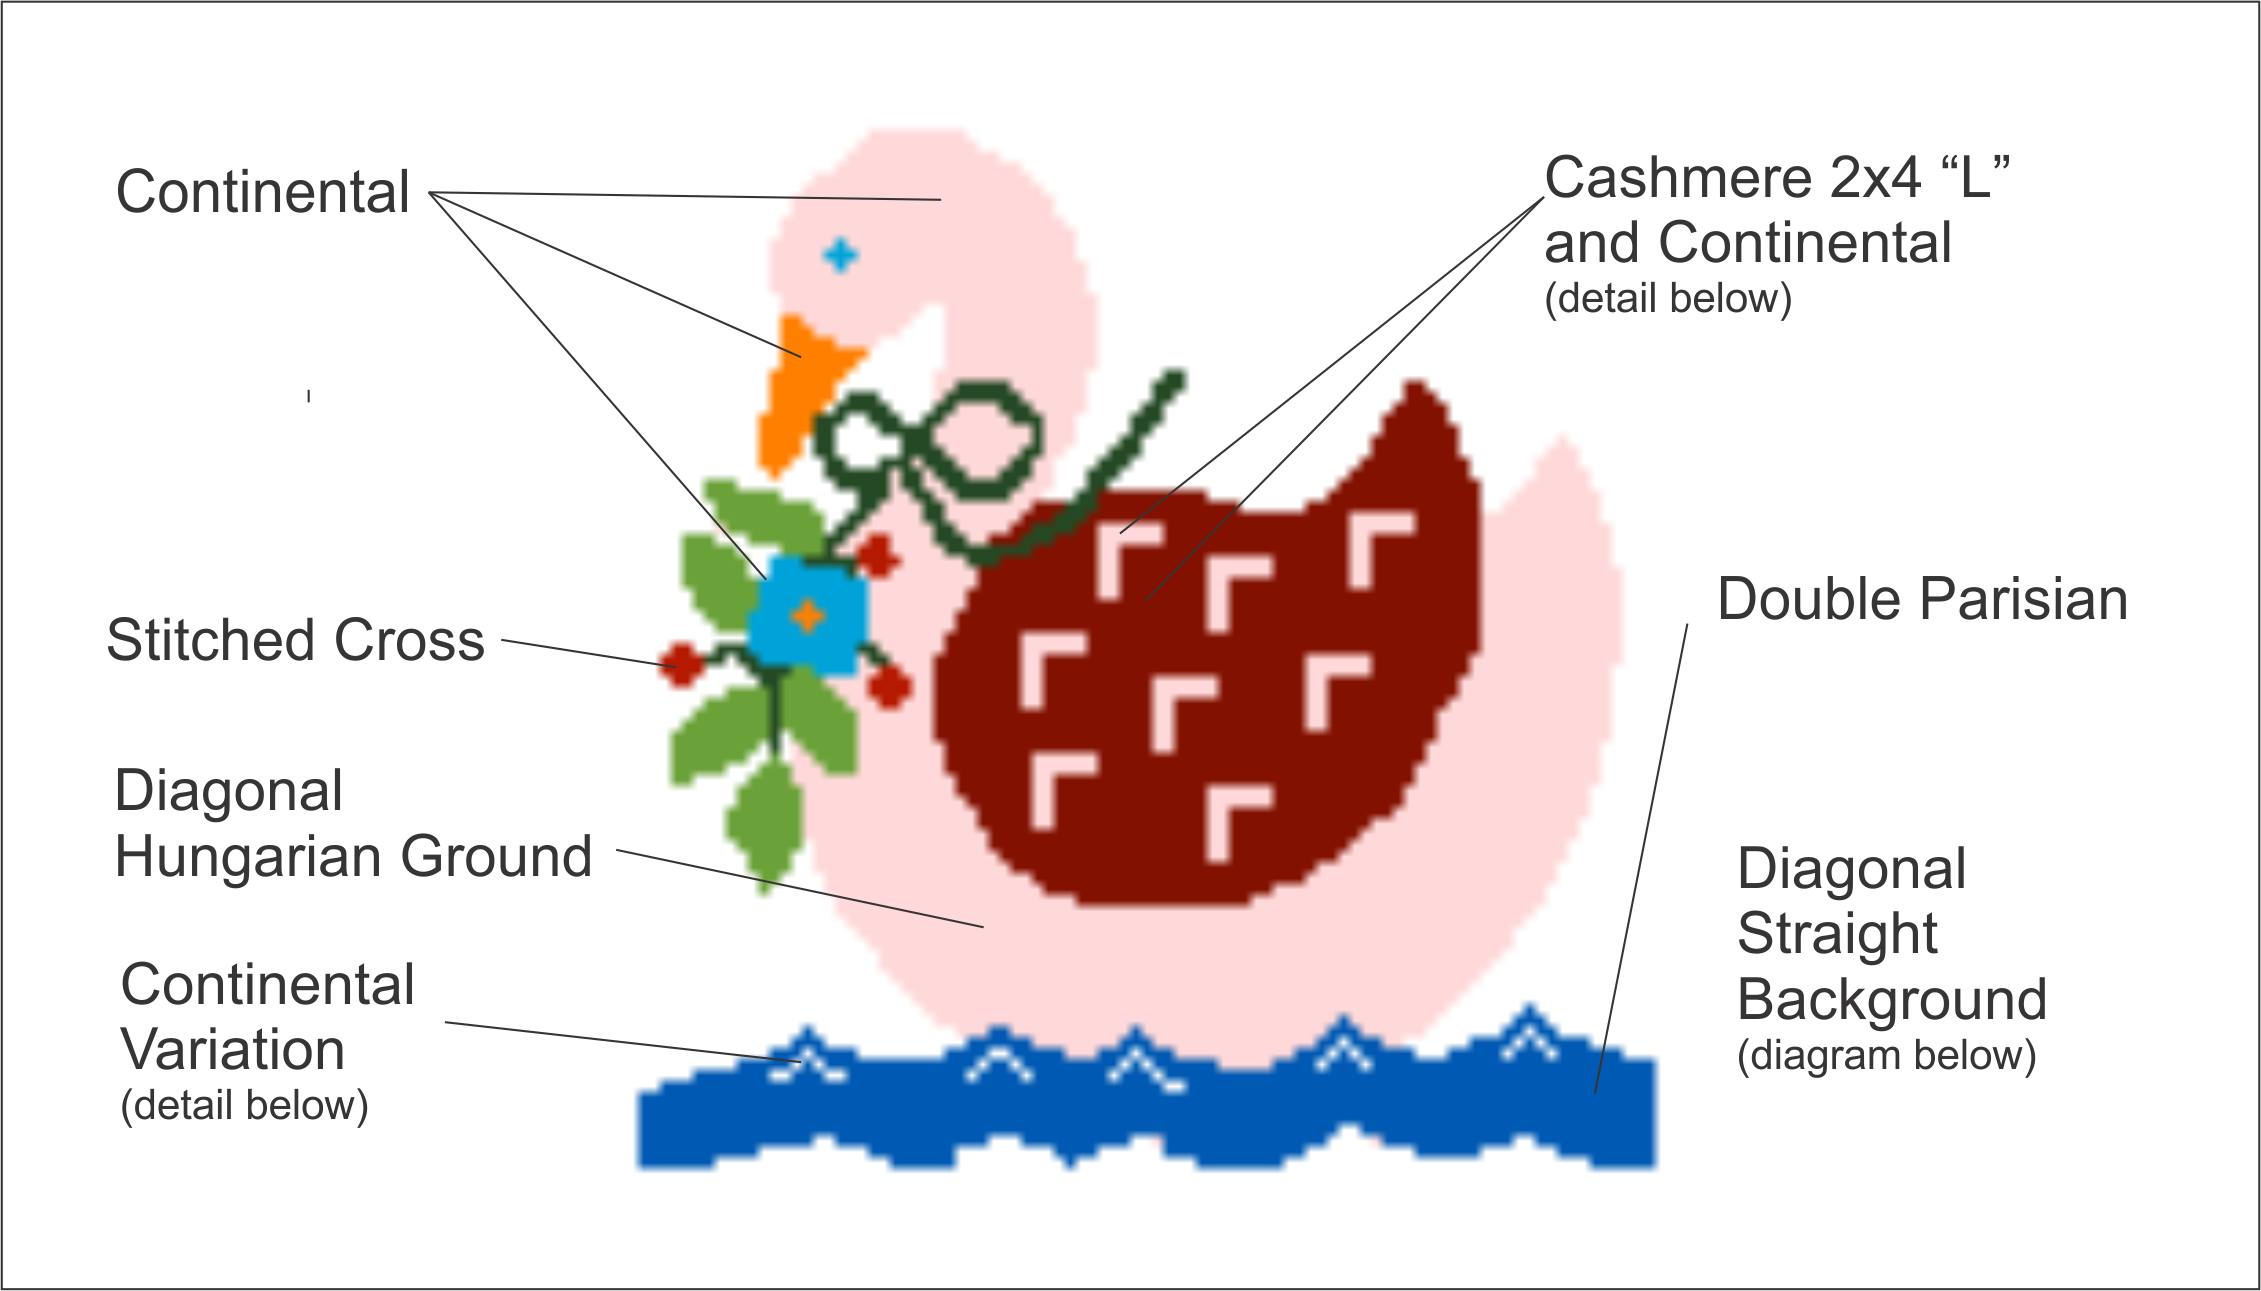
 The main portion of the wave is the Double Parisian with the peaks done with left and right slanting Continental.
 And, the background Slanted Straight stitch is done over three canvas threads working right to left. It is quick and easy.

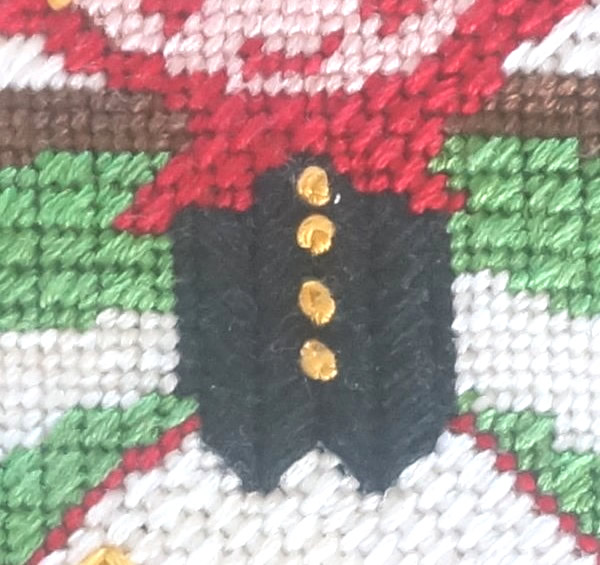 Her vest and pocket of flowers require some explanation.
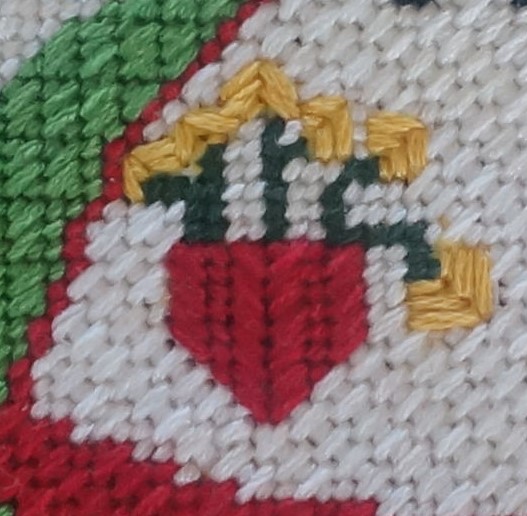 The pocket is done in a manner similar to the heart of the Day 2 and the flowers are a satin stitch.


Written by Seth Berman
Leave a comment