Official blog of www.NeedlePaint.com
where you can design your own Needlepoint!

NeedlePoint Kits and Canvas Designs | Design your own Needlepoint Kit!

Posts tagged ‘needlepoint canvas’

Give Pulled Yarn Stitching a Try

Written by Peggy Bond

Pulled yarn stitches are often overlooked for needlepointing canvases because they do not fully cover the canvas. However, they can be used with conventional stitches and have some advantages as backgrounds. Firstly, they can be worked up quickly and secondly, they are lacy allowing a differently colored backing to show through.   

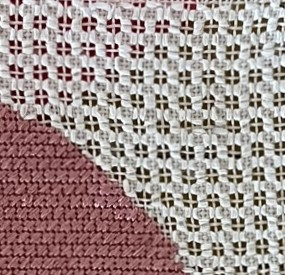
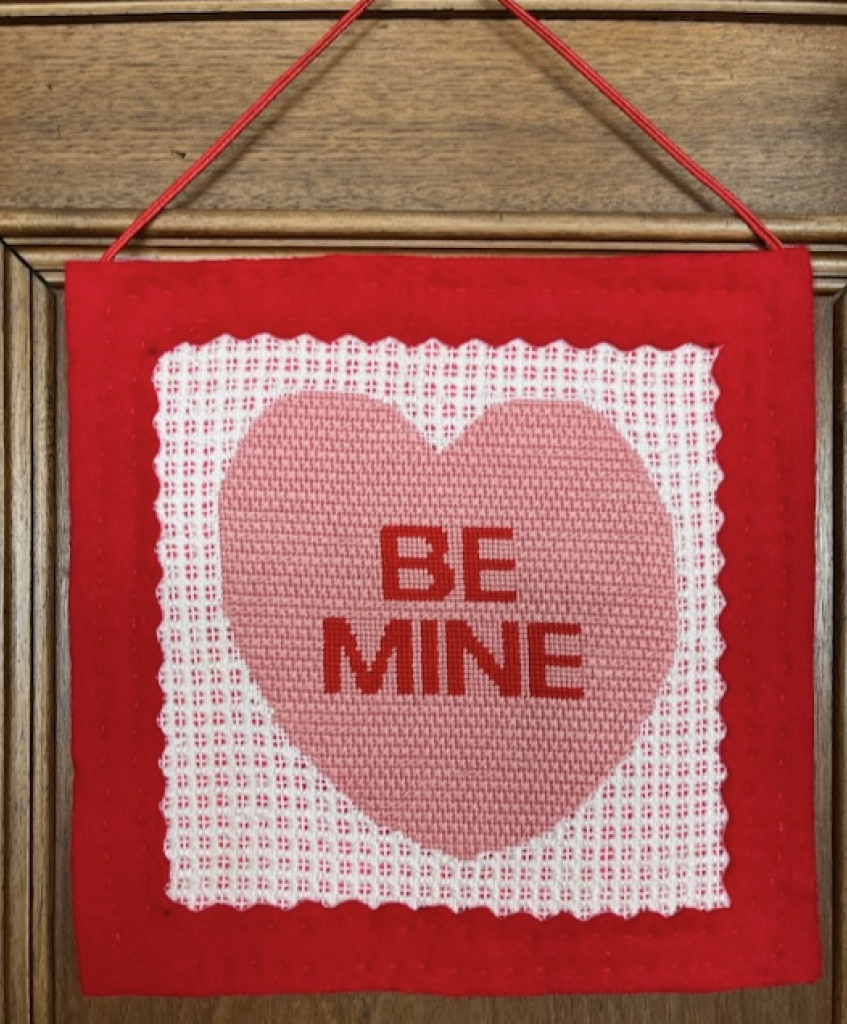
This Be Mine Valentine needlepoint ornament kit finished as a door hanger, has a pink felt backing that gives the background behind the heart, the look of checked gingham.
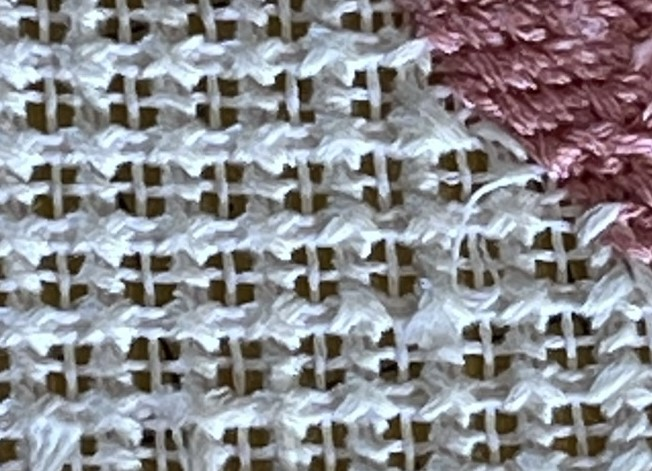
Up close, this is not the case.

When working pulled yarn, it is important to keep consistent tension or pull. This is what creates the pattern. The best pulled yarn stitches have equilateral pull which minimizes distortion.

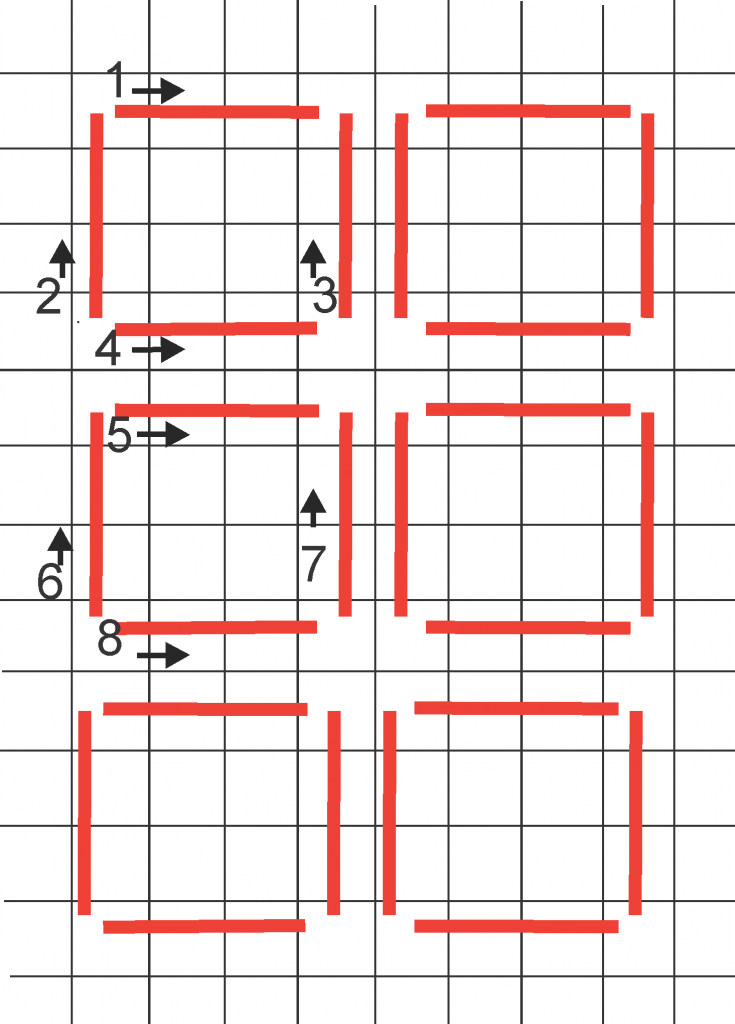
The 4-sided over 3 pattern shown here is a good example. Notice the direction of the stitches:

1 – left to right

2 – bottom left to top

3 – bottom right to top

4 – bottom left to right

The back will show a large cross stitch (X) as shown above.

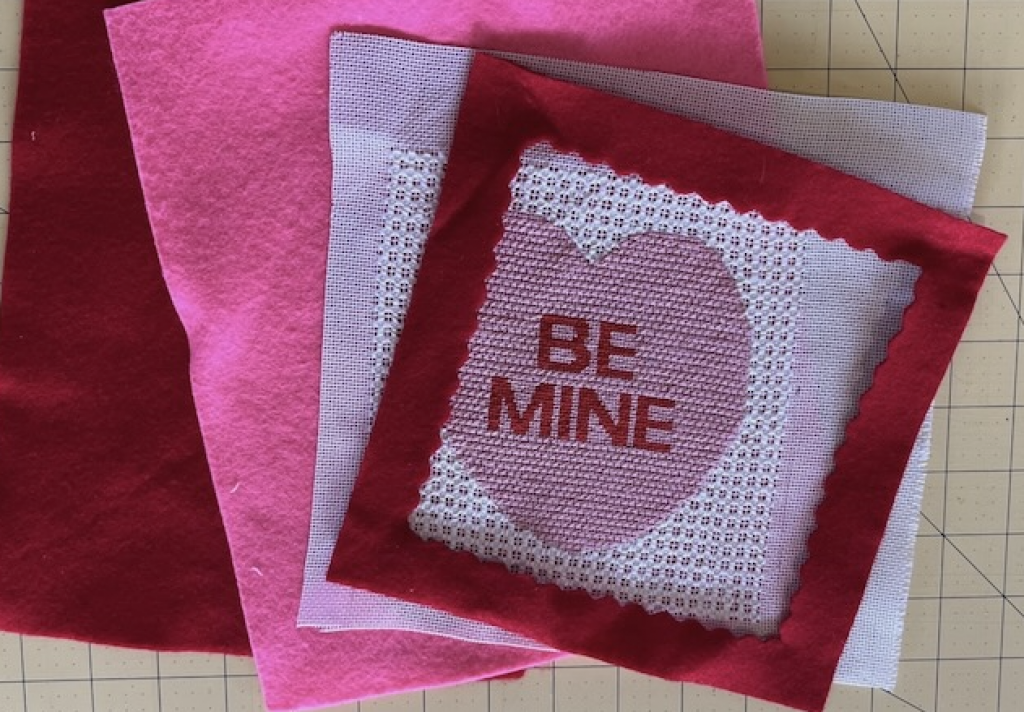
My original idea for this project was to back the canvas the same felt as used for the frame. The red felt did not show through. However, the bright pink felt showed well and tied the red and pink of the heart together. Below is a photo of the four layers that used for the hanger.

This project was stitched with white thread on white canvas and had a hot pink backing. Alternatively, it could be done with red thread on the white canvas and a white or sparkling backing. There are many options, and the only caution would be not to try pulled yarn stitches on a printed background. Pulling the stitches will expose the white of the unprinted canvas.

Please feel free to contact us with any questions you may have at: info@needlepaint.com

Happy Stitching!
Sweet Summer Stitching at NeedlePaint!

IMG_1289

Ahhh . . . . summer! Bright warm sunshine; plenty of picnics; crops of fresh juicy fruit; carefree longer days; and that special time of year when you don’t have to make excuses for being a bit lazy. Take a break in your routine, slow down a bit, and “needlepoint” as long as you want . . . we won’t tell anyone!

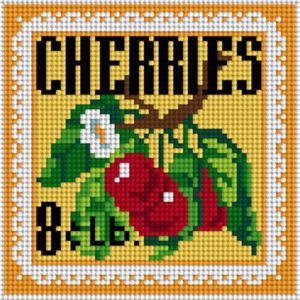
NeedlePaint Cheery Cherries Needlepoint Canvas

4.29” x 4.29” on 14 mesh, “Cheery Cherries” needlepoint canvas.

This new NeedlePaint design, “Cheery Cherries” has “summer” written all over it. Bright, cheerful and full of vivid color; we know you’ll enjoy stitching this sweet needlepoint canvas. Perfect as a small picture for that little spot in your kitchen which could use some color; or as a colorful Christmas ornament to remind you of those wonderful summer days when it’s snowing outside.

IMG_1294

“Life is like a bowl of cherries!” — Wishing you a wonderful summer of stitching!

How To Stitch A Needlepoint Belt Canvas

By Peggy Bond

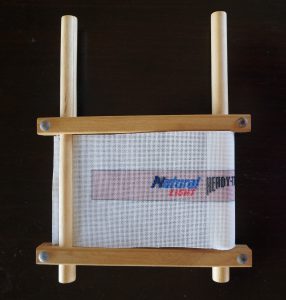
So you have a 5-inch wide by yard long printed needlepoint canvas for a belt. Where do we go now? To a split rail scroll frame which will keep your canvas relatively square while allowing you to access sections of the canvas without having to remove and reposition it.

The F.A. Edmunds 6” x 12” scroll frame is a great option. 

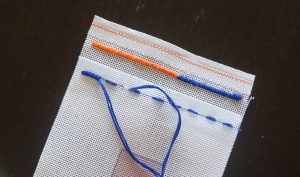
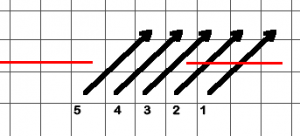
Before putting the canvas in the scroll frame, create “end stops” along the short sides of the canvas. The end stop is made with a doubled length of thread (i.e., 12 strands of floss or 2 strands of wool). First, do running stitches along one row as shown below. Then stitch over that row with a 2 x 2 Continental stitch. The end stops will prevent the canvas from slipping through the slotted dowel rod of the frame.

End Stop

End Stop Diagram

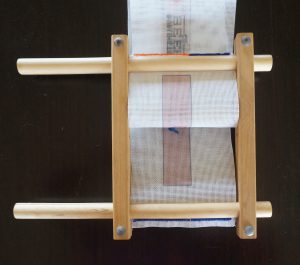
The narrow ends of the canvas are slid into the slotted dowel rods and should go all the way against the end of the slot. Insert the dowel rods into the frame’s spreader rails as shown below. The spreader rails should be flush with the edges of the belt canvas to reduce warping the canvas while stitching. 

In the Frame

Even when the rails’ wing nuts are not tight, the end stops should not be able to be pulled through the dowels and the frame should be a rectangle. The dowels can be turned to roll the canvas as it is worked. After positioning the canvas to a section for stitching, tighten the wing nuts on the rails.

Read to stitch

Where to start the stitching and in what order to do it is a personal choice. Personally, I prefer to stitch all of the images before attacking the background. There is no reason why images and elements can’t be done together as the canvas is wound on the dowels. The only thing to remember is not to stop the background stitches at the same vertical spot on each row.

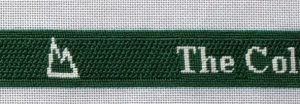
Belts are most frequently stitched with the Tent stitches. For the belt shown below, the Continental and Half Cross Tent stitches were used for the images and lettering, and for filling in where the background stitch couldn’t fill. The background stitch is the Upright Cross. 

CTF Belt Section

Look for our future post on background stitches.

Here at NeedlePaint, we have a large assortment of needlepoint belt canvases we know you will love stitching!

Finishing a Needlepoint Yarmulke

By Peggy Bond:

How to finish off a needlepoint kippah.

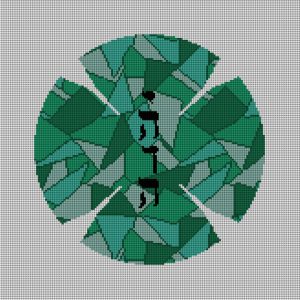
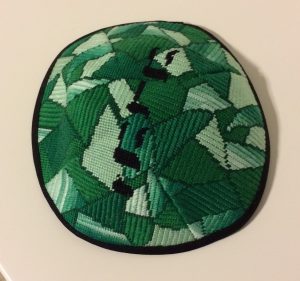
As an example the mosaic needlepoint yarlmuke has been made with four blank triangular areas. These are the “darts” which will be sewn together to give the yarmulke its shape.

1721099214530194

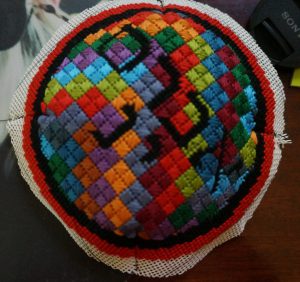
After your yarmulke canvas has been stitched and blocked, trim the canvas leaving a ¼ boarder beyond the stitching. Save this extra canvas and use it as a pattern for the lining. I recommend using 100% quilting-weight cotton for the lining.

Mark darts on the lining to match those of the yarmulke.

Yarmulke with darts sewn

Sew the dart on the canvas together. Steam press the edges of the darts to one side, so they lay flat and form a smooth rounded shape on the top of the yarmulke. Repeat for the lining, pressing the dart in the opposite direction of the direction that you pressed the canvas. 

With wrong sides together, stitch the lining and canvas together at the edge of the needlepointing. Trim as needed so that the ¼ inch bias tape can be attached to the outside edge, covering the unstitched canvas.

Finished yarmulke

The materials I used were:

1 black fat quarter of cotton quilting-weight fabric
1 package Wrights’ ¼ inch double fold bias tape.

I stitched the yarmulke, lining, and bias tape on my home sewing machine, but it can also be hand stitched, which will take just a little bit longer.

At NeedlePaint, let us create a custom yarmulke canvas for you to stitch!

Custom Needlepoint Wallets

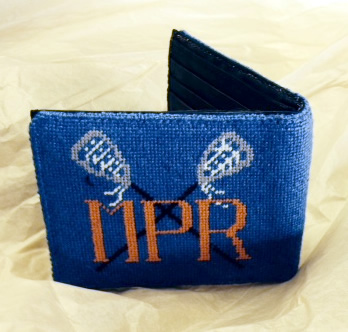
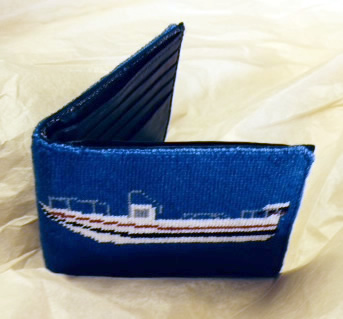
We’ve shown a lot of needlepoint belts on our website, but if you are looking for another fun easy idea for a new project, Kathy at Leatherprize just emailed me some pictures of needlepoint wallets that she finished recently.  Don’t they look great?!!

Custom Needlepoint Wallet

Custom Needlepoint Wallet

These are simple projects for beginners to advanced stitchers who want to stitch something that can be used in the day to day…

We can design a custom needlepoint canvas for you.  The design size (including an extra stitch to fold the edge over with) is 9.1 x 3.5 inches.  Normally you can repeat a design on both sides, or we can do two different designs!

Monograms, favorite sports, hobies, or teams are a few ideas for mens wallets.

Needlepoint Wallet Front

Needlepoint Wallet Front

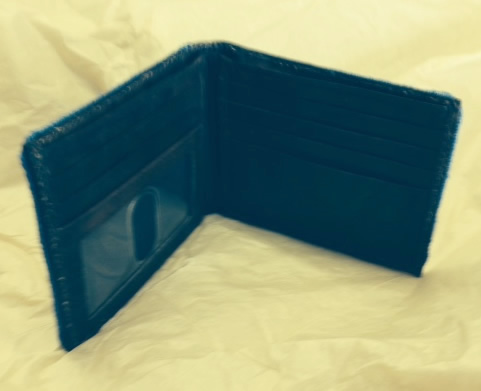
Needlepoint Wallet Inside

Needlepoint Wallet Inside

If you are looking for a great needlepoint belt finisher Kathy is your person.  We’ve been sending our customers to her and have had great reviews.  Poke around her website, there are lots of ideas there that we’d be happy to help design the canvas for you to stitch and have her finish.

Contact us if you’d like help designing your own needlepoint kit for a belt or wallet.


How to Choose the Right Needlepoint Canvas

We get a fair amount of orders from people who are purchasing custom needlepoint projects as gifts for other people (especially around Christmas).

One of the most common questions we get is what is the “correct” mesh count to purchase and how “easy” is the design.

To start out, there is no “correct” mesh count as different stitchers prefer different counts.  

For a newbie learning about needlepoint, the mesh count stands for the number of stitches in one linear inch.  That means you measure 1 inch along a line on the canvas, and count the number holes.  A 10 mesh count means there are 10 holes per inch.  A 18 mesh count canvas means that there are 18 holes per inch.  This may not sound like a lot, but to a stitcher it is a HUGE difference.  If you consider that 10 mesh count canvas has 100 stitches in a square inch and 18 mesh count has 324 stitches per sq. in. that means that the stitcher has a LOT more stitching to do if you order 18 mesh count canvas.  Thus, I suggest not ordering 18 count canvas on any design that is wider or taller than 12 inches.  For smaller canvases it is OK to use 18 mesh count because it allows the design to show a lot more detail. Some stitchers do prefer more detail at larger sizes, so this is just a guideline for reference.

Things to consider when choosing mesh count:

  • The stitchers eyesight.  18 count has more stitches per inch, so the holes are a lot smaller and harder to see.  10 mesh has the largest holes.  If she has weakening eyesight, you may want to avoid 18 mesh count canvas.  14 or larger should be OK.
  • Fiber preference.  Needlepointers love to work with a lot of different fibers, the most common are wool, cotton, and silk.  13 and 14 mesh count canvas will work with almost any fiber and are the most commonly used canvas today.  If the stitcher prefers wool, you may want to use a canvas with 14, 12, or 10 mesh count.  With 18 count canvas we only supply cotton, but there are other fibers that will work, just not as many.
  • The design details.  Higher mesh counts (18 and 14) will show more detail than the larger mesh counts (12 and 10).  Belt canvases often come on 18 mesh count canvas because you need the extra stitches to show designs on an area that is so limited in height.  If your design is very detailed or you want to fit a lot into a smaller area, you will want to use 18 mesh count.  But, if you try the 14 mesh count option on the website and still think it looks good, you can use that too.
  • The design size. If you find that you need more detail but have to use larger holes, you can always increase the overall size of the design, this an alternative way to increase the detail, but does add to the cost of the project.  Typically I think the sweet spot for design size is around 12 x 8 inches.
  • To see how to adjust the mesh count and height, watch our how to design a pillow instructional video.

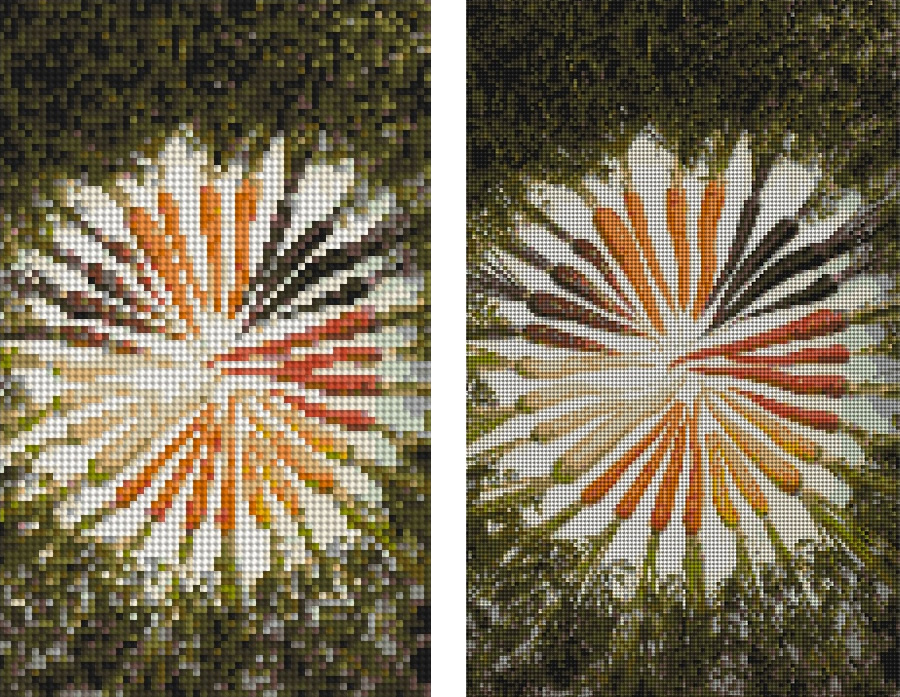
Carrots of Many Colors 10 mesh count vs 18 mesh count canvas

Carrots of Many Colors 10 mesh count vs 18 mesh count canvas. The 18 mesh is on the right and shows a lot more detail.

Next we have the “easy” question, or degree of difficulty.

This is very subjective, but there are some obvious guidelines that can help you determine how difficult a project will be to stitch.

  • The number of colors.  Often, the more colors there are on a canvas the trickier it will be to stitch.  This is especially true with photo needlepoint canvas designs.  The shadowing and gradients get harder to see the more colors there are.  Also the thread colors get very close, so even they get hard to tell apart.  When stitched this looks amazing, but a beginner stitcher may find this very tedious.  Typically I recommend keeping the number of colors below 20 if possible.  If you are using the website and want help, feel free to email us, we’d be happy to help!
  • The nature of the design.  If you are using a photo there is often a lot of intricacy in the placement of the stitches.  Easier canvases will group the colors together in larger blocks, so the stitcher does not need to change thread every third stitch.  Designs and artwork with plain colors and patterns often are the easiest to stitch as the contrast between the colors is big and the patterns are simple to follow.  The dog needlepoint designs we have on our website range from moderate to difficult, the new stitcher can do a moderate design, but it will take them a while.  The original artist needlepoint designs we have licensed are easy to moderate, mostly they go in the easy category.  And our baby and kids designs all are also in the easy realm.

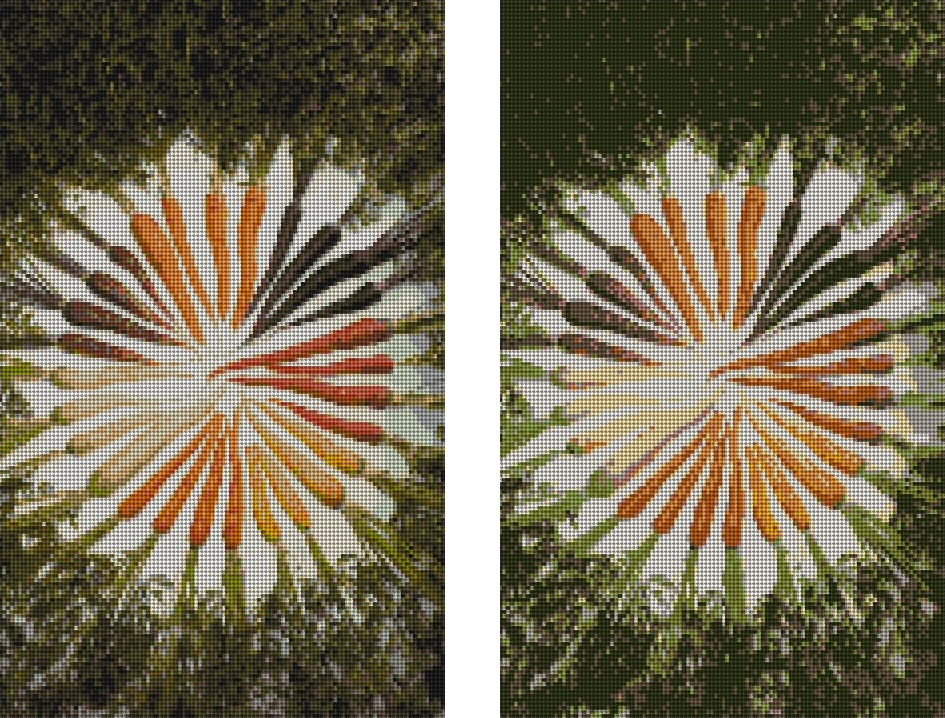
Carrots of Many Colors 25 colors vs 11 colors

Carrots of Many Colors 25 colors on left vs 11 colors on right.  Notice the white carrots loose detail.  Not a very big difference to the eye, but to the stitcher 25 colors would be significantly harder.

If you decide to reduce the number of colors, but notice something that you would like adjusted, go ahead and place your order and email us the image you used, we can touch up the design for you!

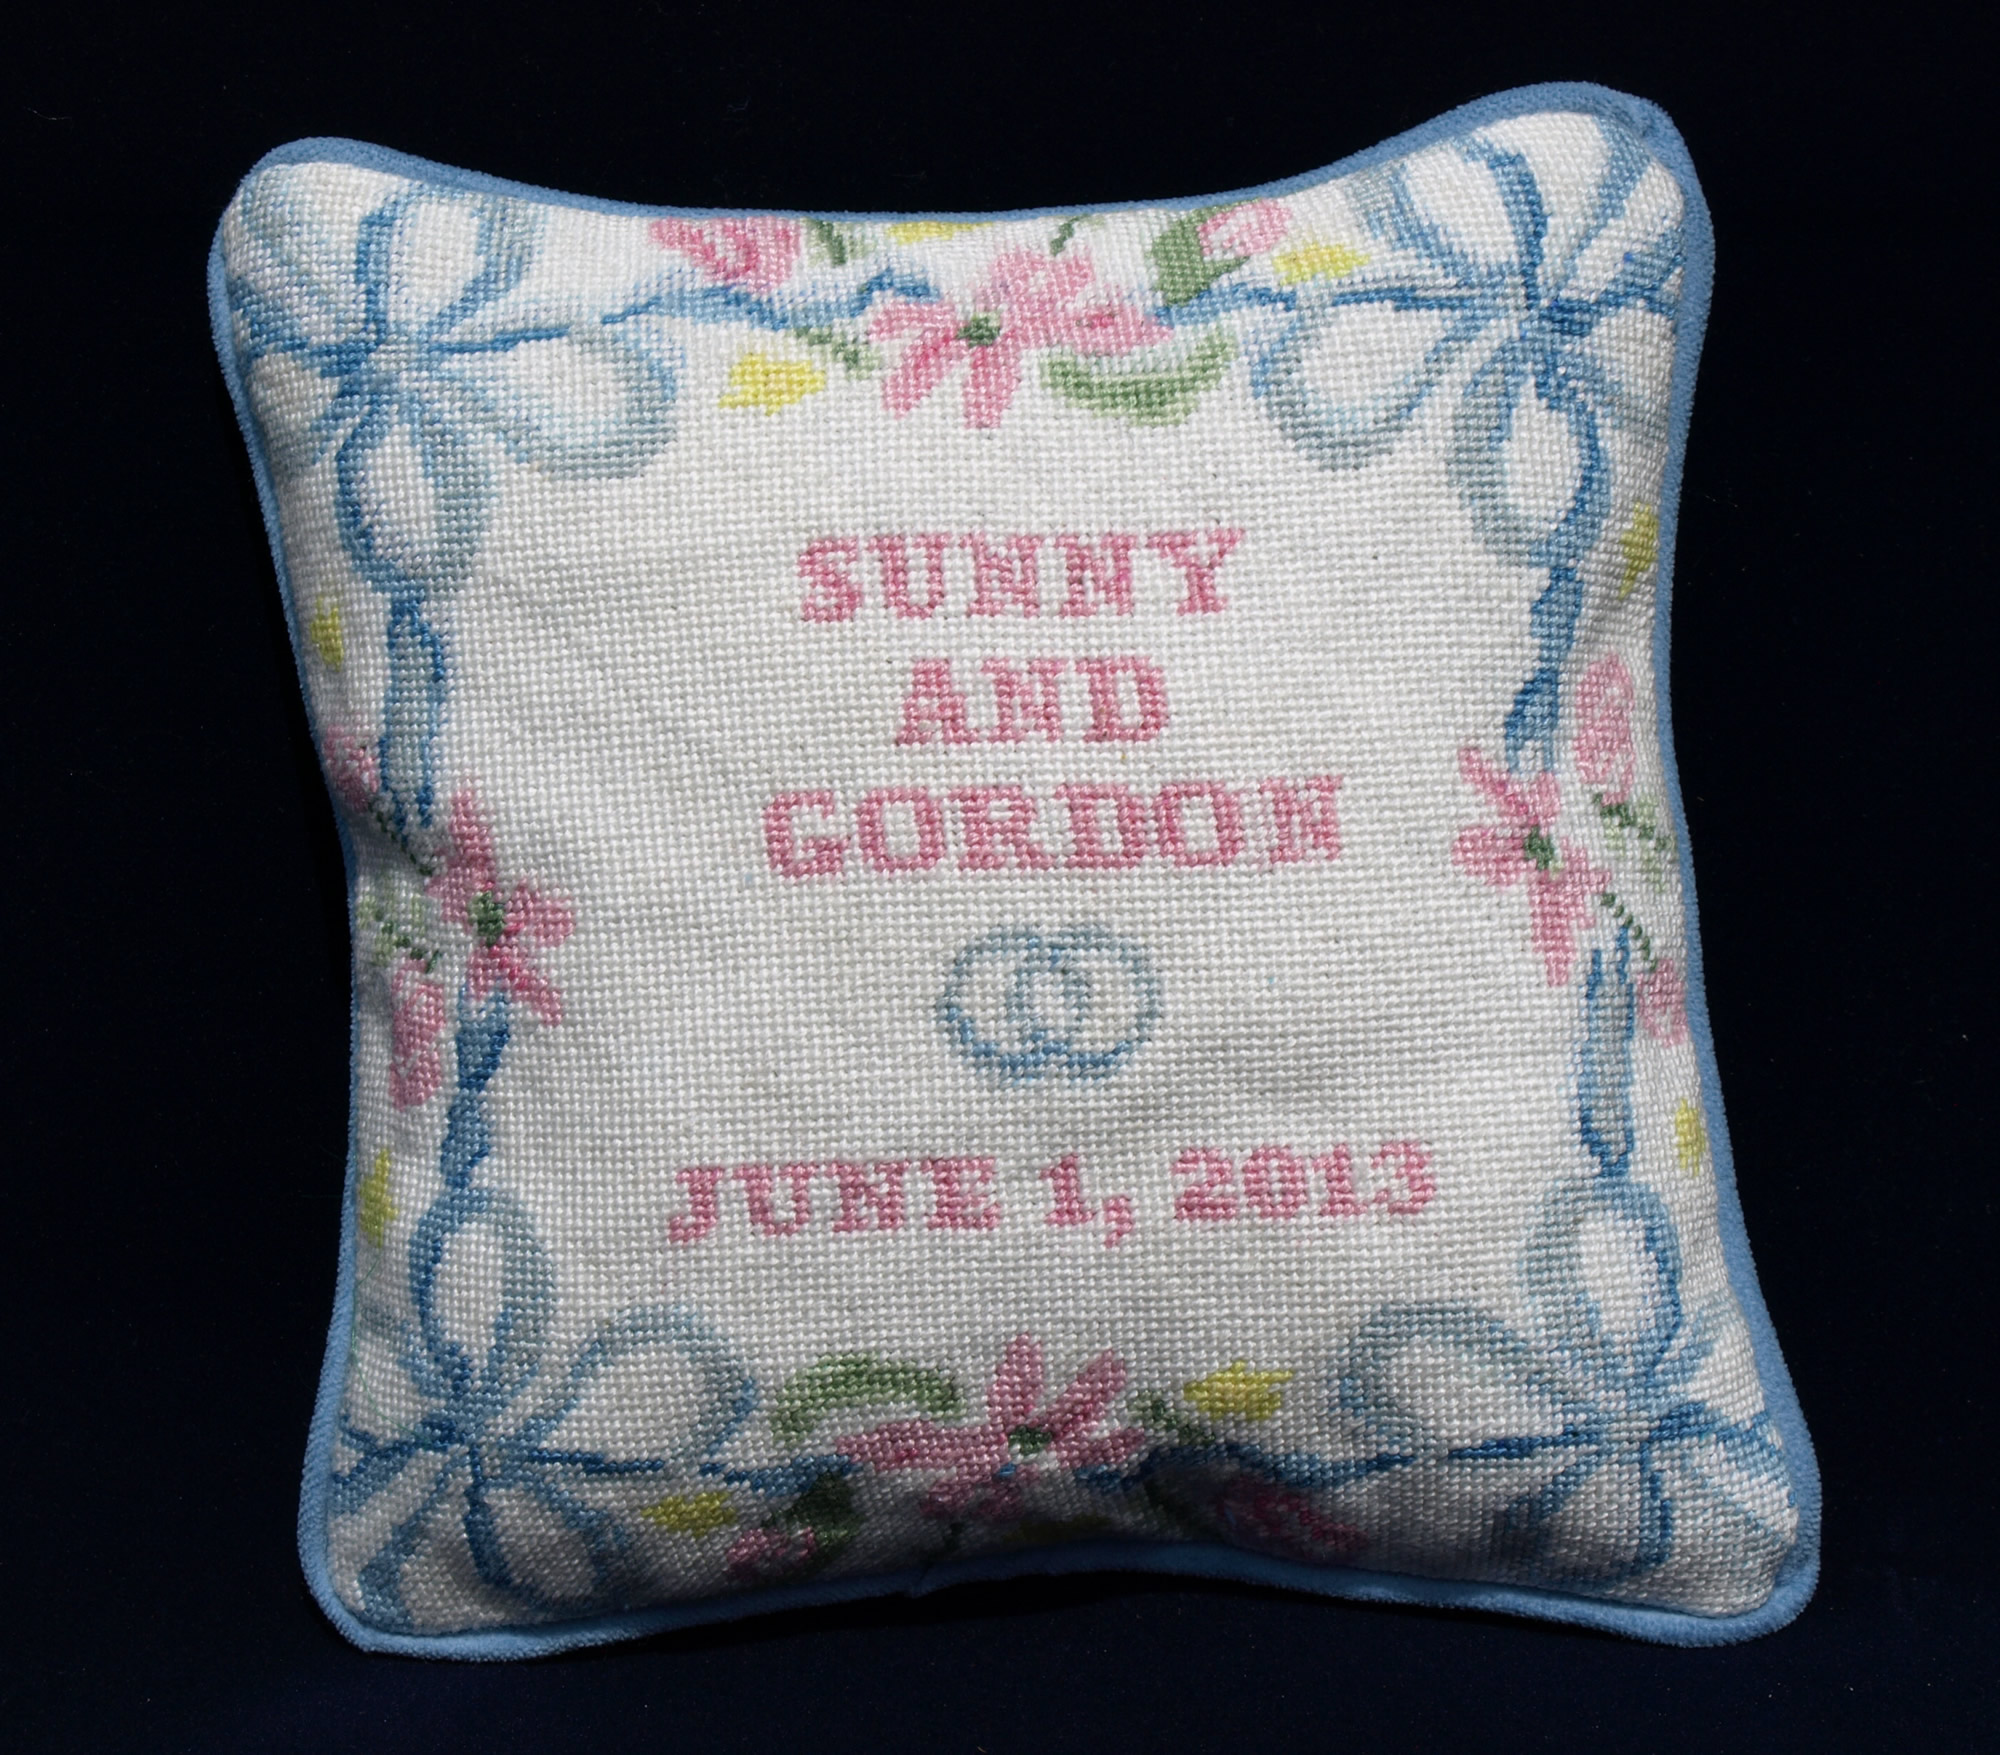
Spring Ribbon Needlepoint Ring Bearer Pillow

It has been a while since we last posted a new ring bearer pillow design.

Here is a new beautiful Spring Ribbon ring bearer pillow needlepoint canvas design.  It was inspired by a customer’s request.

The picture is of a needlepoint pillow that we stitched for a wedding in California this year, and I do have to say that I love it!

Spring Ribbon Needlepoint Ring Bearer Pillow

Spring Ribbon Needlepoint Ring Bearer Pillow

If you are interested in a custom needlepoint pillow, please contact us.

How to Measure a Needlepoint Belt

We’ve really had a great time designing needlepoint belts this year.  One request we keep sending out is to show people how to measure a needlepoint belt.

I figured that we may as well write a blog post about this, so more people who are searching can learn how to measure a belt.

Actually, this was a mystery for me for a long time, as some companies belt sizes seem to vary from others, and I never understood why.

Basically, the key to figuring out a belt size, is to measure from the end of the belt (not the belt buckle – see left side marked A) to the center hole (see  right side marked B).  Click on the image below to see it more clearly.

How to measure a Needlepoint Belt

How to measure a Needlepoint Belt

This explains why some companies with longer metal buckles would have differences from belt size to belt size.

If you are stitching a custom needlepoint belt canvas and having it finished with leather belt ends, you’ll also want to know how much to stitch.

With our leather belt ends, you can calculate this by subtracting 8 inches from the belt size.  This is what we refer to as the visible area.  Then from here, we add two extra inches of background color to each side (the belt buckle will cover up this area).

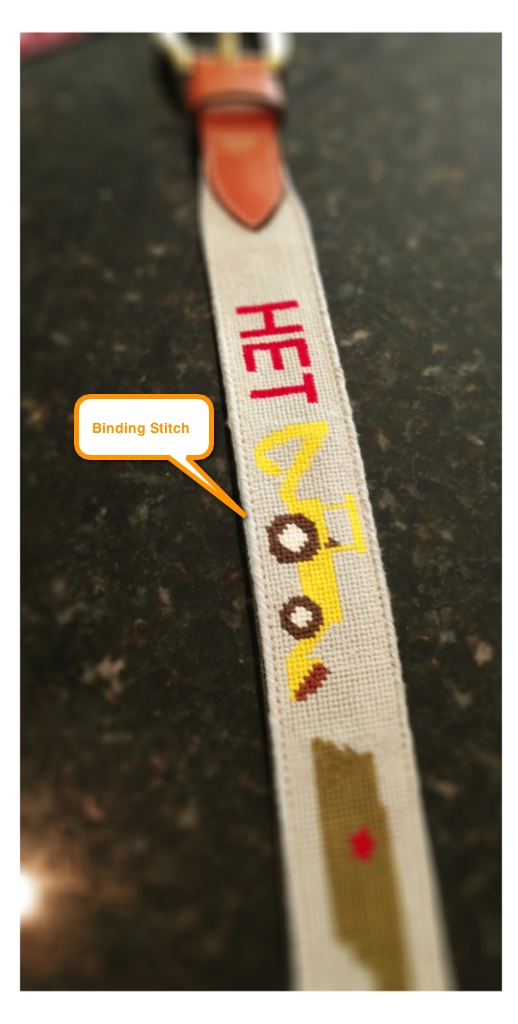
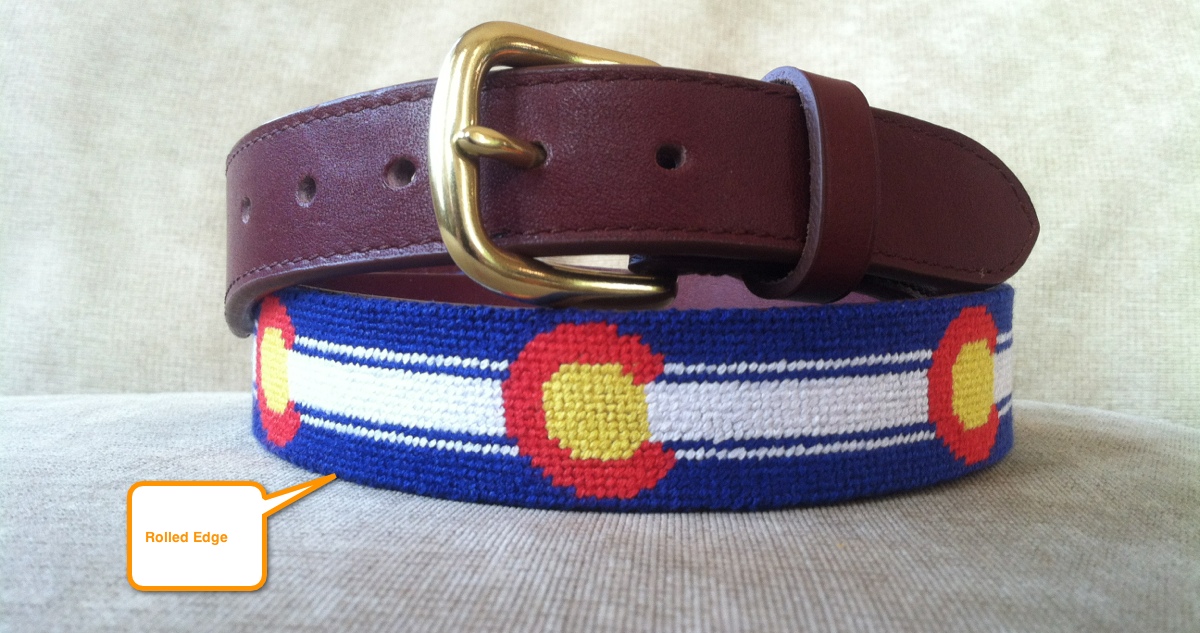
Also, I’ve been going back and forth with finishers on a rolled edge vs using a binding stitch.  We have found a finisher who does not charge extra for doing a rolled edge, so it is a matter of preference.

Needlepoint Belt Binding Stitch

Needlepoint Belt Binding Stitch

Needlepoint Belt Rolled Edge

Needlepoint Belt Rolled Edge

If you prefer the rolled edge, then you will need to stitch two extra rows above and below the design, so the finisher can wrap the canvas under.

If you are looking for needlepoint belt ideas, check out our needlepoint belt canvas section, or have a look through our needlepoint belt blog posts.  If you have something else in mind, we’d be happy to design a custom belt canvas for you!

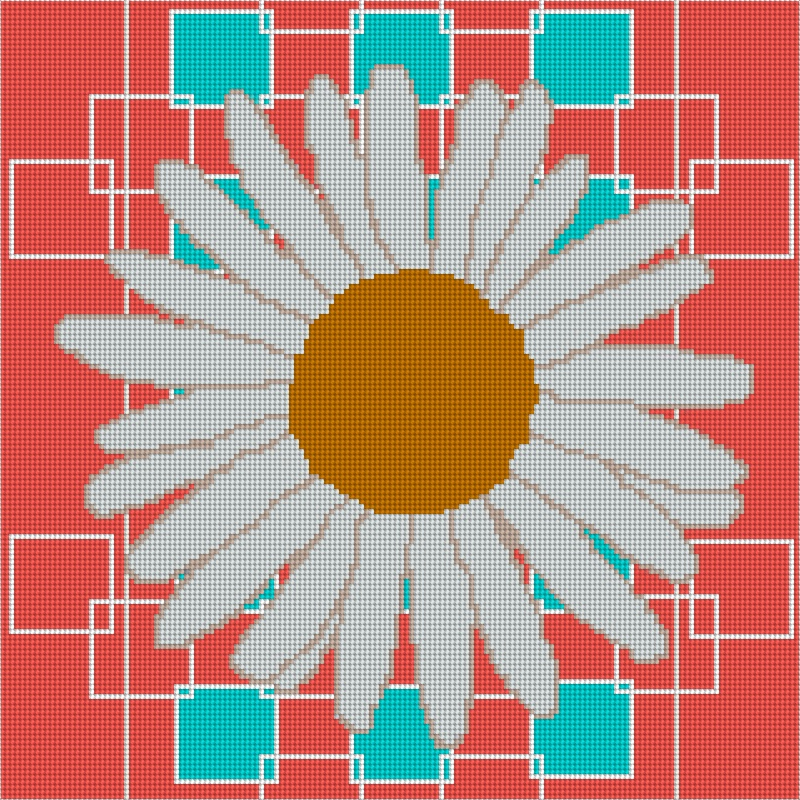
Daisy Needlepoint Pillow

Check out our new summery, colorful, and fun new design, the Daisy Needlepoint Pillow Kit!

The design was inspired by the great summer weather and beautiful wildflowers that are now abundant in Colorado.  This design is perfect to brighten up a sun room or add a summer spin to anything!

This design is now available on our website.

Daisy Needlepoint Pillow Kit

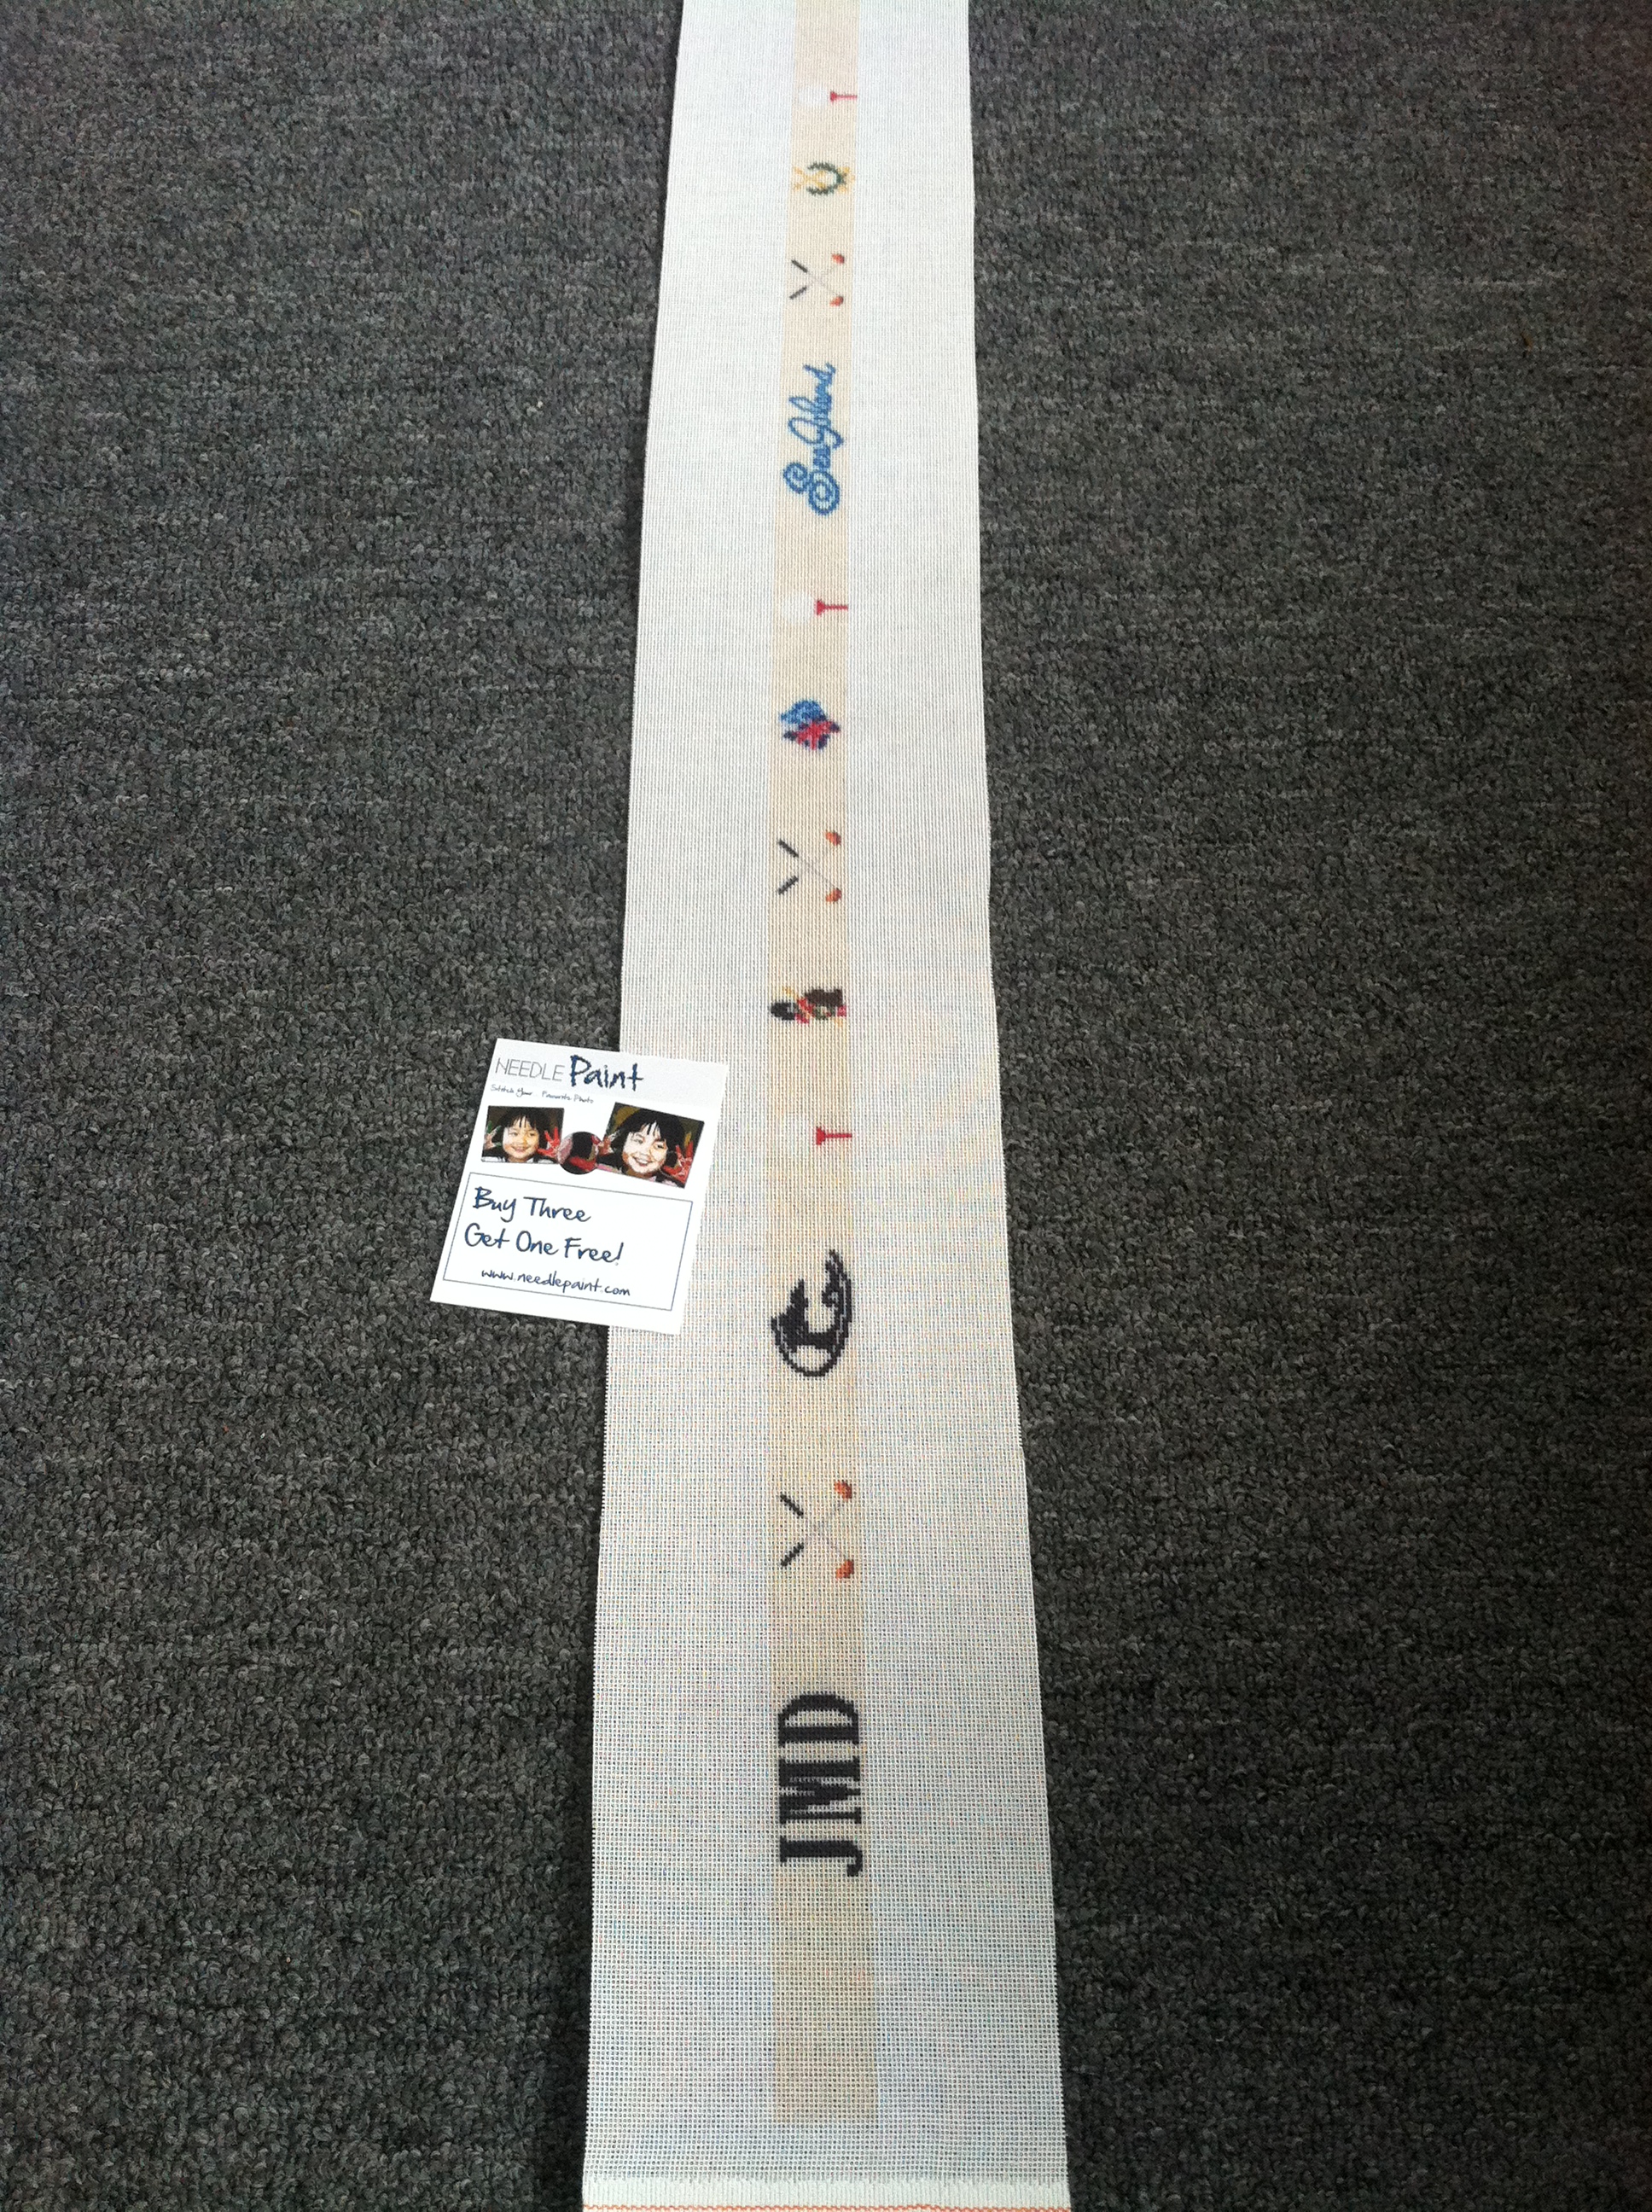
Custom Golf Needlepoint Belts

Have you been looking for a great project or gift your favorite golfer ? (not the professional one, but the one who you live with 🙂 )

Consider a custom needlepoint golf belt.  These are great projects to learn how to needlepoint, as they are fast, easy, and the needlepoint belts looks amazing!

If you love the idea, but do not have the time, we can make it for you! (Contact us for pricing)

Ideas for what to put on the custom belt are:  Monogram, Favorite Golf Club Logos (see our needlepoint belt design library), Golf Balls, Golf Clubs, or anything else you can think of!

Designing your own custom belt is easy, simply purchase the golf belt needlepoint canvas in NeedlePaint.com’s shop, and then email us the designs, colors, and other items you would like to be included, and we will create a digital preview for your approval.  If you don’t love our designs, you will not be charged!

Custom Needlepoint Golf Belt Canvas

Custom Needlepoint Golf Belt Canvas

Finished Preview of a Custom Golf Needlepoint Belt

Finished Preview of a Custom Golf Needlepoint Belt

Please note, on the actual belt, the buckle will cover up more of the background color than in the preview.  And the golf clubs in the upper right are followed by the tree on the lower left.