Official blog of www.NeedlePaint.com
where you can design your own Needlepoint!

NeedlePoint Kits and Canvas Designs | Design your own Needlepoint Kit!

Posts tagged ‘needlepoint canvases’

Friday Design Inspiration – New Needlepoint Kits This Week

We make so many great custom needlepoint kits, that I realized that we should be sharing them with our readers!  (With their permission of course)

This week a customer designed a needlepoint canvas that not only looks amazing, but has a great story behind it.

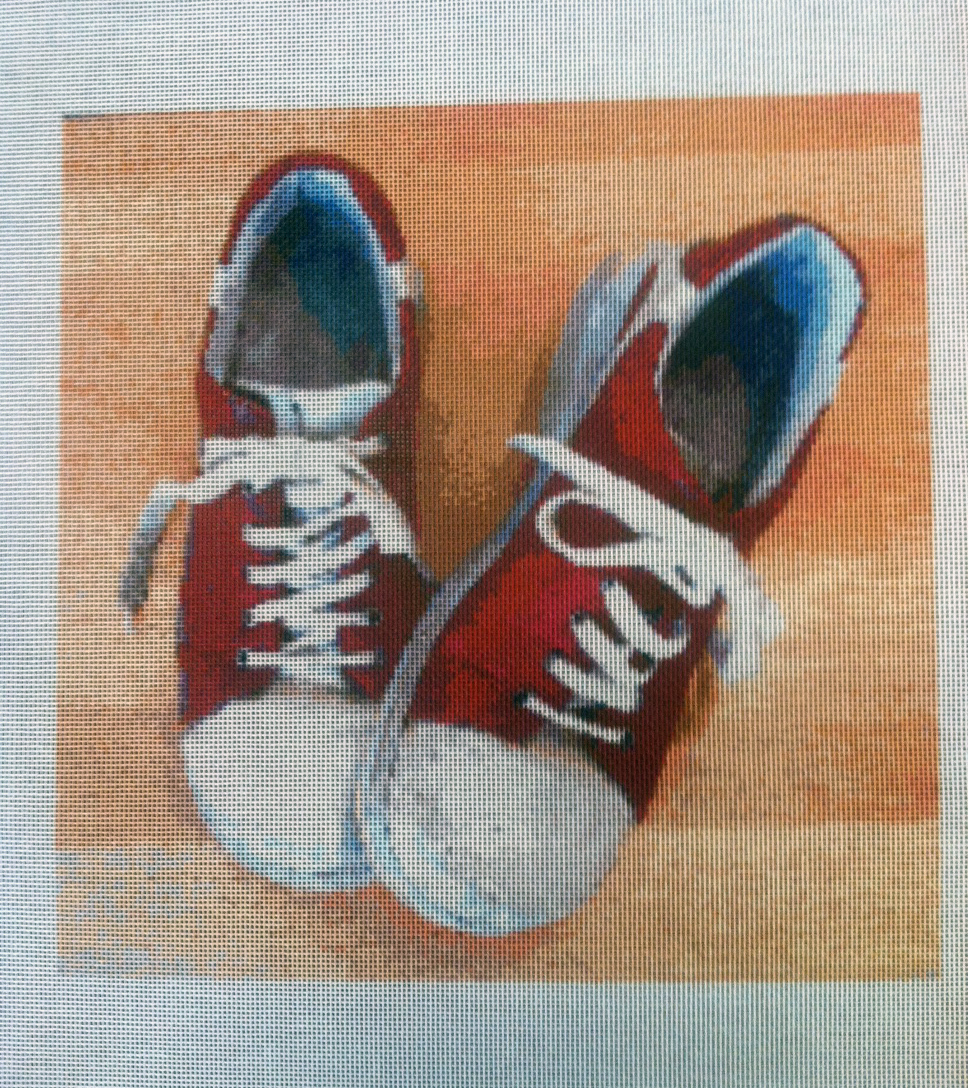
These red shoes took her around Croatia, after connecting with relatives from the “old country”.  The story behind them, is that they were lent to her durning a rainy  week by her cousin, and her daughter took a picture of them before returning them.

What a great picture, and think about how great is this going to look when it is stitched!

Red Walking Shoes Modern Needlepoint Canvas


Custom Flower Needlepoint Pillows

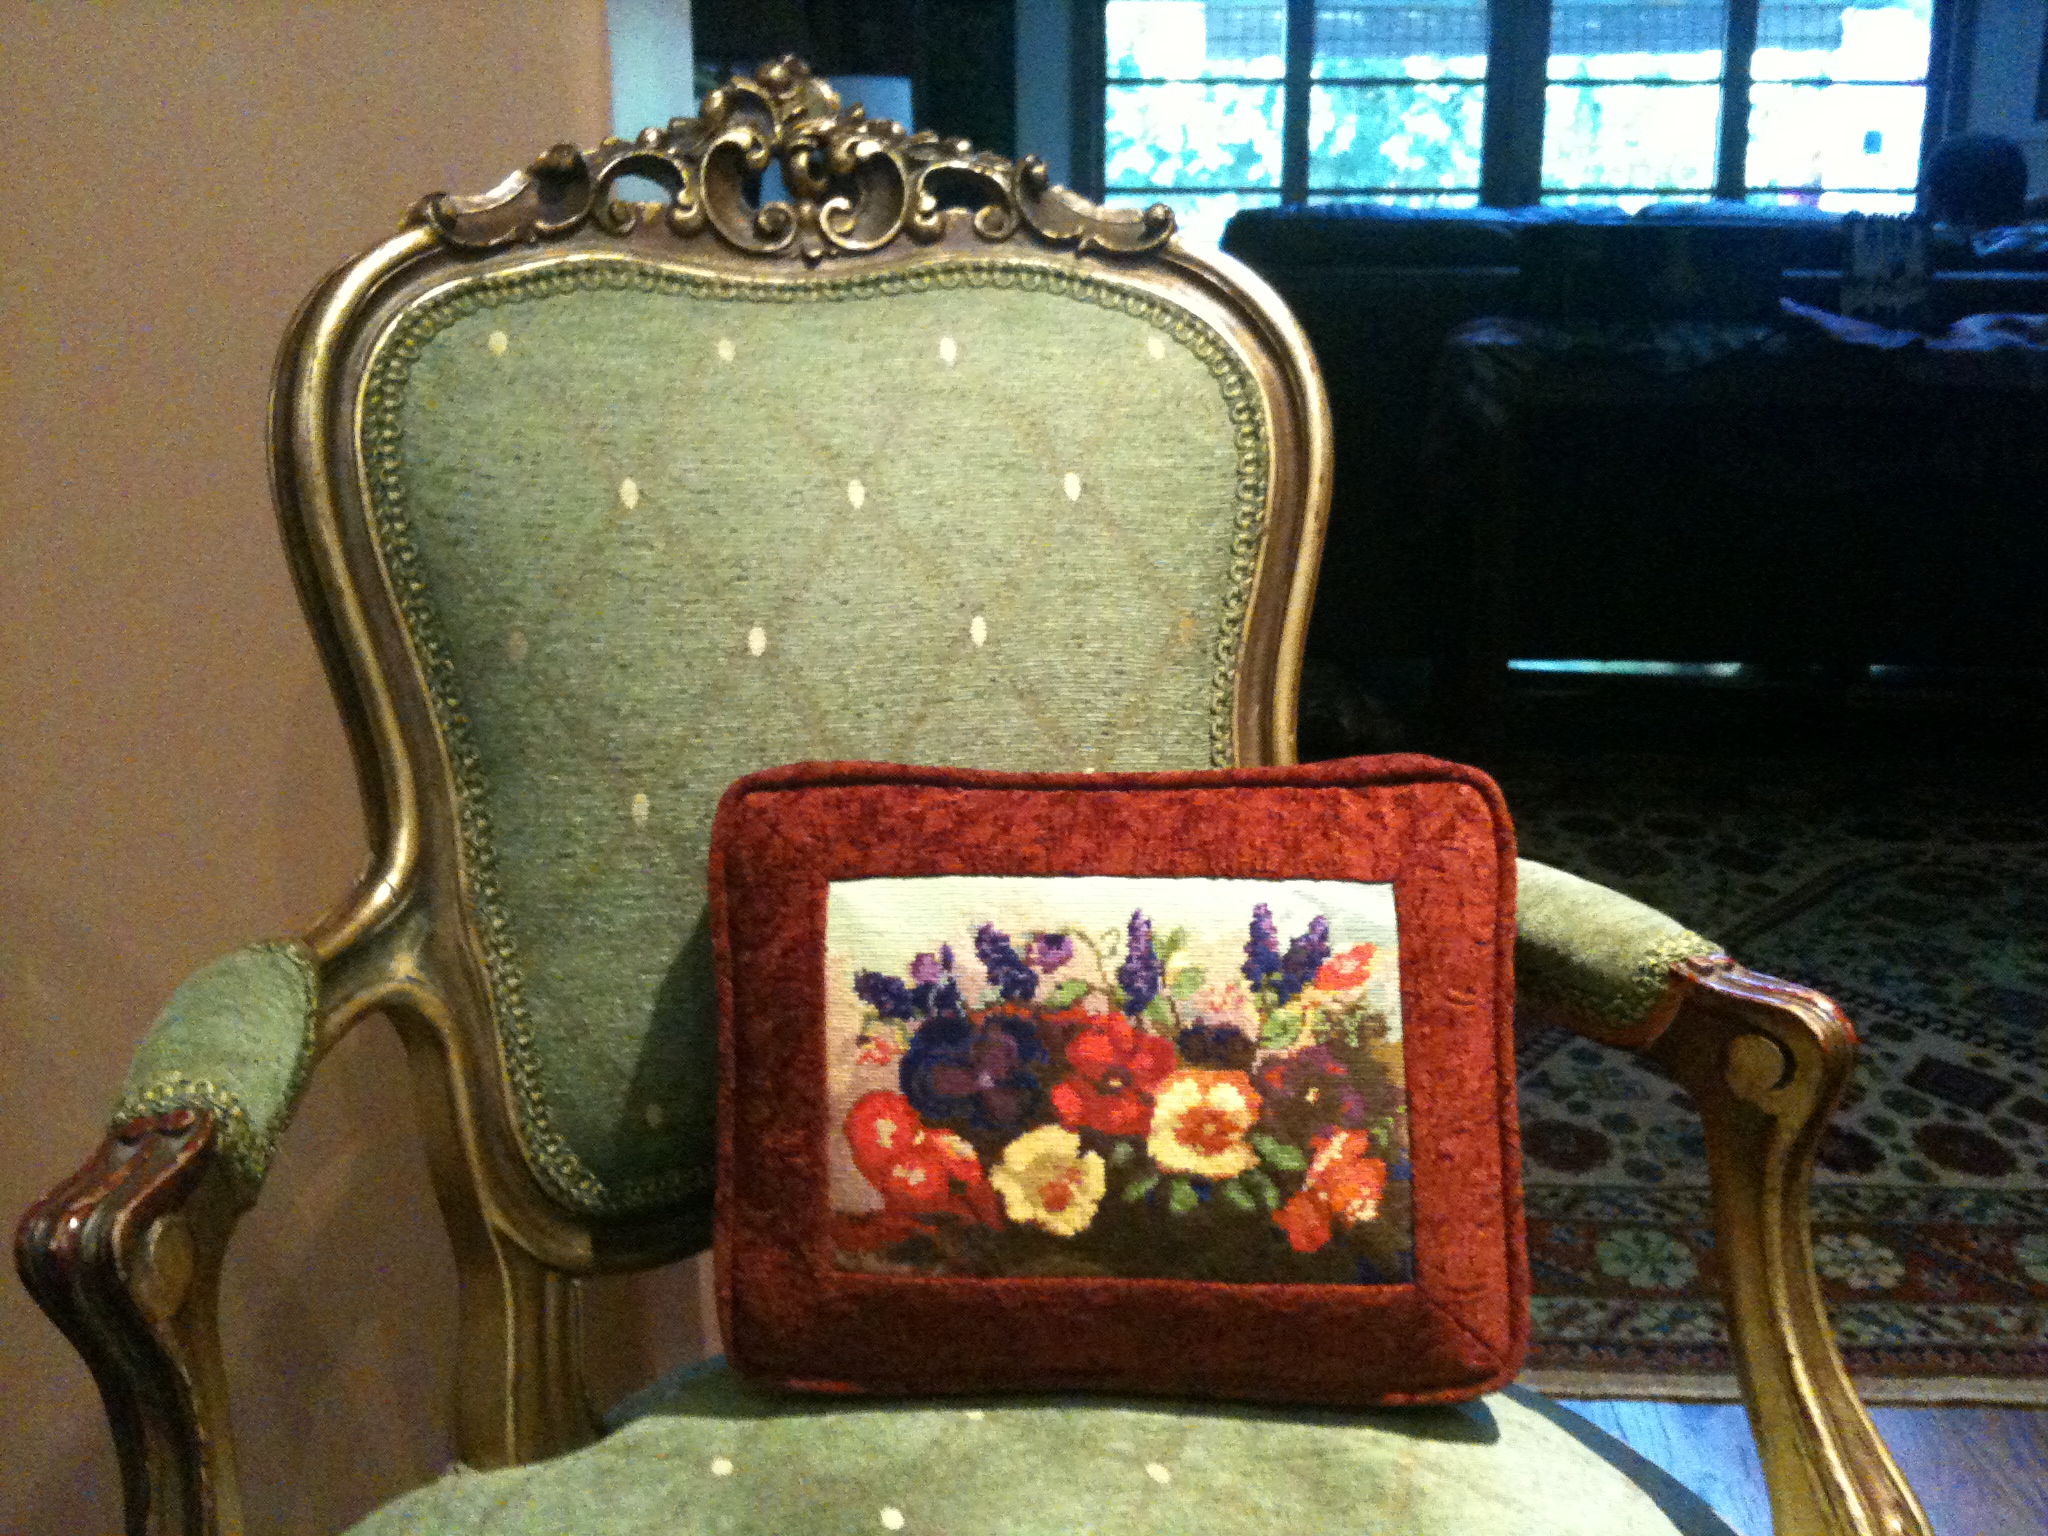
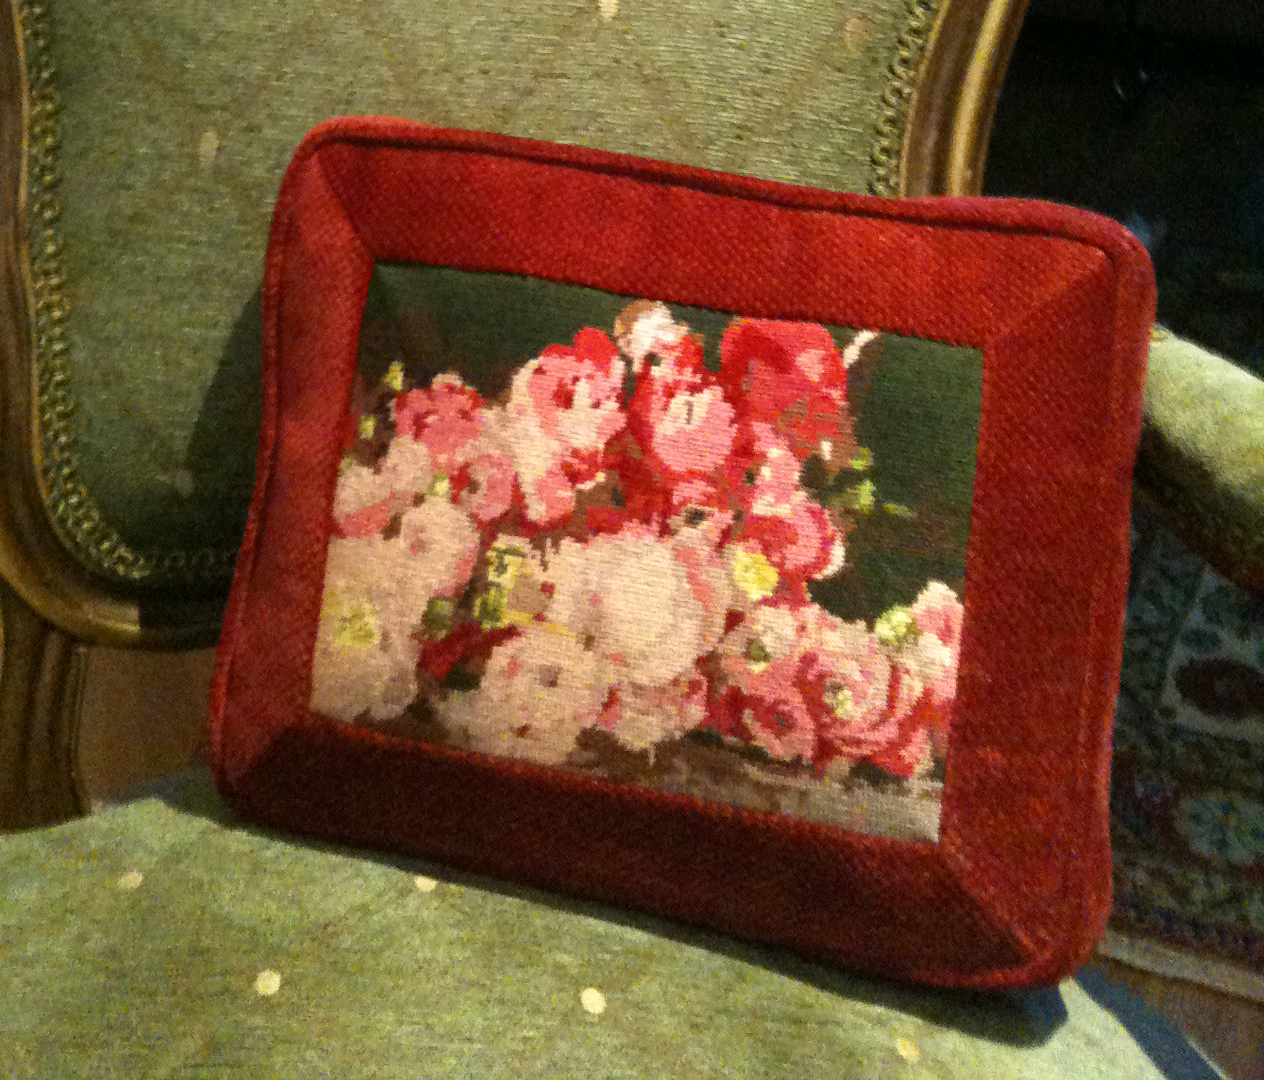
One of our customers, Hala Alfi, just finished two of her custom needlepoint canvases into beautiful pillows.

These designs were made using needlepoint kits from NeedlePaint.com  where you can upload your own photo to design needlepoint canvases online.

I love the framed box edges on the pillows, they give an elegant look, while adding extra size to the pillow.

Many thanks Hala!  Keep up the beautiful work!

Custom Colorful Flower Needlepoint Pillow with a Box Edge

A Second Beautiful Flower Needlepoint Pillow

Flower Needlepoint Kits

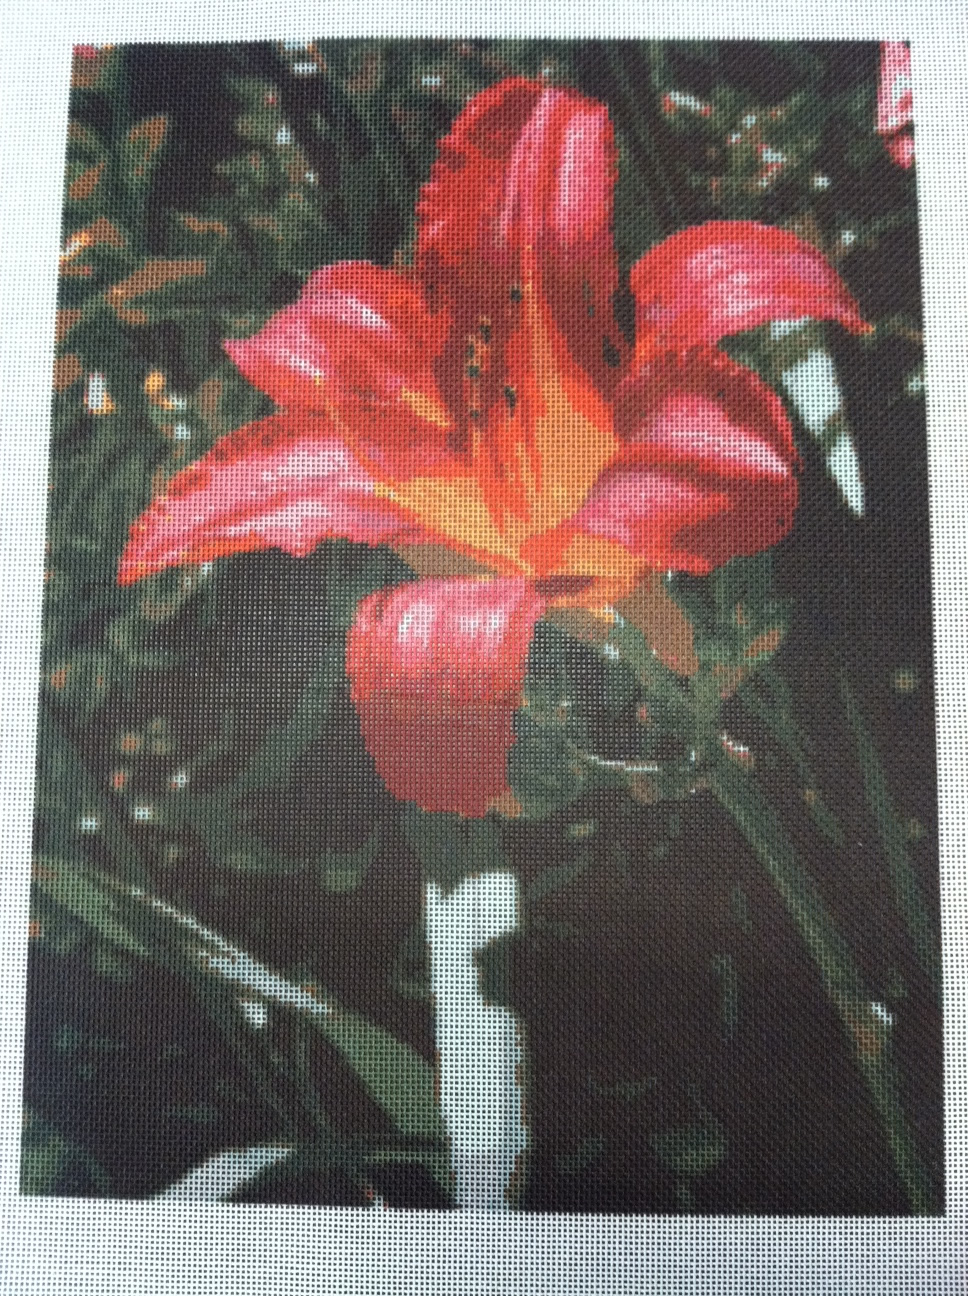
We have designed some stunning flower needlepoint kits.

We made this flower needlepoint canvas yesterday and I had to take a picture of it!  We will be adding it to our website store soon, but if you are interested in ordering it, please contact us at info (at) NeedlePaint.com.

Do you have your own photos of flowers you want to stitch?  Try to design your own needlepoint canvas from a photo at www.needlepaint.com.

Red Daylily Flower Needlepoint Canvas

The No Tears Needlepoint Pillow

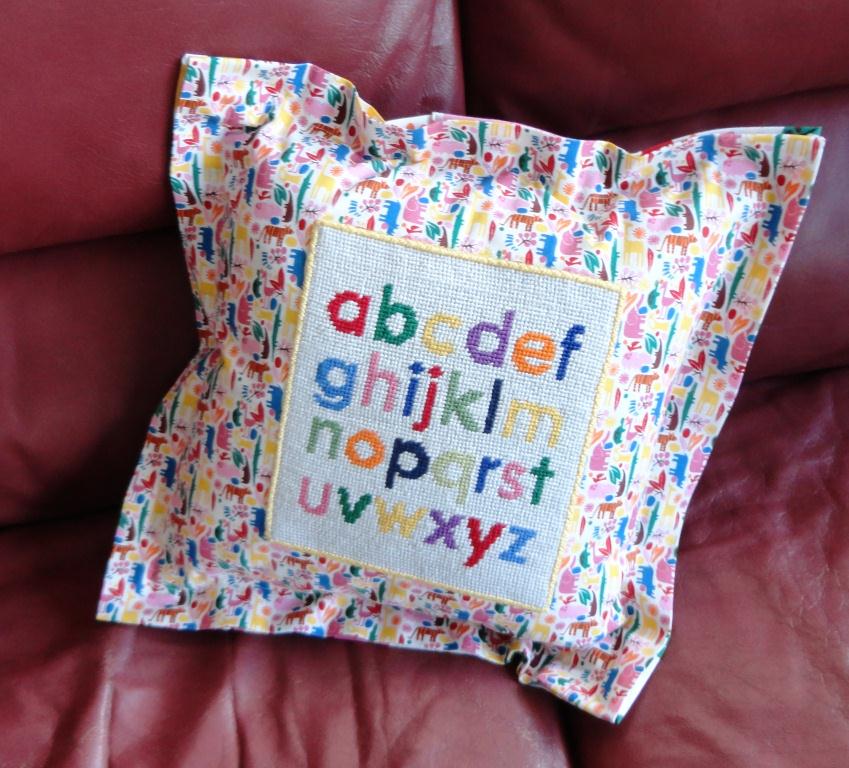
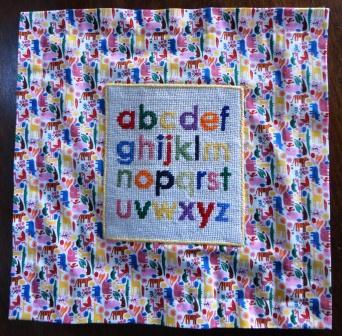
As I mentioned in my earlier post An Elegant Finished Edge, I had come up with a use for the odd-shapped design that we had designed for our first test custom needlepoint canvas. This 6″ x 7″ canvas is now the center piece of a 12′ x 12′  pillow  for my granddaughter’s nursery.

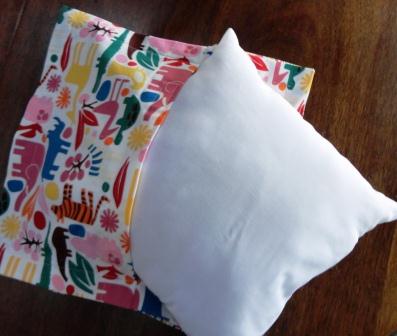
As you can see, this pillow does not have piping — the most difficult and frustrating part of needlepoing pillow finishing. Also, there is no zipper, no turning inside out, and IT IS EASY!  It is a modified pillow sham which fits over a 12″ x 12″ pillow form.

Materials for the pillow are:

  • 12″ x 12″ polyester-filled pillow
  • 1/2 yard 42″-45″ fabric
  • 1/4 yard Velcro (optional)
  • finished needlepoint canvas that is smaller than 12″ x 12″ and whose edges have been bound

Directions:

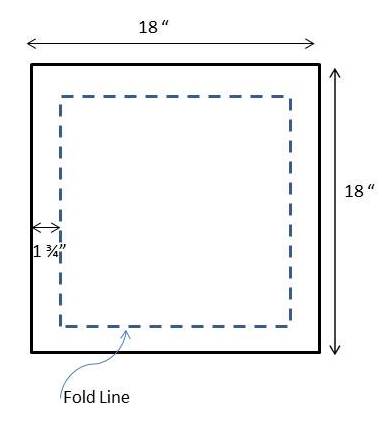
  1. Cut one 18″ x 18″ front.
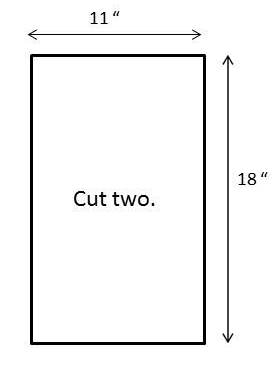
  2. Cut two 11″ x 18″ piece for left and right sides of back.
  3. Position finished needlepoint canvas in the center of the front. Stitch in place by machine using zig-zag stitch or by hand using an overcast slip stitch.
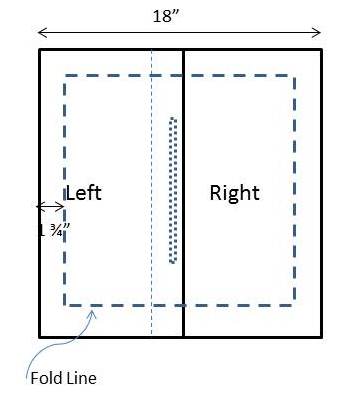
  4. Sew 2″ hem on left back side and narrow hem on right back side as shown below. (Optionally sew Velcro as shown.)
  5. Place left back over right back to create a 18″ x 18″ square.
  6. Fold under 1 3/4″ on all four sides of front and back and press with steam iron, mitering each corner.
  7. With wrong sides together, stitch around  1 1/4″ from the edge.
  8. Stuff pillow form into completed pillow sham.

This method works well for a casual cushion and especially well for a child’s pillow because the finished needlepoint can be easily removed and the pillow sham washed.

An Elegant Finished Edge

I was cleaning out the attic the other day (I  know, it isn’t the time for Spring cleaning, but with3 feet of snow on the ground cleaning the attic sounded like more fun than shoveling the driveway) and I found the original test needlepoint kit which we did for Needlepaint.  It was languishing away because we hadn’t really thought the end product through. The needlepoint canvas was a strange size, 6″ x 7″, so it didn’t fit in a standard frame.

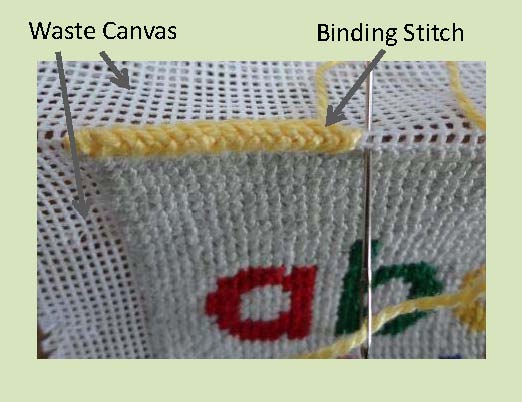
By coincidence that colors matched the decor of my granddaughter’s bedroom. It would work on a pillow. My original idea was to use it an an insert, but after looking through my favorite needlepoint book The Needlepoint Book by Jo Ippolito Christensen, I decided that if I used Jo’s binding technique I would get a finish edge in a contrasting color. The stitch is a variation of the fern stitch that is worked over two threads of the canvas instead of three.

The Needlepaint piece could then be sewn onto the pillow and could then be removed easily if the pillow needed washing.

TIPS:

  • Do not trim the canvas before doing the binding.
  • Block the canvas if necessary before binding.
  • Fold back and steam waste canvas in place before binding.
  • Trim waste canvas to 1/2″ after binding.
  • It may be desirable to reblock after binding

Coming soon, the finished pillow!

Needlepoint Finishing and Wedding Pillow Design

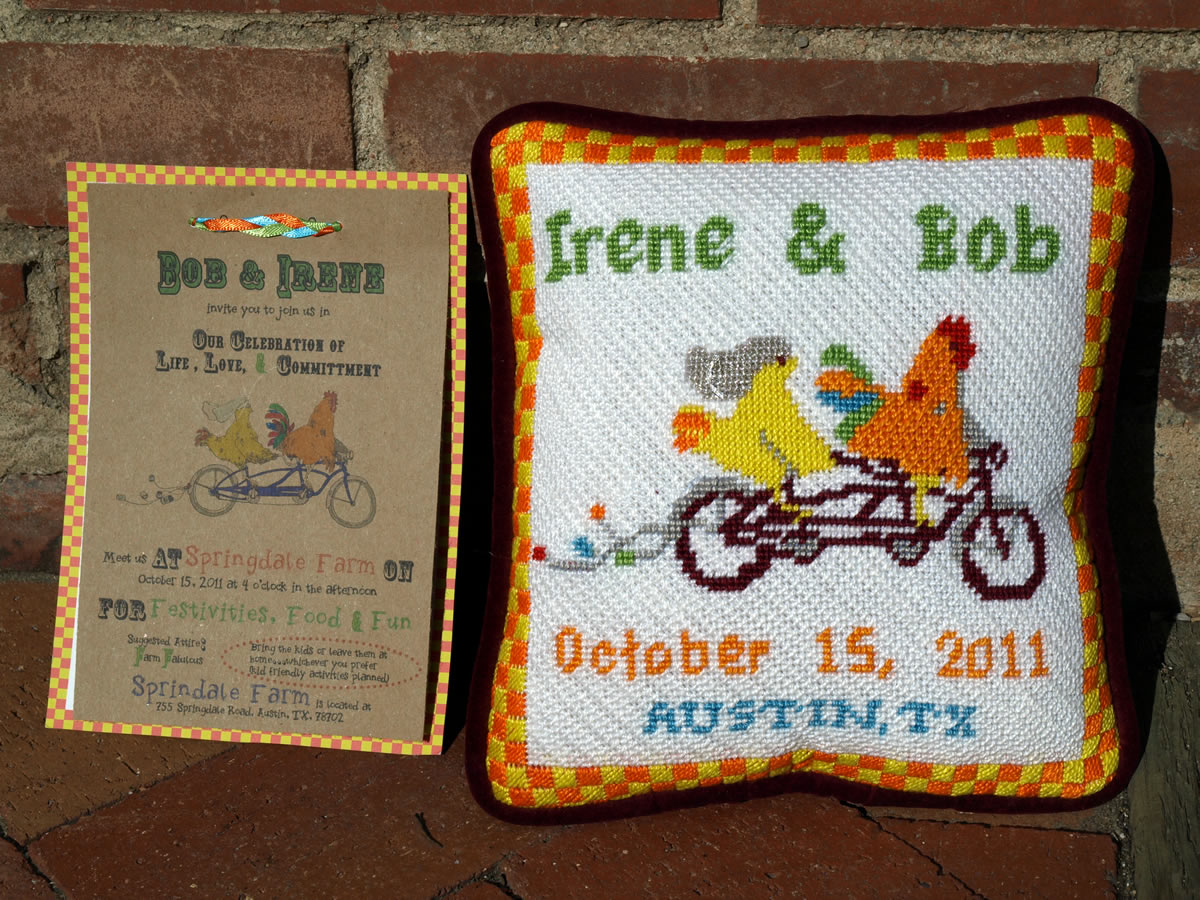
My friends Bob and Irene got married this summer, and I decided that since we love our ring bearer pillow so much, I’d have to make them one!   (You click the following link see our wedding ring bearer pillow.)

Their Custom NeedlePoint Wedding Pillow

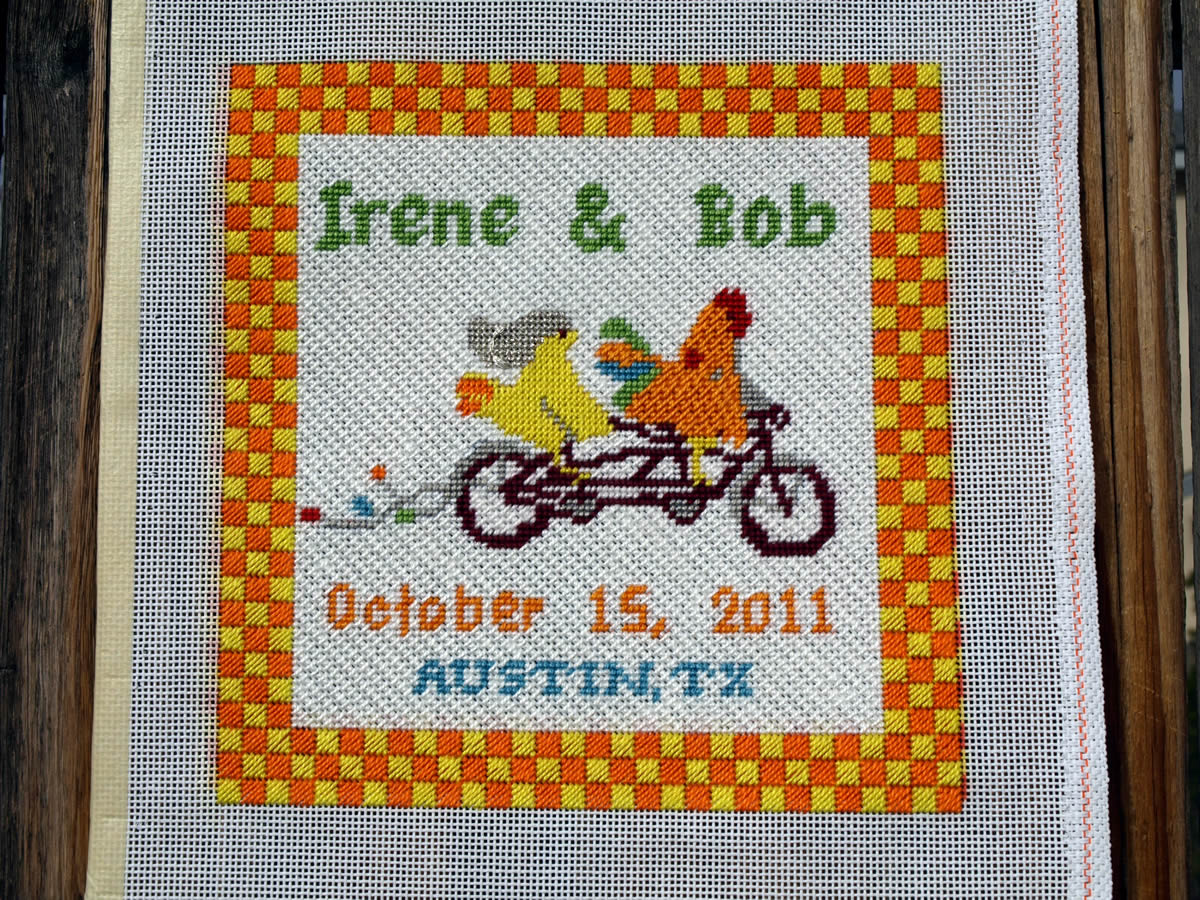
Not only was this a fun project to design, but it also was a great opportunity for us to test out our new needlepoint finisher and our pillow finisher.  I’ve used them 5 times so far, as can be seen on the cat needlepoint post and in our newsletter, but this time the stitcher got away from the tent stitches and she decided what stitches she thought would look best.

Designing the pillow was relatively simple, I used Bob and Irene’s wedding invitation for my design inspiration, and made some alterations in photoshop.  You can see I even used their invitation for matching the colors.

We used a burgundy velveteen backing for the pillow, and the contrast looks great.  My only regret on this project, is that I think I should have made the pillow 12 x 12 rather than 8 x 8.  It does not cost much extra to put a ‘frame’ around the needlepoint, and I think fills out better on a sofa.

If you have a project that you don’t have time for, we can make it for you.  Our prices start at $2 per inch for stitching, $50 for custom needlepoint kits, $60 for pillow finishing, or $160 for a complete custom ring bearer pillow.

You can visit our personalized needlepoint shop online at www.needlepaint.com

Needlepoint Finishing Close Up Picture - Click to Enlarge

A War and Peace Needlepoint Christmas Stocking

Three weeks before Christmas, my daughter-in-law finally finished the needlepoint design for her daughter’s (my grand-daughter’s) needlepoint Christmas stocking.  So, I put the canvas on my Victorian stretcher frame, began leafing through my favorite needlepoint books ( The Needlepoint Book by Jo Ippolito Christensen and A Pageant of Pattern for Needlepoint Canvas by Sherlee Lantz), and began stitching like mad.

Zoe's Personalized Needlepoint Stocking - BEAUTIFUL!!! (Click on Photo to Enlarge)

Well, not that fast! I took some time to picking out the stitches while I downloaded from my local public library the audio recording of War and Peace by Leo Tolstoy by Blackstone Audio, Inc. Downloadable audio books which can be listened to on your computer, MP3 player, or iPod has allowed me to combine creative stitchery and literature and learning.

War and Peace was 60 hours and 42 minutes long and I finished listening to Tolstoy a couple hours before I finished the stocking. Thus, I have termed the project the Ware and Peace Stocking. Similarly, an afghan which I knitted for a wedding present became The Children’s Book Afghan and I sent a copy the book by A.S. Byatt as an additional gift. Both books are long and dense. I found them much more enjoyable as audio presentations as I stitched away than they would have been had I read the written words. I remember that the first time I read War and Peace in 1968, it took me the entire summer!

Coming soon details of some of the unusual stitches I used on my Ware and Peace Stocking.

Baseball Player Needlepoint Kits

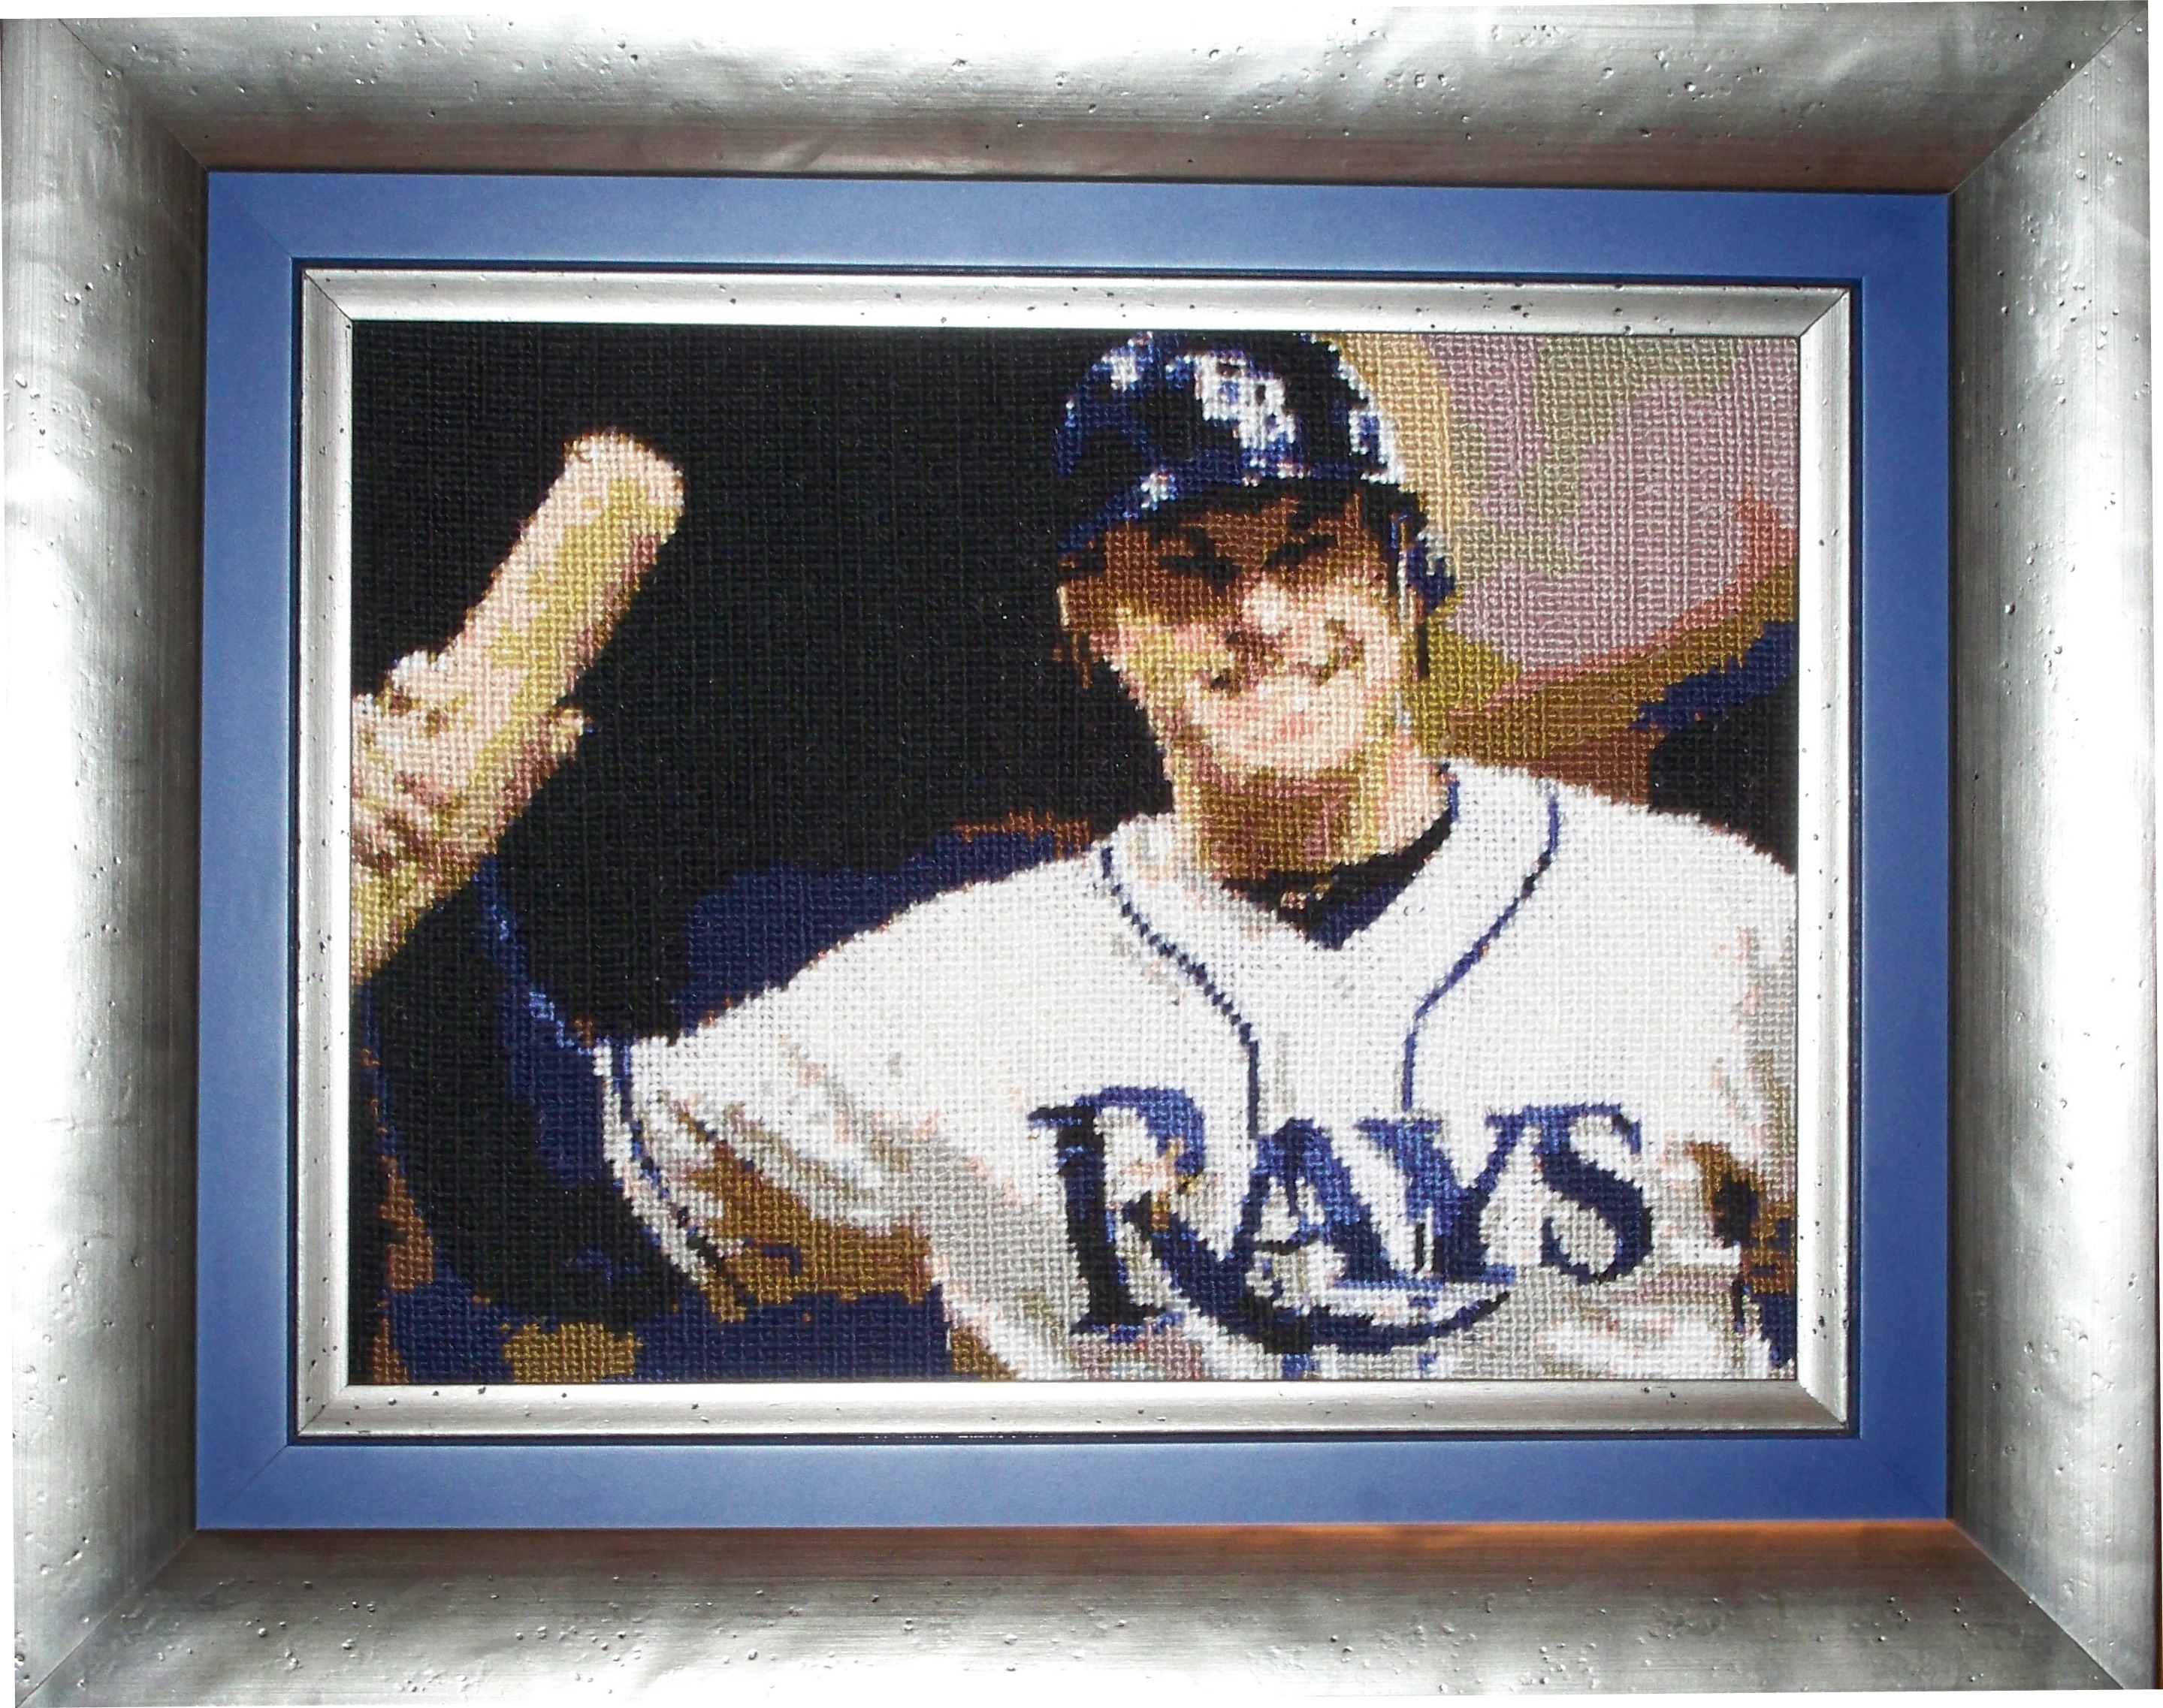
Zainab Al-Chalabi recently created this beautiful needlepoint kit of a Evan Longoria.  Her exquisite stitching and framing capture a great memory in Florida baseball.

Evan Longoria in Needlepoint

A few things I want to mention.  #1.  The picture is cropped very close so the details of the face and body show up really well.  #2.  The colors on the face had very good lighting.  This can be adjusted, if you are uploading a portrait to make a needlepoint canvas and having trouble, feel free to email us and we will adjust the colors on your image in Photoshop.

Currently, we are working on a portrait of a customers grandchild that is a portrait from their sports team.  It looks like another fantastic project!

Customer Service and Needlepoint Design service

The last few months have been going very well at NeedlePaint.com.  As you may guess, creating custom needlepoint kits is not always a perfect process, but we always do our best to get it right the first time.

A few things you may not be aware of that we do.

#1.  We love to help before you place your order!  If the photo needlepoint preview does not look as good as your want or you want help cropping it, please email us the photo and we will work on it and help you with your project.  Also, we develop designs from scratch and are happy to discuss ideas for a new project.

#2.  We review your order to be sure there are no major errors and that it looks like something we would want to stitch.  You will get an email asking for the photo if we think colors may not look right, or that the canvas needs to be improved.

#3.  Sometimes colors on the computer look good, but when we proceed with the order, the colors we find are totally off!  On animals and people we try to color match the floss by hand as computers don’t recognize dog breeds or skin tones.  Most often, we’ll get purple and green tones, but alas, we will fix them!

#4.  If you are not happy with your project, we will fix the design and replace the canvas!  These projects take a lot of time and the needlepoint will probably be with your family for a very long time, sometimes generations, so we encourage all of our customers to speak up if they have any problems with an order.

The feedback we’ve been getting is really nice, and lets us know that going the extra mile is worth it!

“Thank you for the update.  I am really impressed with your customer service.  A+ with the proactive approach—it is refreshing.”  Nancy, from AZ

“I am very excited about this…and THANK YOU so much again for you help & patience with getting this perfect!! It really means a lot!!”  Erica, from NJ

“Got it today and it looks great. Thank you!”  Holly, from NJ

“I received my shipment yesterday and the canvas is just beautiful!!!!”  Deb, from MN

This week's orders
NeedlePoint Dog Canvases

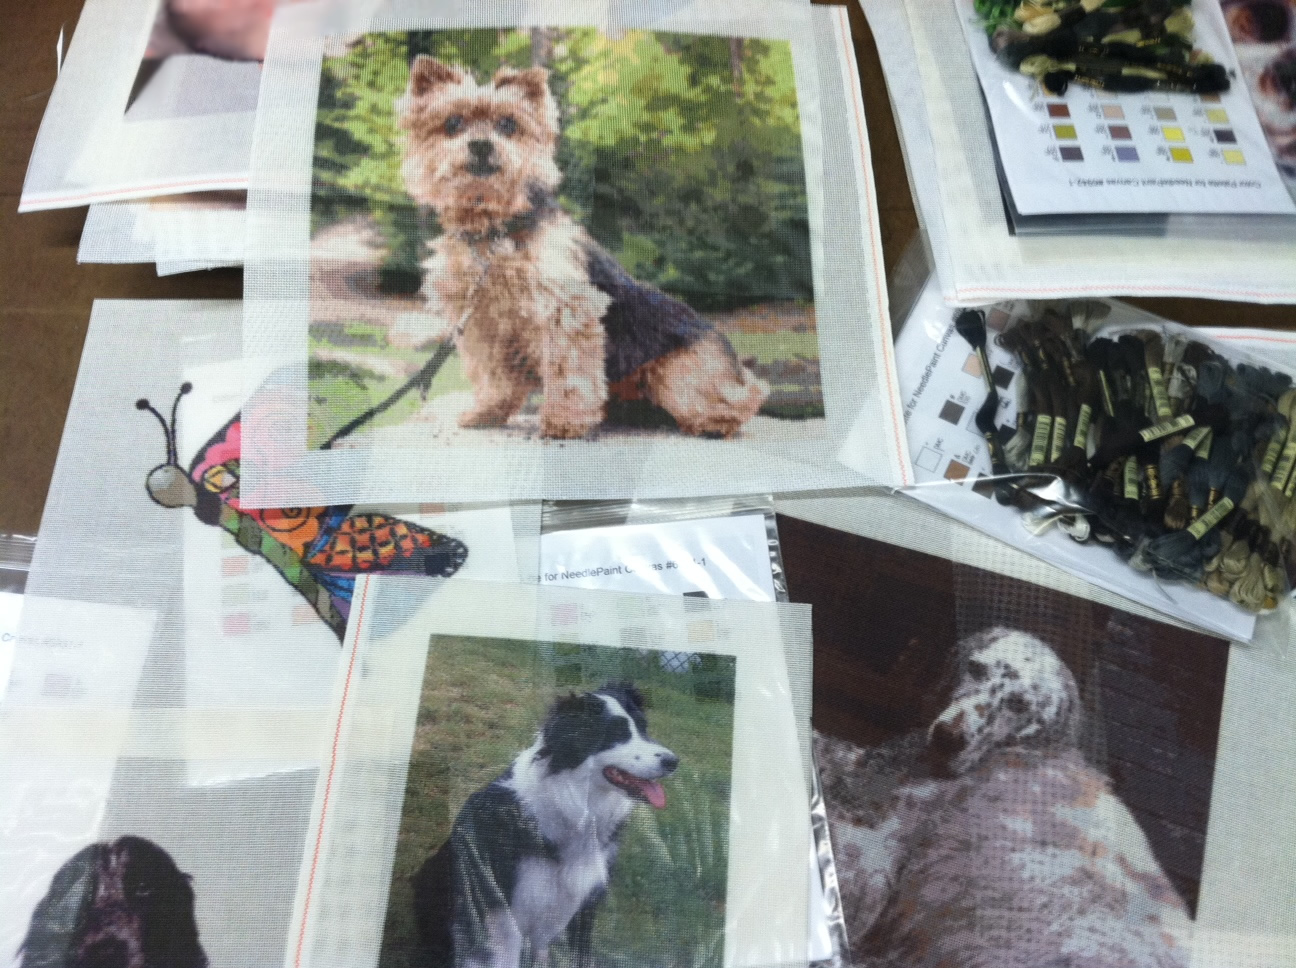
One of our favorite projects we see almost every week is the dogs.  Two weeks ago, we actually had 5 dog needlepoint canvas orders, along with two cat needlepoint canvases.

Some of the dogs are below.  You can see that the close up images look great.  Also, we’ve been working on finding more dog breeds to add to our Etsy shop.  You can browse more dog needlepoint canvases there, or upload your own needlepoint photo to create a custom needlepoint kit at our website!