Official blog of www.NeedlePaint.com
where you can design your own Needlepoint!

NeedlePoint Kits and Canvas Designs | Design your own Needlepoint Kit!

Posts tagged ‘needlepoint kits’

Win a Free Custom Needlepoint Kit

NeedlePaint.com is running a Facebook contest from May 22 to June 4. The winner will be announced after June 5th and they will receive a FREE needlepoint kit worth $100!

To enter the drawing, all you have to do is to “Like” NeedlePaint’s Facebook page. If you already have “Liked” the page before the contest date, then you can “Share” NeedlePaint’s contest post on your profile page to enter to win.

Once selected, the winner will work directly with NeedlePaint.com to design their own needlepoint canvas. The needlepoint design can be up to 12 inches by 10 inches. All of our needlepoint canvases are stitch printed, matched to DMC floss, and come with a counted stitch guide.

The winner can choose to have their design printed on 10, 12, 14, or 18 mesh Zweigart mono deluxe canvas (orange line). And they have the choice of getting a larger canvas worth $100, or a complete kit with DMC floss worth $100.

This contest is limited to 1 entry per person. The maximum value of the needlepoint kit or canvas is not to exceed $100. The drawing will be held after June 5th. The winner will agree to share a picture of their project on NeedlePaint.com blog and Facebook page.

So, click here and Like us to enter now!

Enter to win a Free Needlepoint Kit!

NeedlePaint Reviews

OK, every week we get good feedback, but a few special needlepoint kits we shipped out got really good needlepoint reviews that I figured I would share.

“We’ve been out of town for several days and just returned last night.  Your canvas was waiting for me when we got back, and I absolutely could not be more delighted!  I’ve already started stitching, and will send a photo as soon as it’s done.  Thanks so much for doing this marvelous canvas for me and for getting it to me so quickly.  I also appreciate your personal touch:  you color changes were square on. 

I will definitely be ordering more personal canvases in the future and look forward to working with you again and again.”

Gloria – Atlanta, GA

One more–

“HOLY CRAP IT’S GORGEOUS!!!!

So happy! Will definitely be back and will send photos of the finished work.”

Christopher – NY, NY

Well, this is probably a boring post for most, but we love to get feedback, and as a reminder, we have a 60 day return policy here at NeedlePaint.com so if you are not happy with your canvas for any reason, we offer full refunds.

Happy Stitching!

Beautiful Needlepoint Flower Inspiration

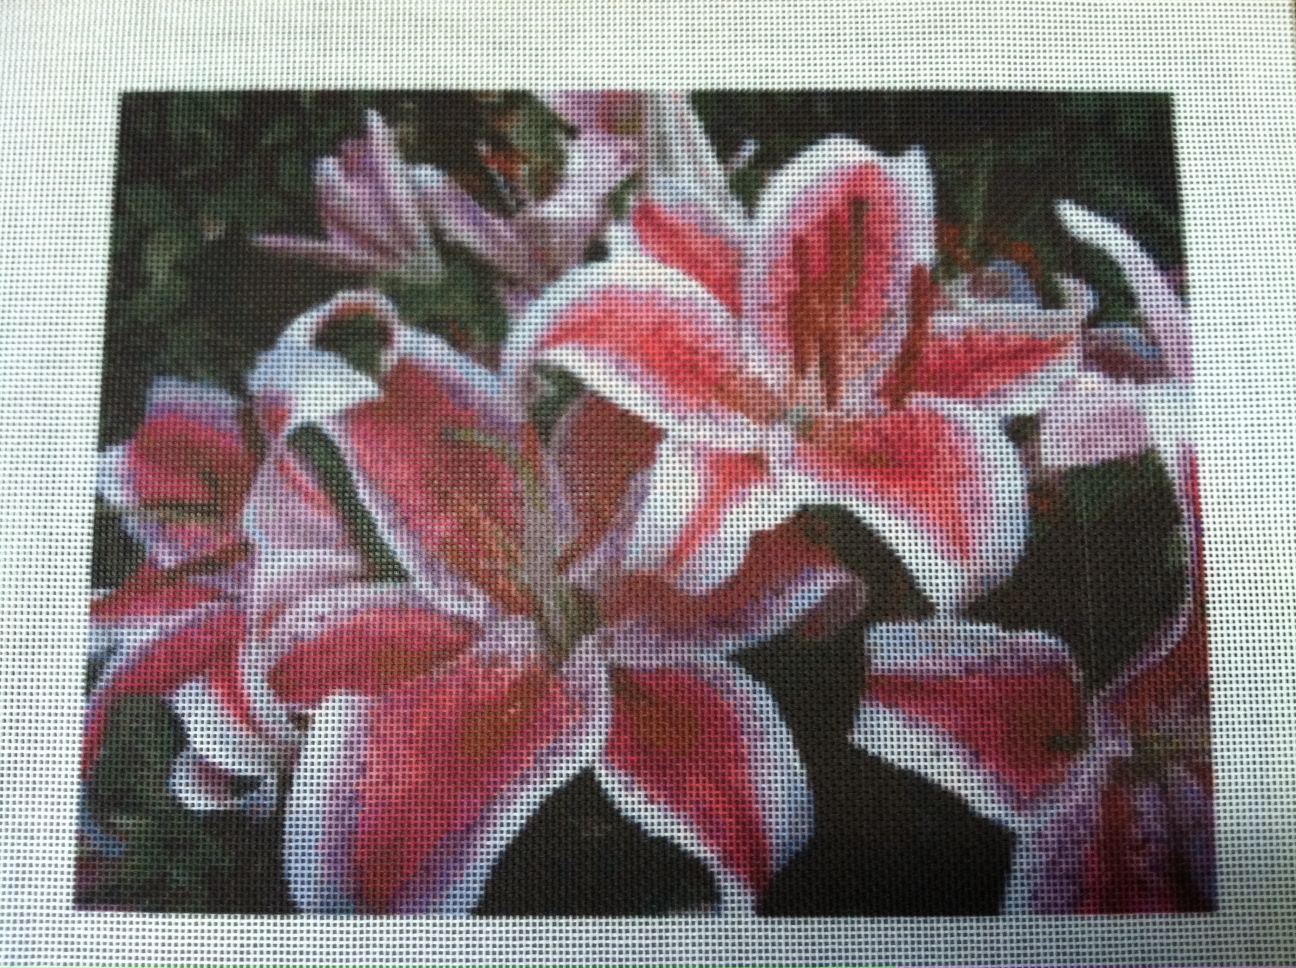
I was going through my camera over the weekend and came across one of the beautiful needlepoint canvases we made a few months back.

The color on these lilies came out really well, I am looking forward to seeing this needlepoint kit finished!

Friday Design Inspiration – New Needlepoint Kits This Week

We make so many great custom needlepoint kits, that I realized that we should be sharing them with our readers!  (With their permission of course)

This week a customer designed a needlepoint canvas that not only looks amazing, but has a great story behind it.

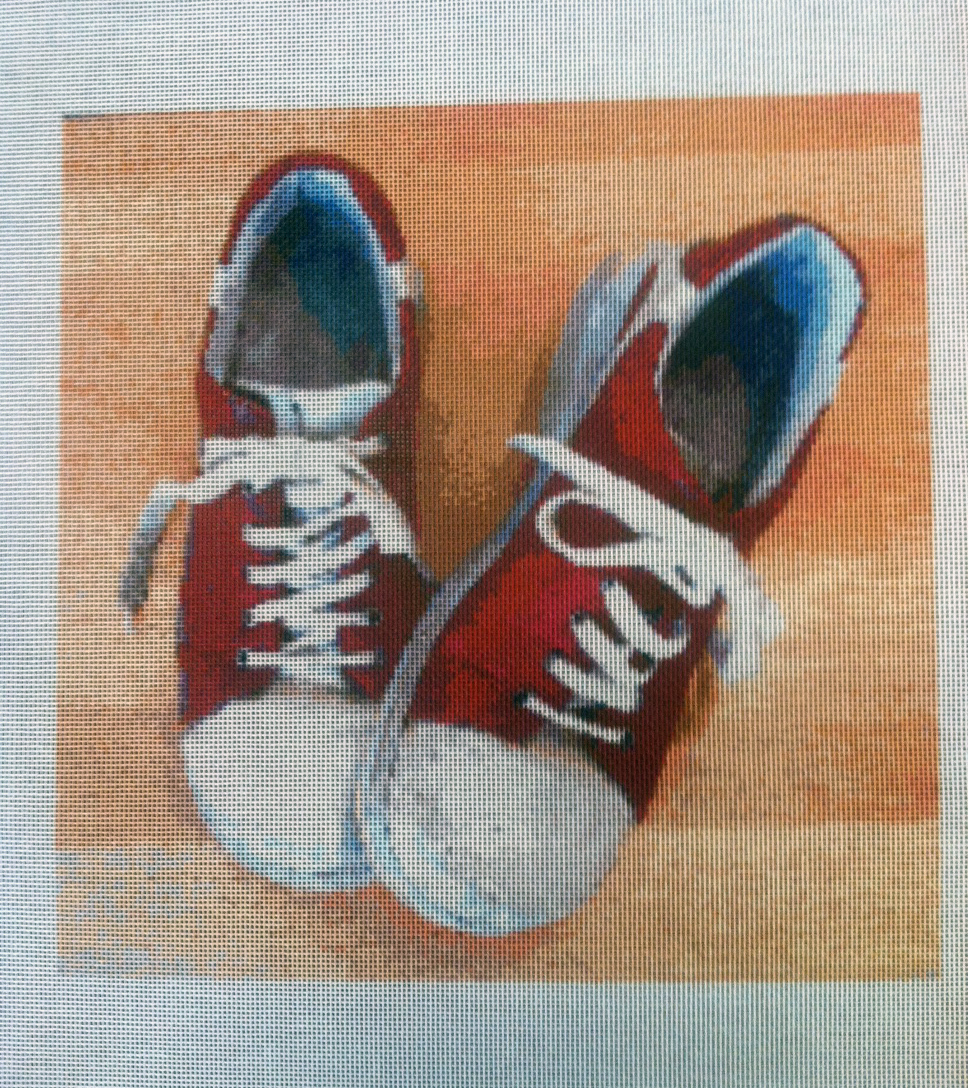
These red shoes took her around Croatia, after connecting with relatives from the “old country”.  The story behind them, is that they were lent to her durning a rainy  week by her cousin, and her daughter took a picture of them before returning them.

What a great picture, and think about how great is this going to look when it is stitched!

Red Walking Shoes Modern Needlepoint Canvas


Custom Flower Needlepoint Pillows

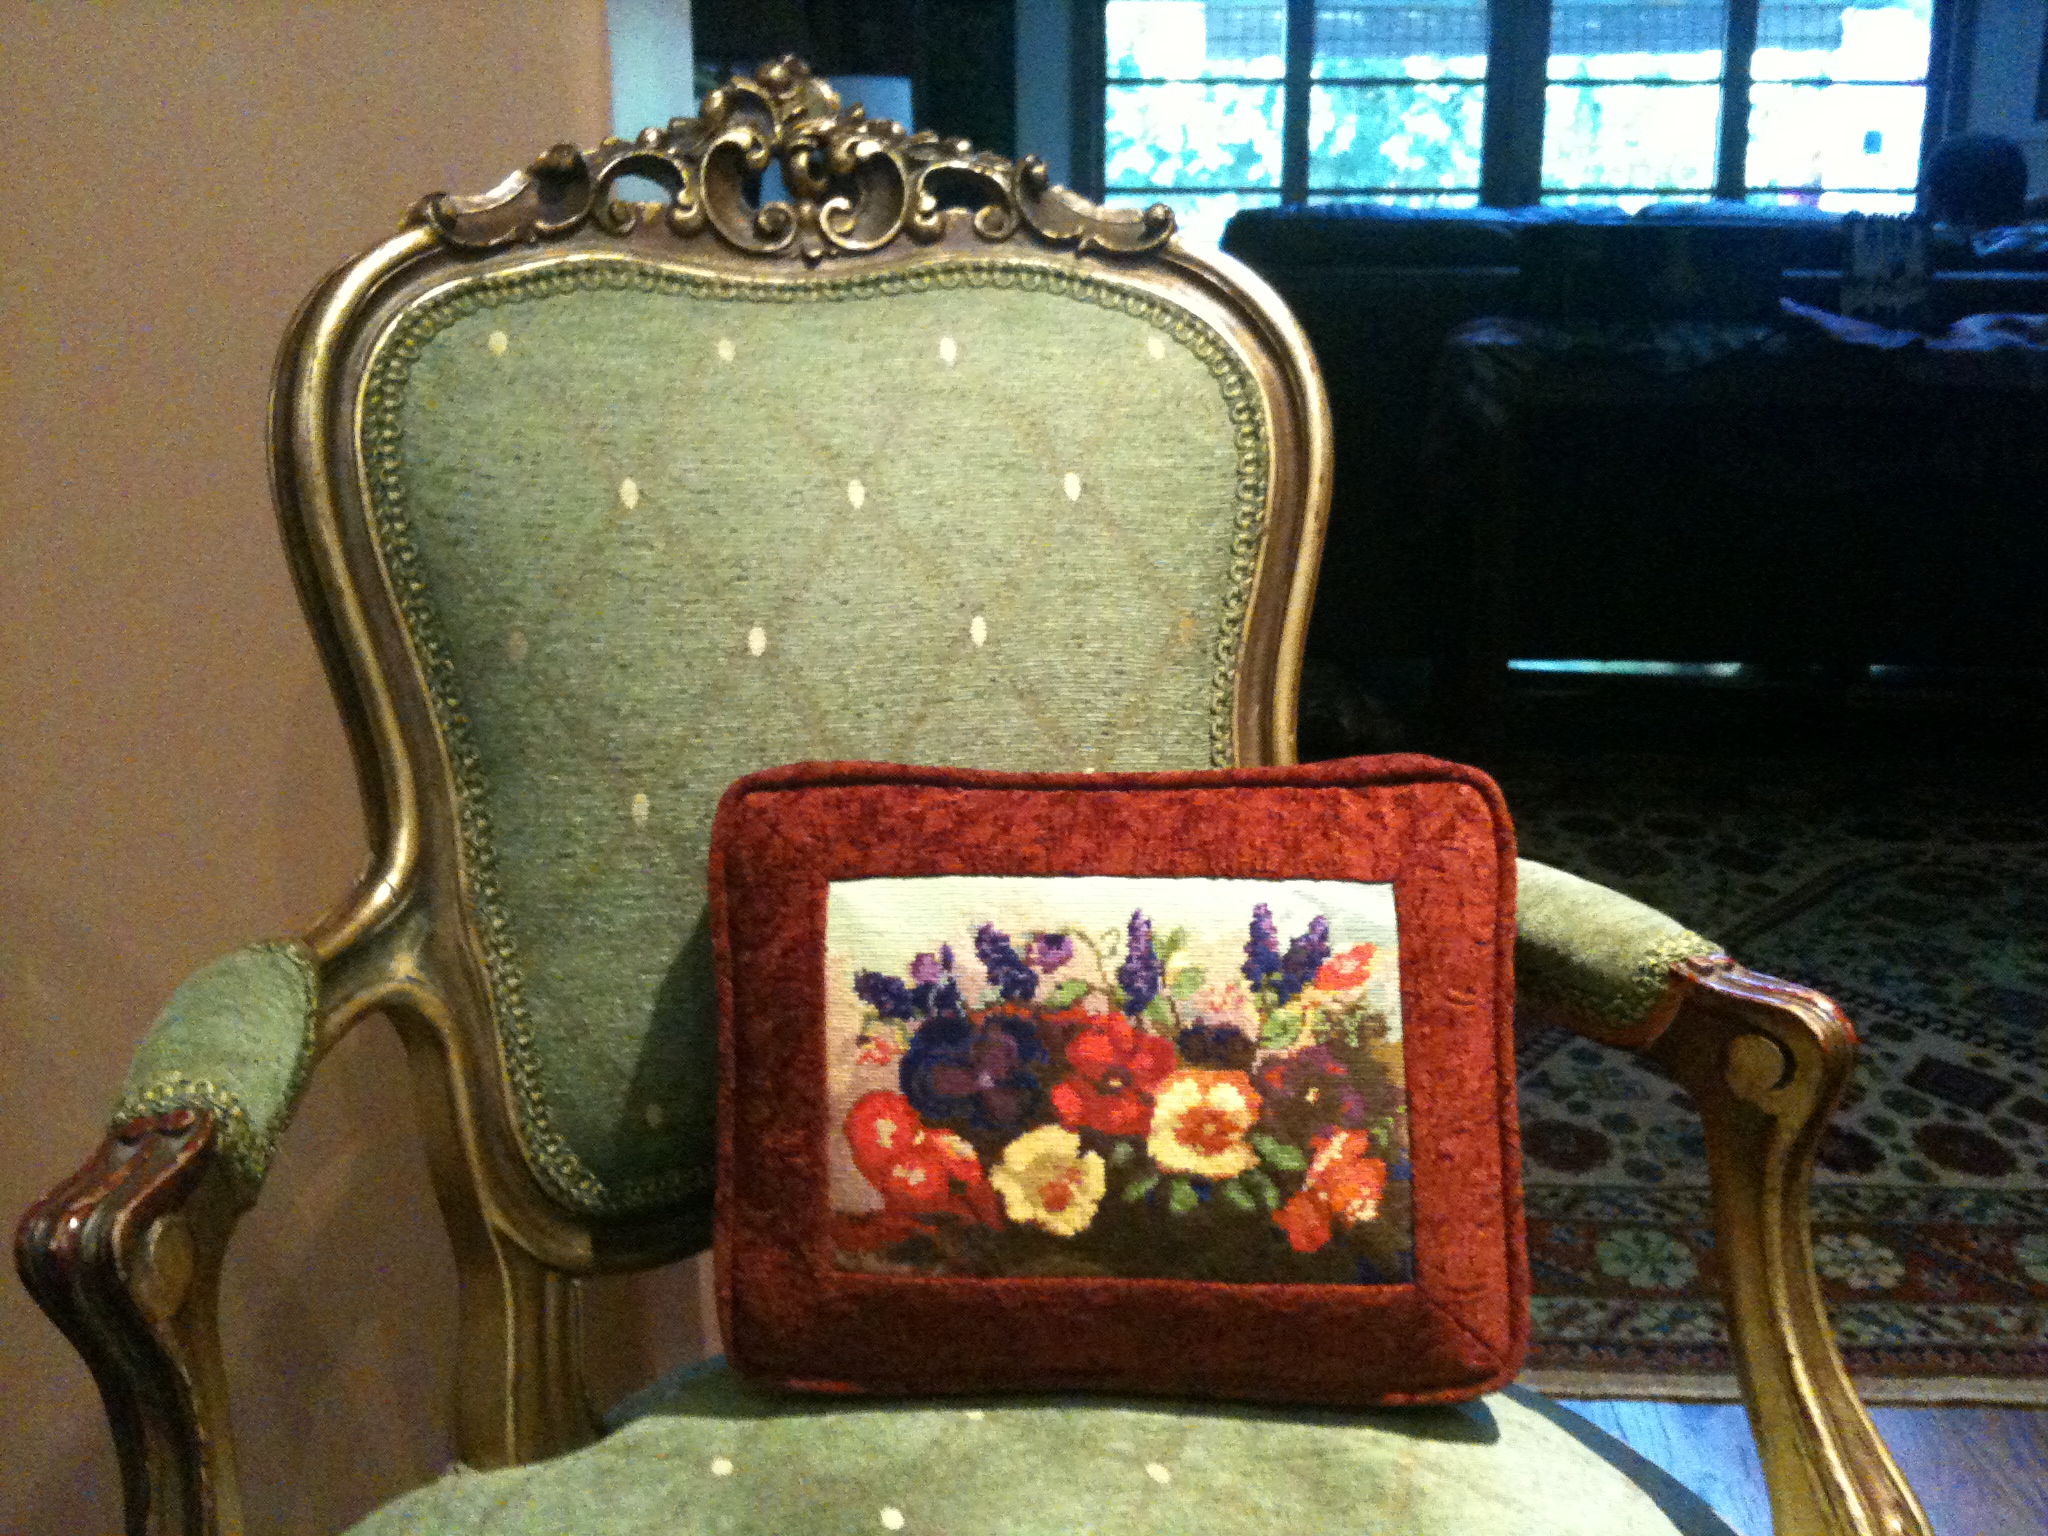
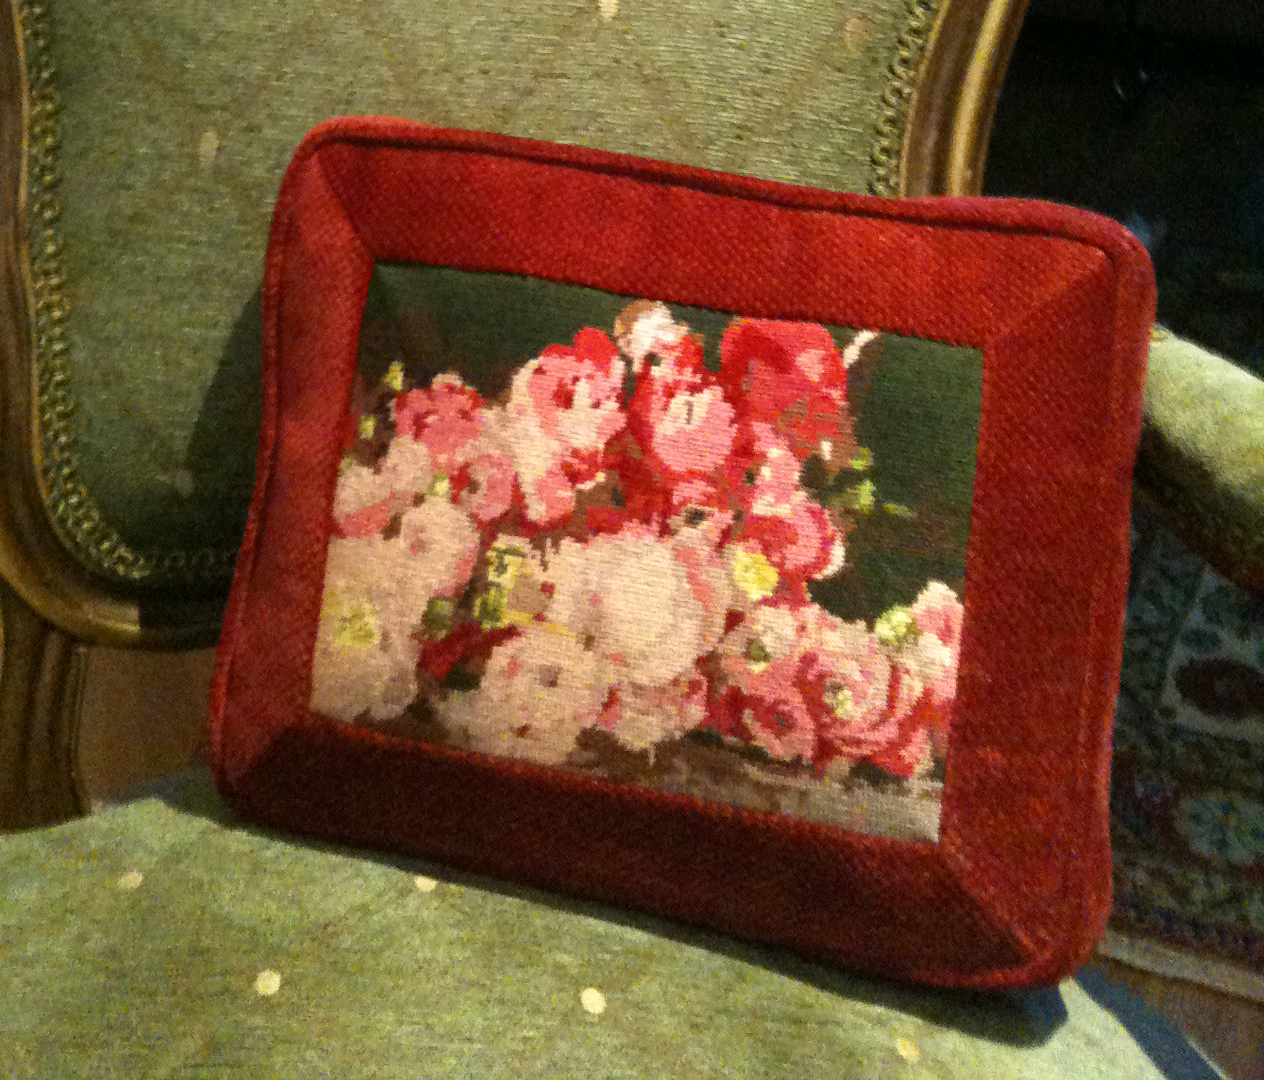
One of our customers, Hala Alfi, just finished two of her custom needlepoint canvases into beautiful pillows.

These designs were made using needlepoint kits from NeedlePaint.com  where you can upload your own photo to design needlepoint canvases online.

I love the framed box edges on the pillows, they give an elegant look, while adding extra size to the pillow.

Many thanks Hala!  Keep up the beautiful work!

Custom Colorful Flower Needlepoint Pillow with a Box Edge

A Second Beautiful Flower Needlepoint Pillow

Funky Wedding Ring Bearer Pillow Needlepoint Kits

Not every wedding is formal, but all of our ring bearer needlepoint kits were!

In order to help out with this problem, we have just added a new ring bearer pillow design to NeedlePaint.com.

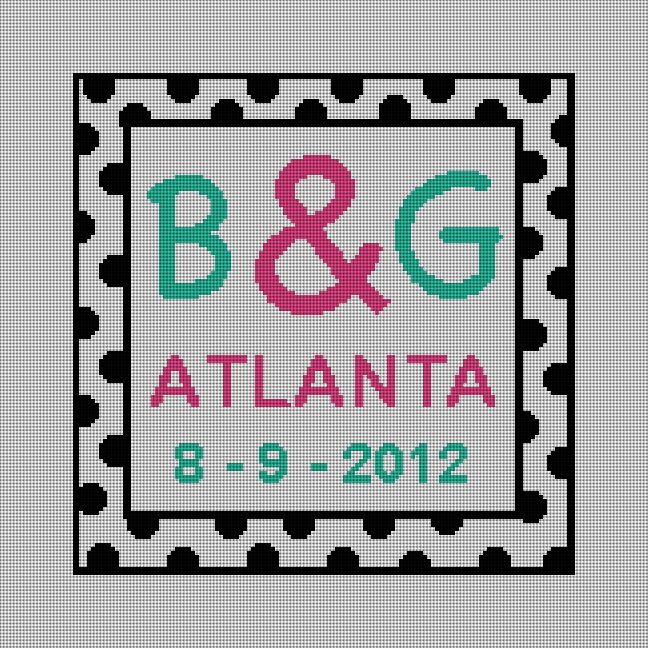
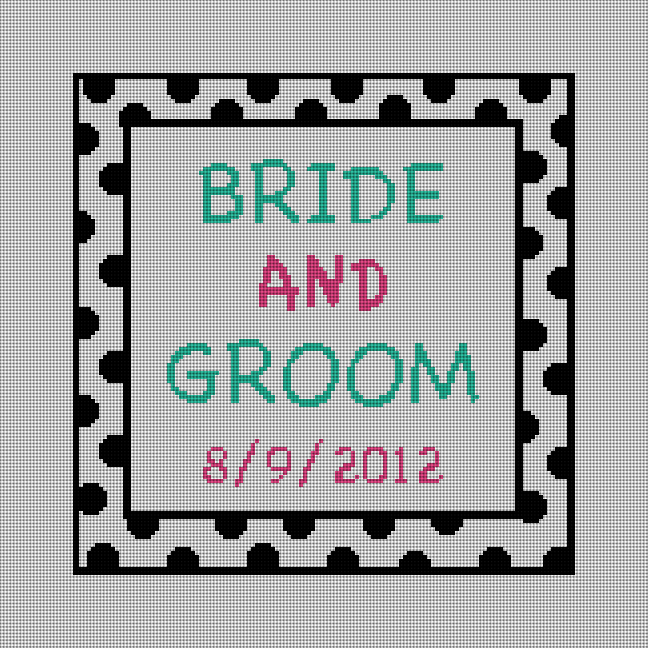
These funky polka dot needlepoint designs are not just great for a fun wedding but could be a great accent pillow in their new home.

Or, if you want to design your own needlepoint pillows, we can change the words to something of your choice, and a size to fit your home.

Which of these is your favorite?

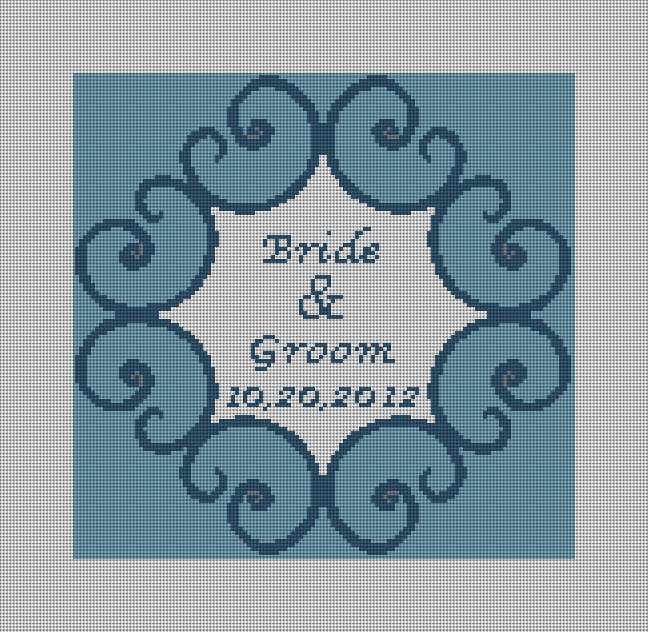
A non traditional design for a ring bearer pillow, B and G are "Bride" and "Groom"

If you prefer, you can add the whole names, or you really can stitch whatever text you want!

(Our needlepoint ring bearer pillow shop can be reached by clicking this link )

Timeless Needlepoint Wedding Ring Bearer Pillow

One of our customers just finished her needlepoint ring bearer pillow and we love it!

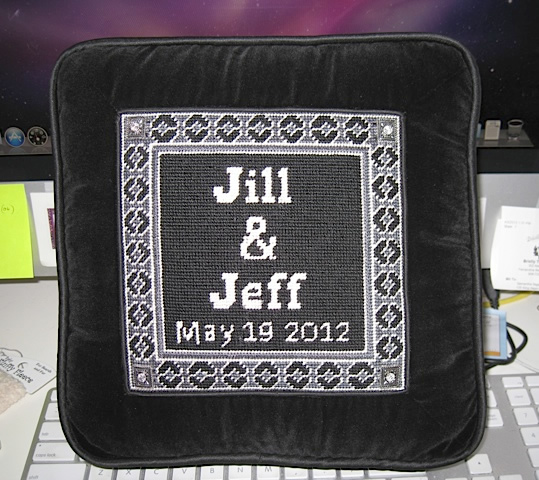
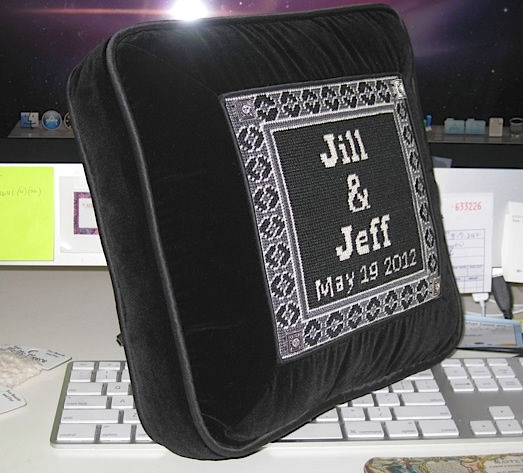
The needlepoint kit is was our gray timeless design but what I really love is how she framed the pillow and made a box edge.  Also, the charcoal gray velevet looks great!

Finally, see if you can notice the extra Bling she added!

Gray Timeless Wedding Ring Bearer Pillow Front View

Gray Timeless Wedding Ring Bearer Pillow Side View

New Wedding Ring Bearer Pillow Canvas Needlepoint Designs

We just created two new ring bearer pillow designs!

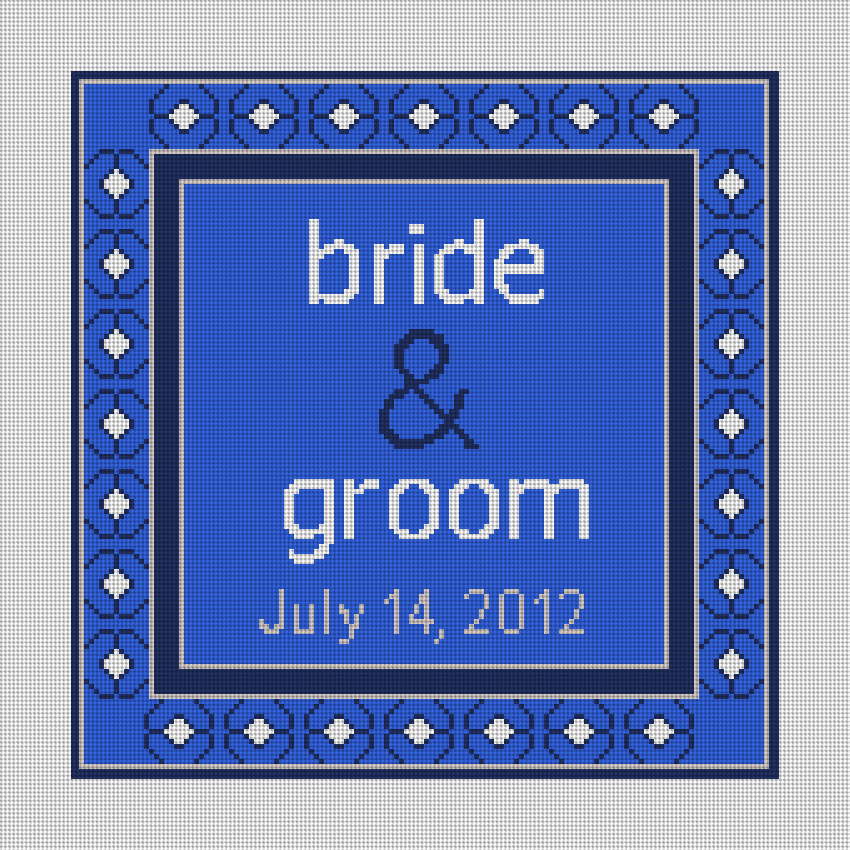
The Blue Spice is a twist on our popular timeless needlepoint design.  And the Iron Scroll is a classic design based on iron work from the early 1900’s.  And, as with all of our custom needlepoint kits, the personalized needlepoint canvases can include your own names and dates!

If you have an idea for a canvas but don’t see it on our website, we’ll be happy to make a new design for you.

Happy Stitching…

Blue Spice Wedding Needlepoint Canvas

Iron Scroll Ring Bearer Pillow Needlepoint Canvas

Great New Reviews on Needlepoint Kits

Since the holiday rush ended in January, we’ve had some extra time to work on fun needlepoint kits.

We know that stitchers always need new projects to work on, and are happy to help. Two of the needlepoint kits I’ve worked on started with phone calls.

The first was a picture of boy in a pumpkin patch. The details and colors were amazing, and the customer had some special requests. First, they prefer to use interlock canvas. Second, they really prefer perle cotton over embroidery floss. The interlock canvas was easy, as we have some in stock, but for the perle cotton, it was a bit trickier since the customer did not have close access to any needlepoint shops.

Being in Denver, we do have a great needlepoint shop, Diversions. For a small fee, we can pick out alternate fibers that they keep in stock.

Anyway, the customer loved the kit! Here is their feedback:

“The canvas came today. I thought it gorgeous, but then what do I know. My aunt, who is doing the work  and who knows what she’s doing, was overwhelmed by it.  “Very professional… Almost like a kit, it’ll be too easy” were some of her comments. I believe she is looking around for three more pictures to take advantage of your buy 3 (get a 4th free) deal.” Peter Shugart – El Paso, TX

Another fun project came from Australia last month. Although we don’t list it on our website, we do ship there. Their idea was to needlepoint a beach scene from an old movie.

“I received the canvas of today. It is just beautiful. The colours are gorgeous and thank you so much for the colour guide. I will find this very useful. I’ve been waiting so long to have this done professionally. I had one done here in Australia and the colours were very faint so it was difficult to distinguish between colours. Lucky it was only a small one. I may wish to have others done and will keep in mind your offer “Buy Three Canvas and get a Fourth free”. I will also look up the blog site. I will be in touch again.” Teresa Portelli – St. Ives Chase, Australia

This week, we also received a lot of positive feedback, and we love to hear it! Our goal is to make sure every project is great, and our customers love them. If you order from us, please send us feedback, we are always looking for ideas and suggestions.

Ok, here is the last customer post I’ll put in this blog, I got yesterday…

“The canvas looks great! I’m so excited…as is my daughter! Her teacher is going to love it. As a stitcher, I love the stitch guide…so wonderful to have on those close calls (do I stitch here or not?). Thank you for including it. And, the canvas is quite crisp. Thank you for taking the time and effort to make it so clear. My daughter is a new stitcher, and it will make quite a difference in her experience!” Marlena – Mass.
 

The No Tears Needlepoint Pillow

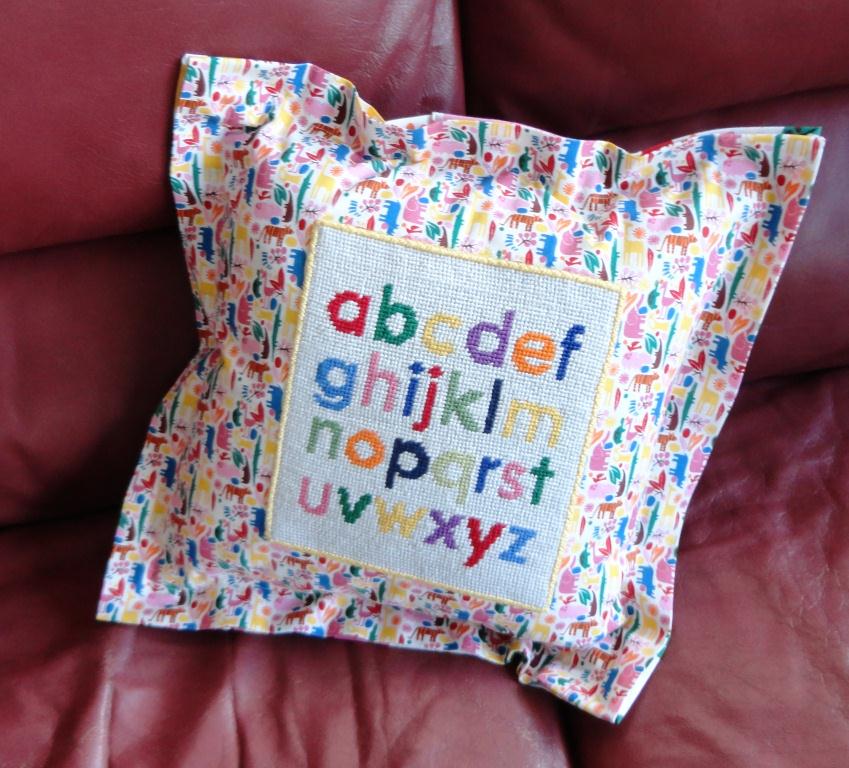
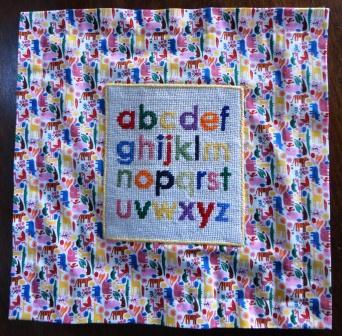
As I mentioned in my earlier post An Elegant Finished Edge, I had come up with a use for the odd-shapped design that we had designed for our first test custom needlepoint canvas. This 6″ x 7″ canvas is now the center piece of a 12′ x 12′  pillow  for my granddaughter’s nursery.

As you can see, this pillow does not have piping — the most difficult and frustrating part of needlepoing pillow finishing. Also, there is no zipper, no turning inside out, and IT IS EASY!  It is a modified pillow sham which fits over a 12″ x 12″ pillow form.

Materials for the pillow are:

  • 12″ x 12″ polyester-filled pillow
  • 1/2 yard 42″-45″ fabric
  • 1/4 yard Velcro (optional)
  • finished needlepoint canvas that is smaller than 12″ x 12″ and whose edges have been bound

Directions:

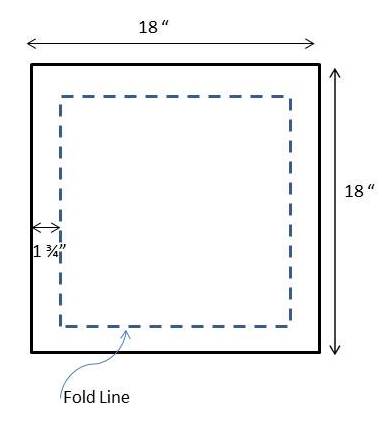
  1. Cut one 18″ x 18″ front.
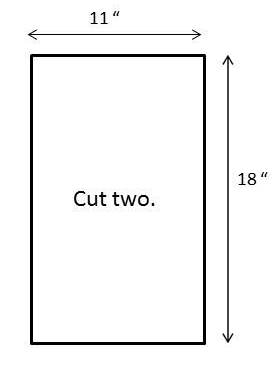
  2. Cut two 11″ x 18″ piece for left and right sides of back.
  3. Position finished needlepoint canvas in the center of the front. Stitch in place by machine using zig-zag stitch or by hand using an overcast slip stitch.
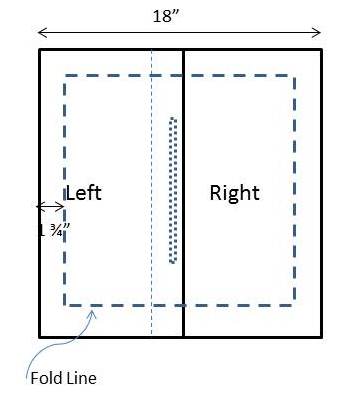
  4. Sew 2″ hem on left back side and narrow hem on right back side as shown below. (Optionally sew Velcro as shown.)
  5. Place left back over right back to create a 18″ x 18″ square.
  6. Fold under 1 3/4″ on all four sides of front and back and press with steam iron, mitering each corner.
  7. With wrong sides together, stitch around  1 1/4″ from the edge.
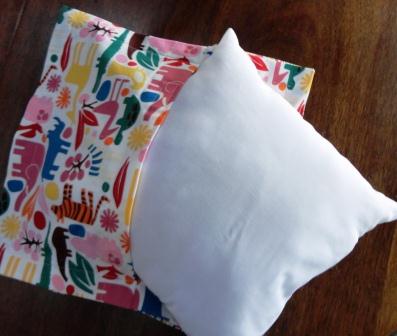
  8. Stuff pillow form into completed pillow sham.

This method works well for a casual cushion and especially well for a child’s pillow because the finished needlepoint can be easily removed and the pillow sham washed.